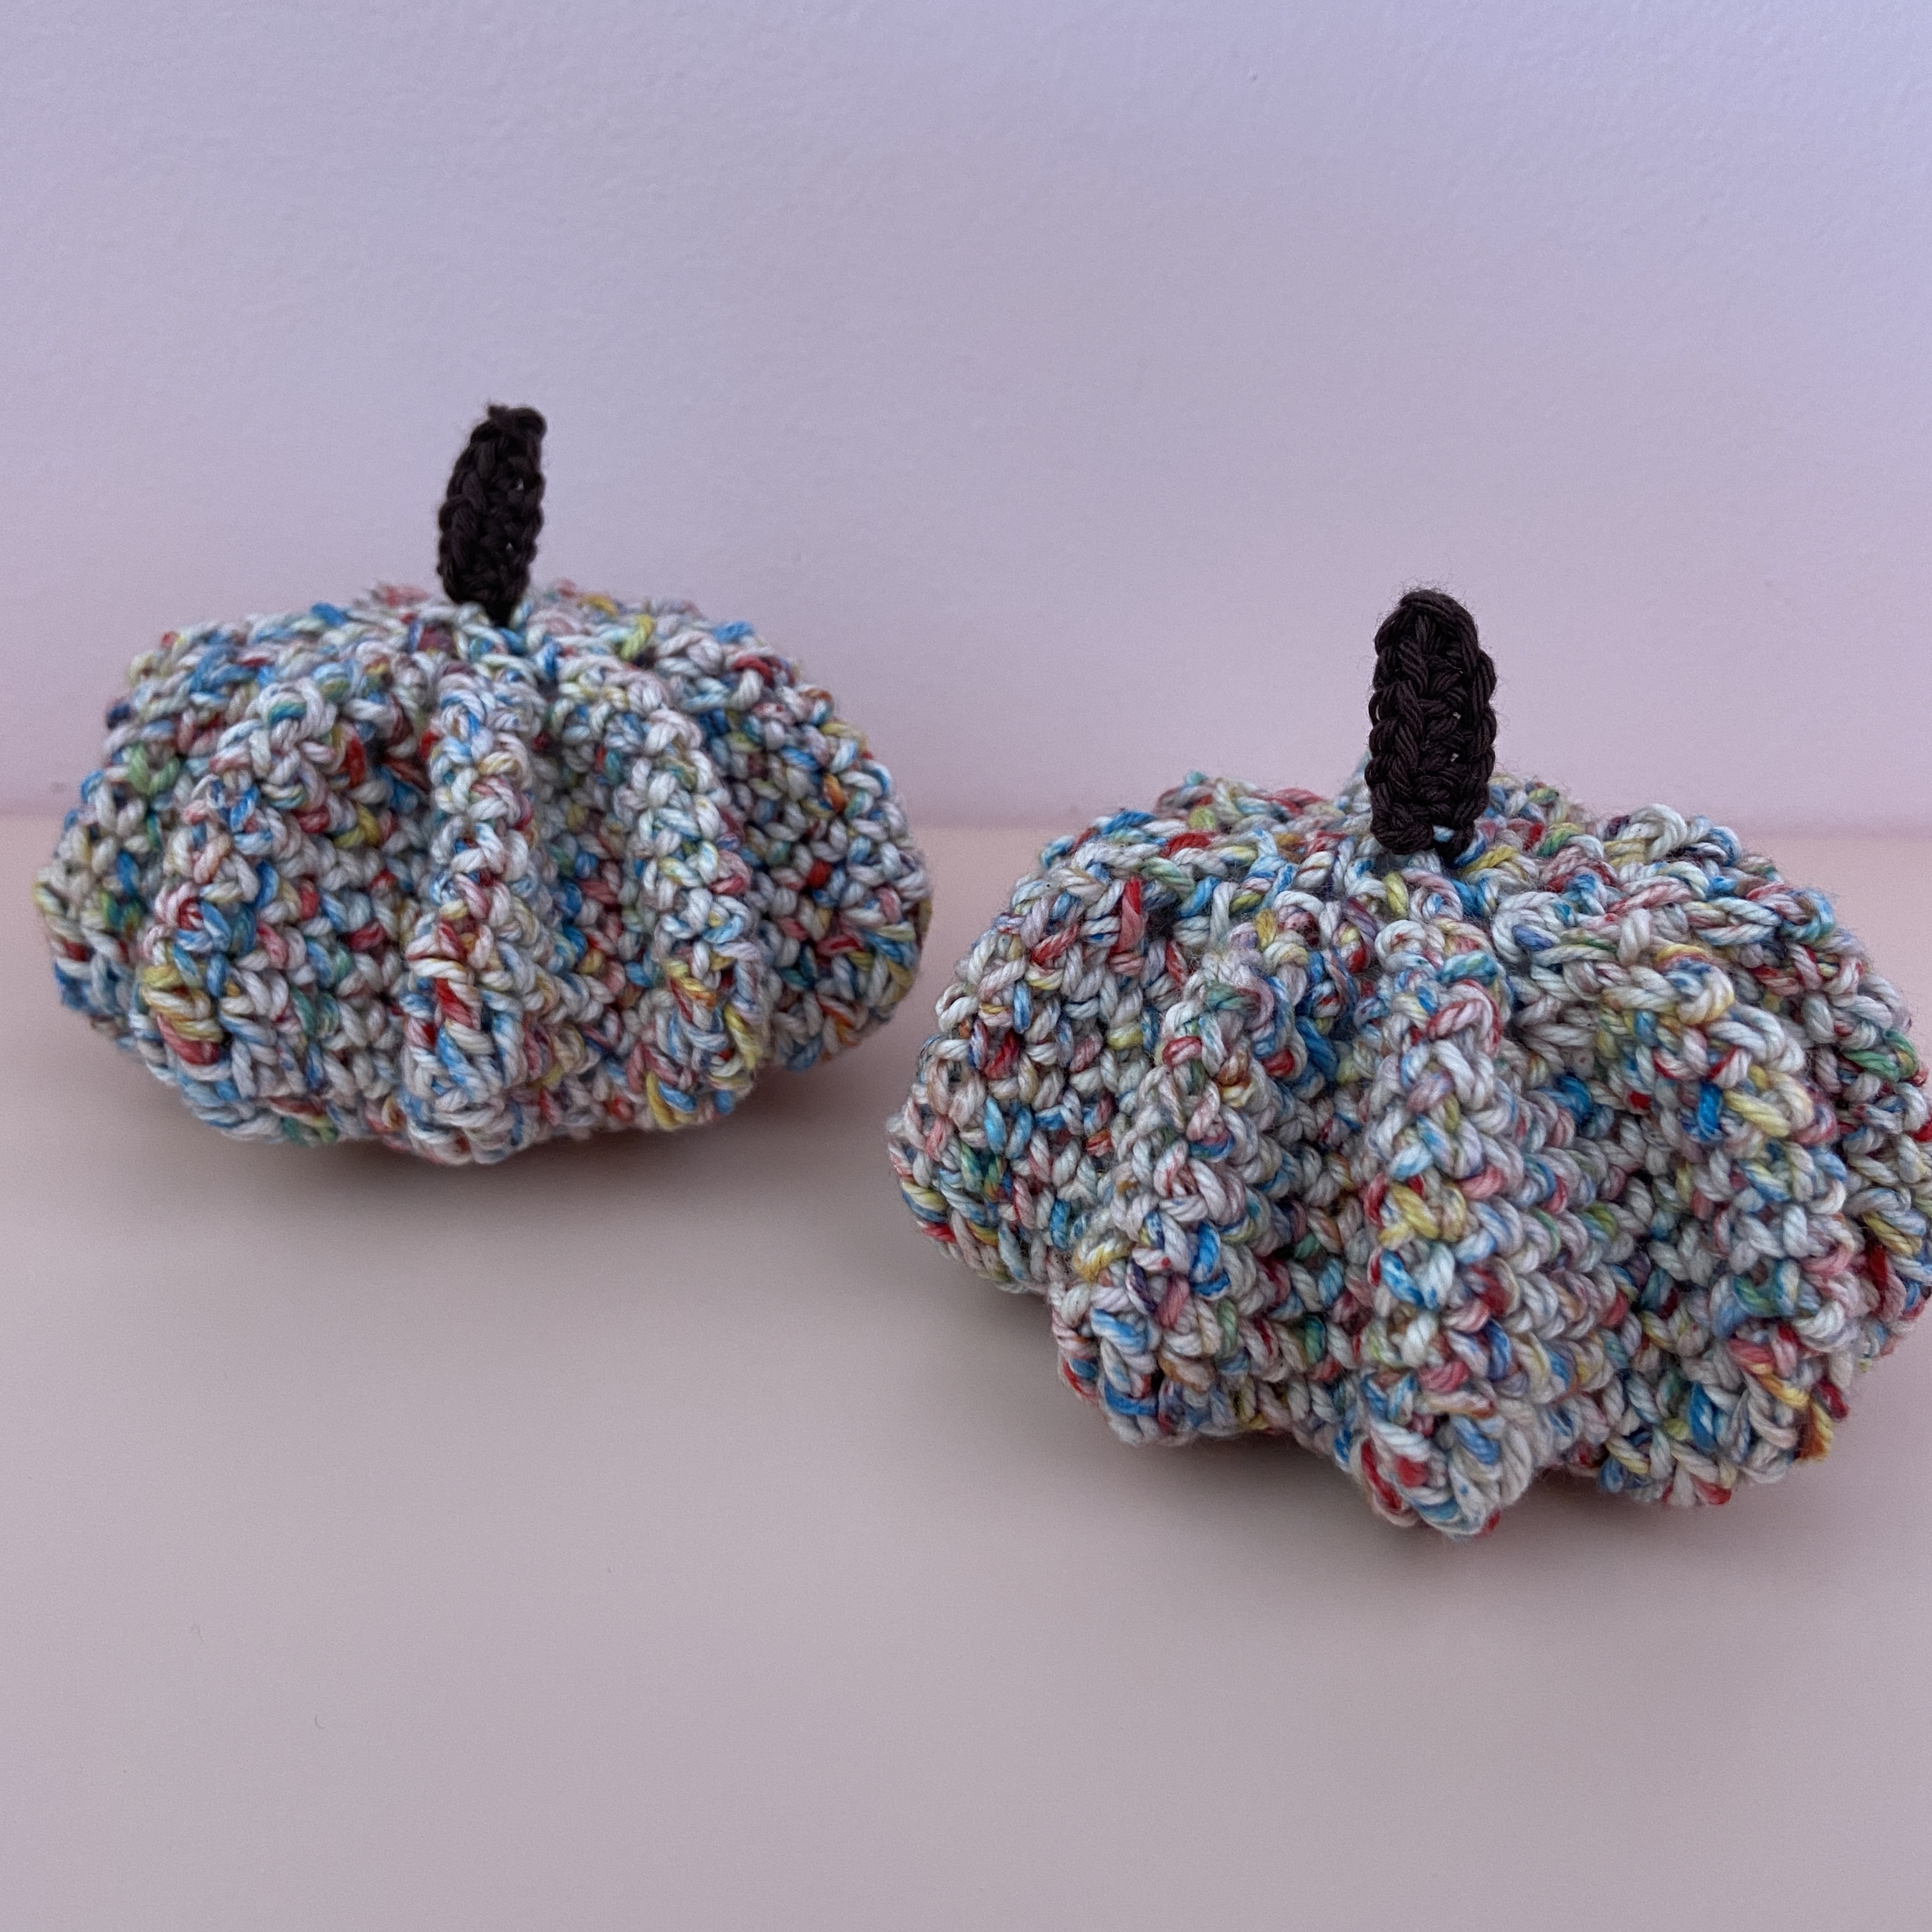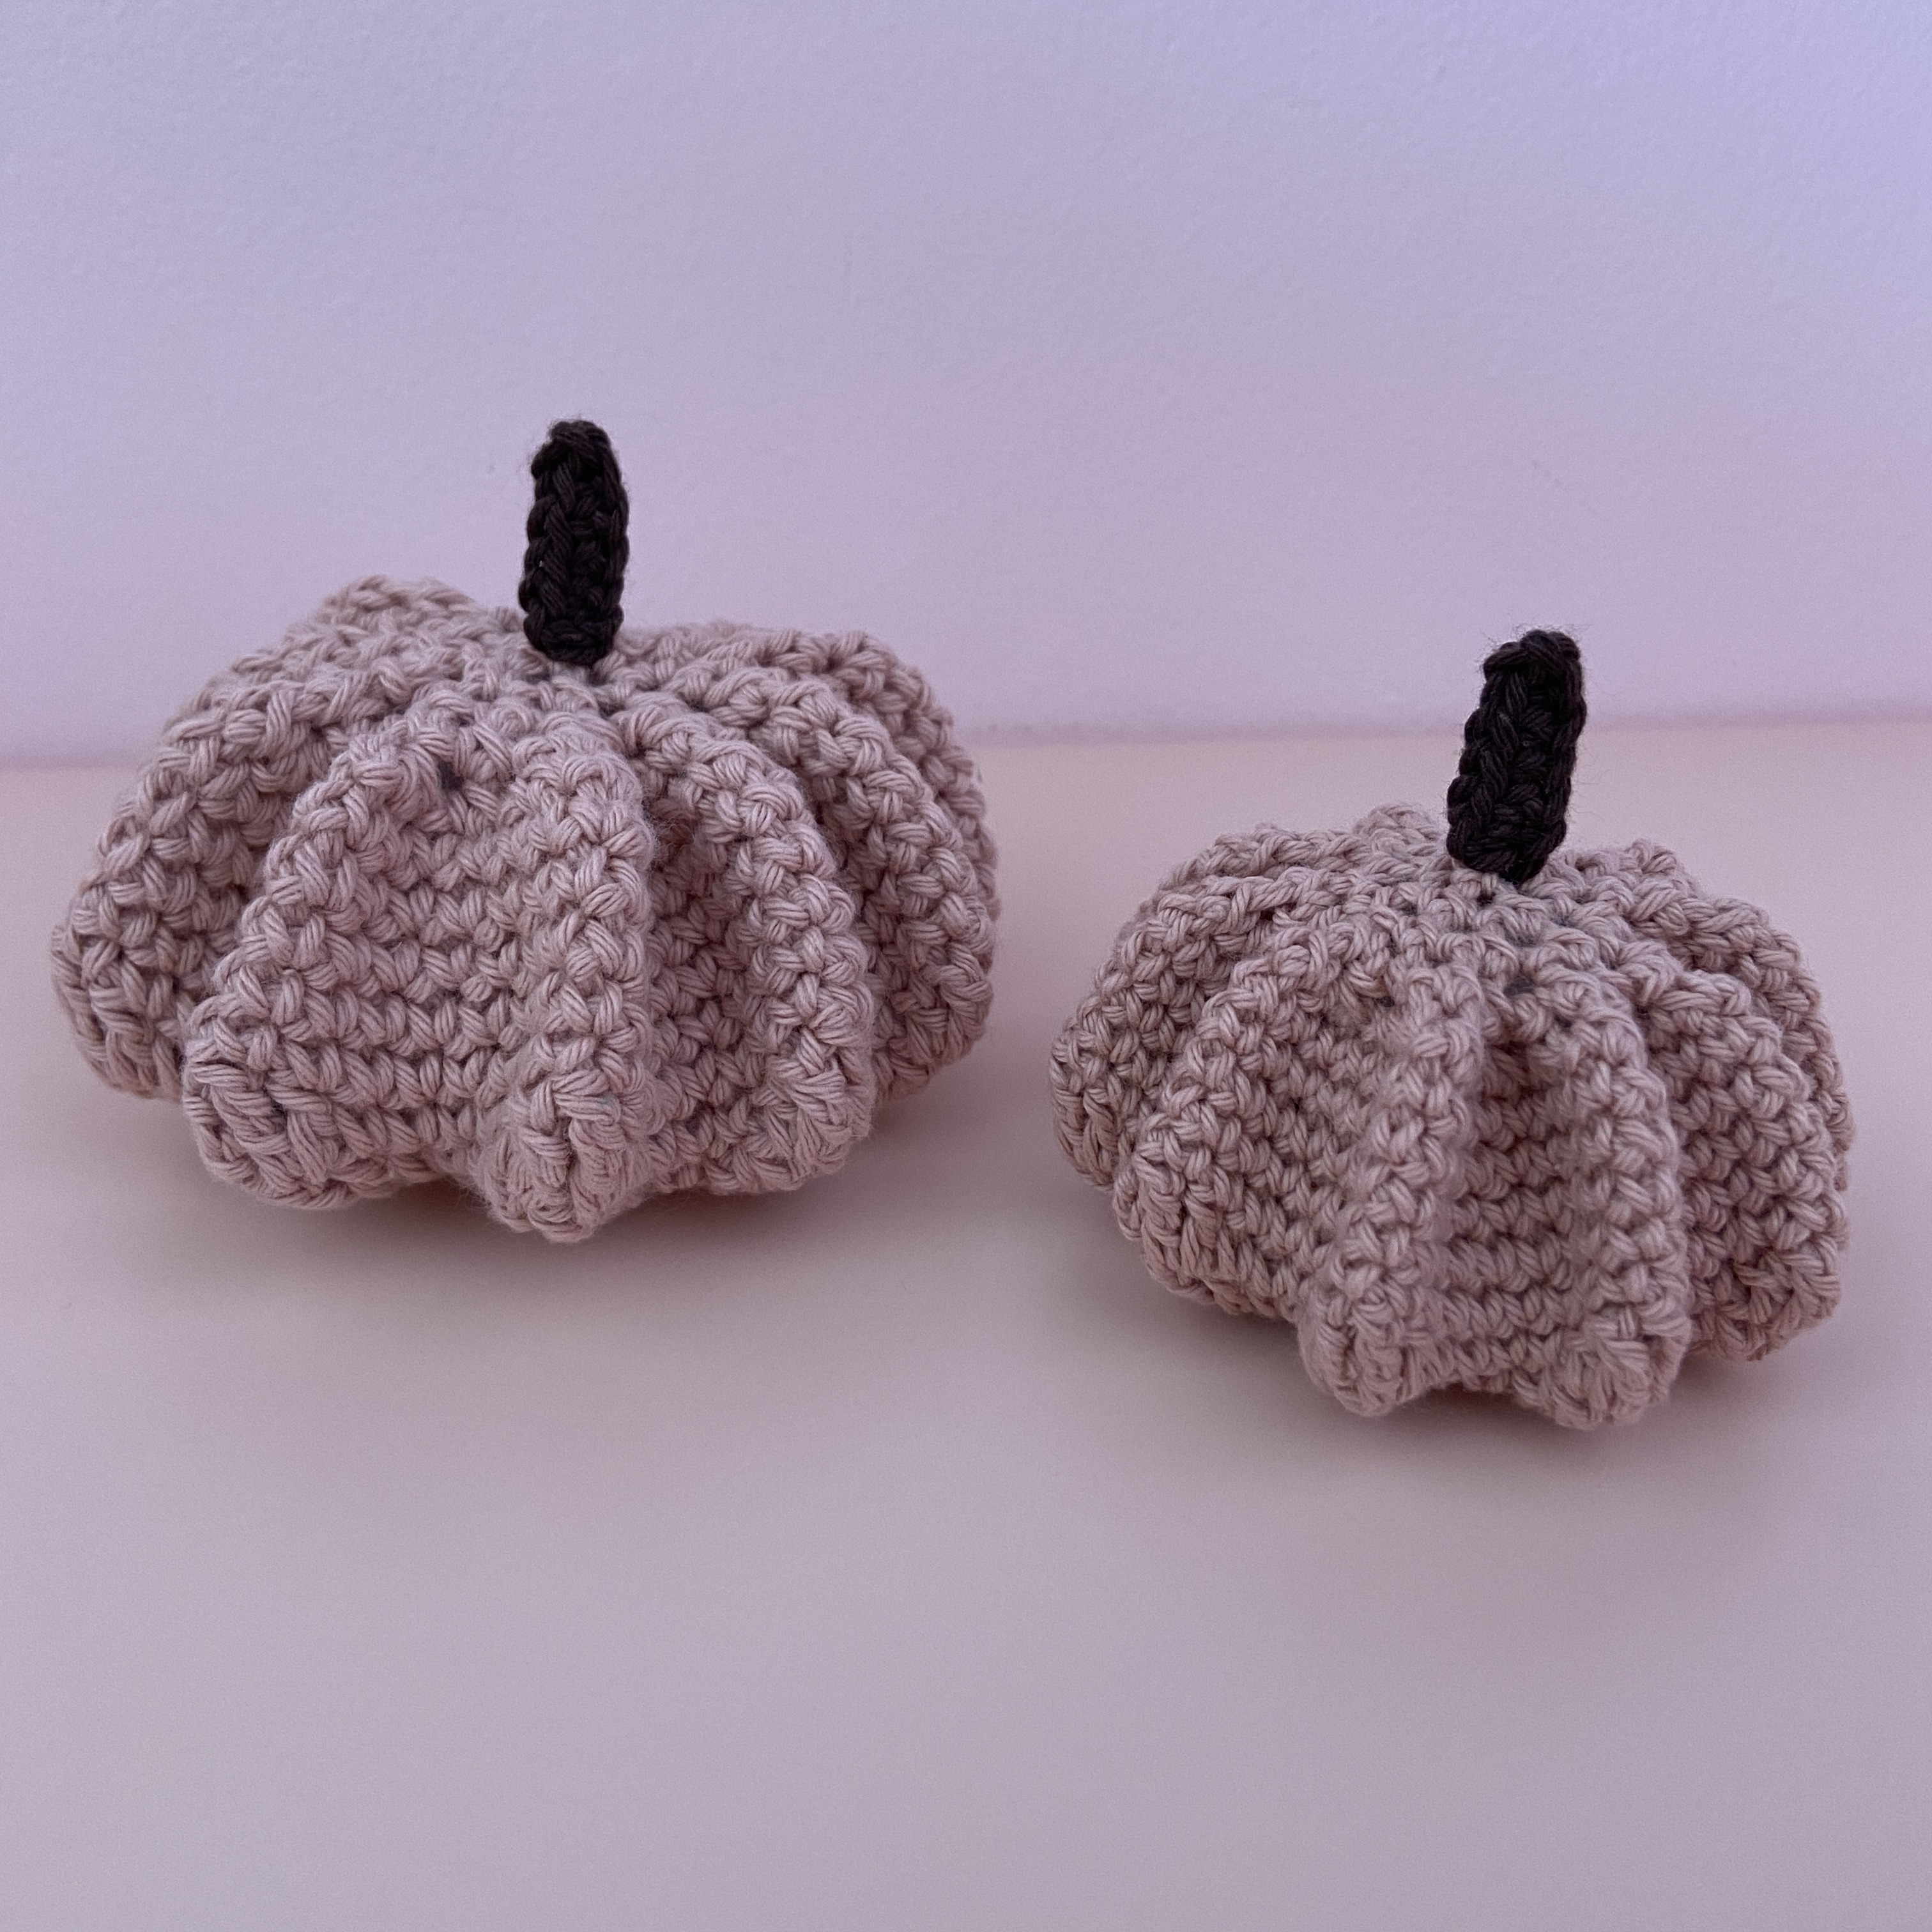


In the past, I have crocheted pumpkins using the traditional method. I was trying to come up with a pattern for pumpkins that did not involve any sewing and I made these! We will begin by crocheting a flower for the base. Then, we will crochet up the sides and use some decreases to bring the pumpkin together. While testing this pattern, I made a lot of pumpkins with yarn from my stash! Now I have lots of pumpkins to gift to family and friends! The weight of the yarn that you use will determine the size of the pumpkin. At the beginning of the pattern, I will go through the information for all of the yarns that I used. You can really use any yarn that you would like with the corresponding hook size. Enjoy the pattern, and let me know if you have any questions (you can email me at maggietrunkhill@daisygirlcrochet.com). I would love to see the pumpkins that you make, so if you share them on Instagram, please use the hashtag #crochetbydaisygirlcrochet and tag me!
There is also another version of this pattern which uses tapestry crochet! There is a short video on my YouTube channel to explain how to change color for these pumpkins.

Getting Started
Materials
- Crochet hook
- Scissors and a tapestry needle- for weaving in ends
- Yarn
- Polyester fiber fill
Yarn I Used
For these pumpkins, I used a lot of different yarns from my stash! Over the next few pages, I will list the specific details about the yarns and hook sizes. You can really use any yarn from your stash and the corresponding hook size for these pumpkins! The weight of the yarn determines the size of the pumpkin. I originally designed this pattern with dk weight yarns, and the pumpkins were the size of the small ones that are often found at pumpkin stands. If you use chunky yarn, the size of the pumpkin will increase. I also made some with lightweight yarn (sport and sock weight yarns) to create some tiny ones.
You can also hold the yarn double for these pumpkins. If you haven’t tried this technique before, I demonstrate it in the video tutorial. When you hold the yarn double, the yarns do not have to be the same weight. I like to hold a variegated yarn with a solid-colored yarn, but you can also hold two solids together to create a variegated yarn. When holding yarn double, it’s difficult to come up with a general method to determine the crochet hook size to use. Try going up a few hook sizes until you find one that feels comfortable.
For the stems
I used Hobbii Rainbow Cotton 8/6 in the shade dark brown for all the stems. I used the same size hook as the pumpkin for the stem; however, if I was crocheting a large pumpkin, I would switch to a smaller hook size (I will note this below).
Abbreviations: In U.S. Terms (Translated to UK in parentheses)
st= stitch
sp= space
ch= chain (chain)
ss= slip stitch (slip stitch)
sc= single crochet (double crochet)
hdc = half double crochet (half treble)
dc= double crochet (treble)
tr= treble (double treble)
sc2tog= decrease 2 single crochet sts together (decrease 2 double crochet sts together)
cc = change color
[ ] indicate that the sts are worked into the same space
{ } indicate that the the sts are repeated later in the pattern
Starting Stitches
At the beginning of a round/row, a ch 2 counts as the first hdc st, a ch 3 counts as the first dc st, and a ch 4 counts as the first tr st (unless stated otherwise).
A ch 1 at the beginning of a round usually does not count as a stitch, so I will note if it should be counted.
The Pumpkins I Made


- These were the first ones I made!
- Hobbii Rainbow Cotton 8/6 (100% cotton; 114 yds/ 50 g) in the shades: old rose, dark old rose, pastel yellow, beige, army green, and light purple.
- This is a sport weight yarn, but when I crochet with it, its gauge matches a lot of the dk weight yarns that I have used!
- 3.5 mm crochet hook
- 4 inches wide and 2 inches tall


- Cascade Nifty Cotton Splash (100% cotton; 185 yds/ 100 g) in the shades: primary and carnation
- Medium weight yarn
- 4.00 mm crochet hook
- 4.5 inches wide and 2.25 inches tall


- This is one of the ones that I am most excited about! I held the Cascade Nifty Cotton Splash in the shade primary double with Hobbii Rainbow Cotton 8/6 in the shade old rose (I ran out of primary, so I had to change to carnation at the end)
- 5.5 mm crochet hook. I switched to a 4.00 mm for the stem.
- 6 inches wide and 3 inches tall


- The tiny ones! You can use any sport or sock weight yarn to make these!
- Rainbow Cotton 8/4 (100% cotton; sock weight; 175 yds/ 50 g) in the shade old rose
- Hobbii Baby Cotton Organic print (100% Egyptian cotton; sock weight; 185 yds/ 50 g) in color 3. This one reminds me of candy corn! This color is currently sold out on their website, but any of the Baby Cotton print, Rainbow Cotton 8/4 print, and Friends Cotton 8/4 print colors would work well!
- 3.00 mm crochet hook
- 3 in wide, 1.5 in tall


- I made this one by holding the two previous yarns double!
- 4.00 mm
- 4.5 in wide, 2.25 in tall
The Pattern
Foundation: With the color of the pumpkin, begin with a magic circle.
Round 1: Ch 2 (counts as first hdc throughout), 9 hdc into the magic circle. Close the magic circle. Ss into the top of the ch 2. (10).
Round 2: [Ch 2, hdc]. In each of the following sts of the previous round, [2 hdc]. Then, ss into the top of the ch 2. (20).
Round 3: [Ch 2, hdc], hdc. { [2 hdc], hdc}. Repeat {} til end (8 more times). Then, ss into the top of the ch 2. (30).
Round 4: Ch 1 (counts as first ss), [2 dc], dc. {Ss, [2 dc], dc}. Repeat {} til end (8 more times). Then, ss into the ch 1 from the beginning. (40).
Round 5: [Ch 1 (does NOT count as a st), sc], [dc, tr], [tr, dc], sc. {Sc, [dc, tr], [tr, dc], sc}. Repeat {} til end (8 more times). Then, ss into the first sc. (60).
Round 6: [Ch 1 (does NOT count as a st), sc], sc, [dc, tr], [tr, dc], 2 sc. {2 sc, [dc, tr], [tr, dc], 2 sc}. Repeat {} til end (8 more times). Then, ss into the first sc. (80).
Round 7: [Ch 1 (does NOT count as a st), sc], sc into each of the following sts of the previous round. Then, ss into the first sc. (80).
Rounds 8 – 11: Same as round 7.
Round 12: Ch 1, then sc into the next st (counts as first sc2tog). For the rest of the round, sc2tog. Then, ss into the first sc (not the ch 1). (40).
Rounds 13-15 are the same as round 12 (stop after round 13 to add the filling). At first, it might not seem like the top of the pumpkin is going to come together, but trust me, it will! Here are the stitch counts:
Round 13: 20 sts
Add a small amount of filling. No need to pack firmly; simply place a small amount inside.
Round 14: 10 sts
Round 15: 5 sts
At the end of round 15, fasten off.
Join the brown into any st of round 15. Ch 7. Skip over the first ch (the one that is the closest to the hook) and sc into each of the following 6 chains. Fasten off and weave in the ends.
I hope you enjoyed this pattern! I would love to see the pumpkins that you make with it, so if you post pictures of them on Instagram, make sure you tag me! You can also email me a picture at maggietrunkhill@daisygirlcrochet.com.
*If you would like to make some of these pumpkins and sell the pumpkins, please give me (Maggie Trunkhill) credit as the pattern designer. Do not reproduce this pattern in any form without my permission.
There is also another version of this pattern which uses tapestry crochet! There is a short video on my YouTube channel to explain how to change color for these pumpkins.

