


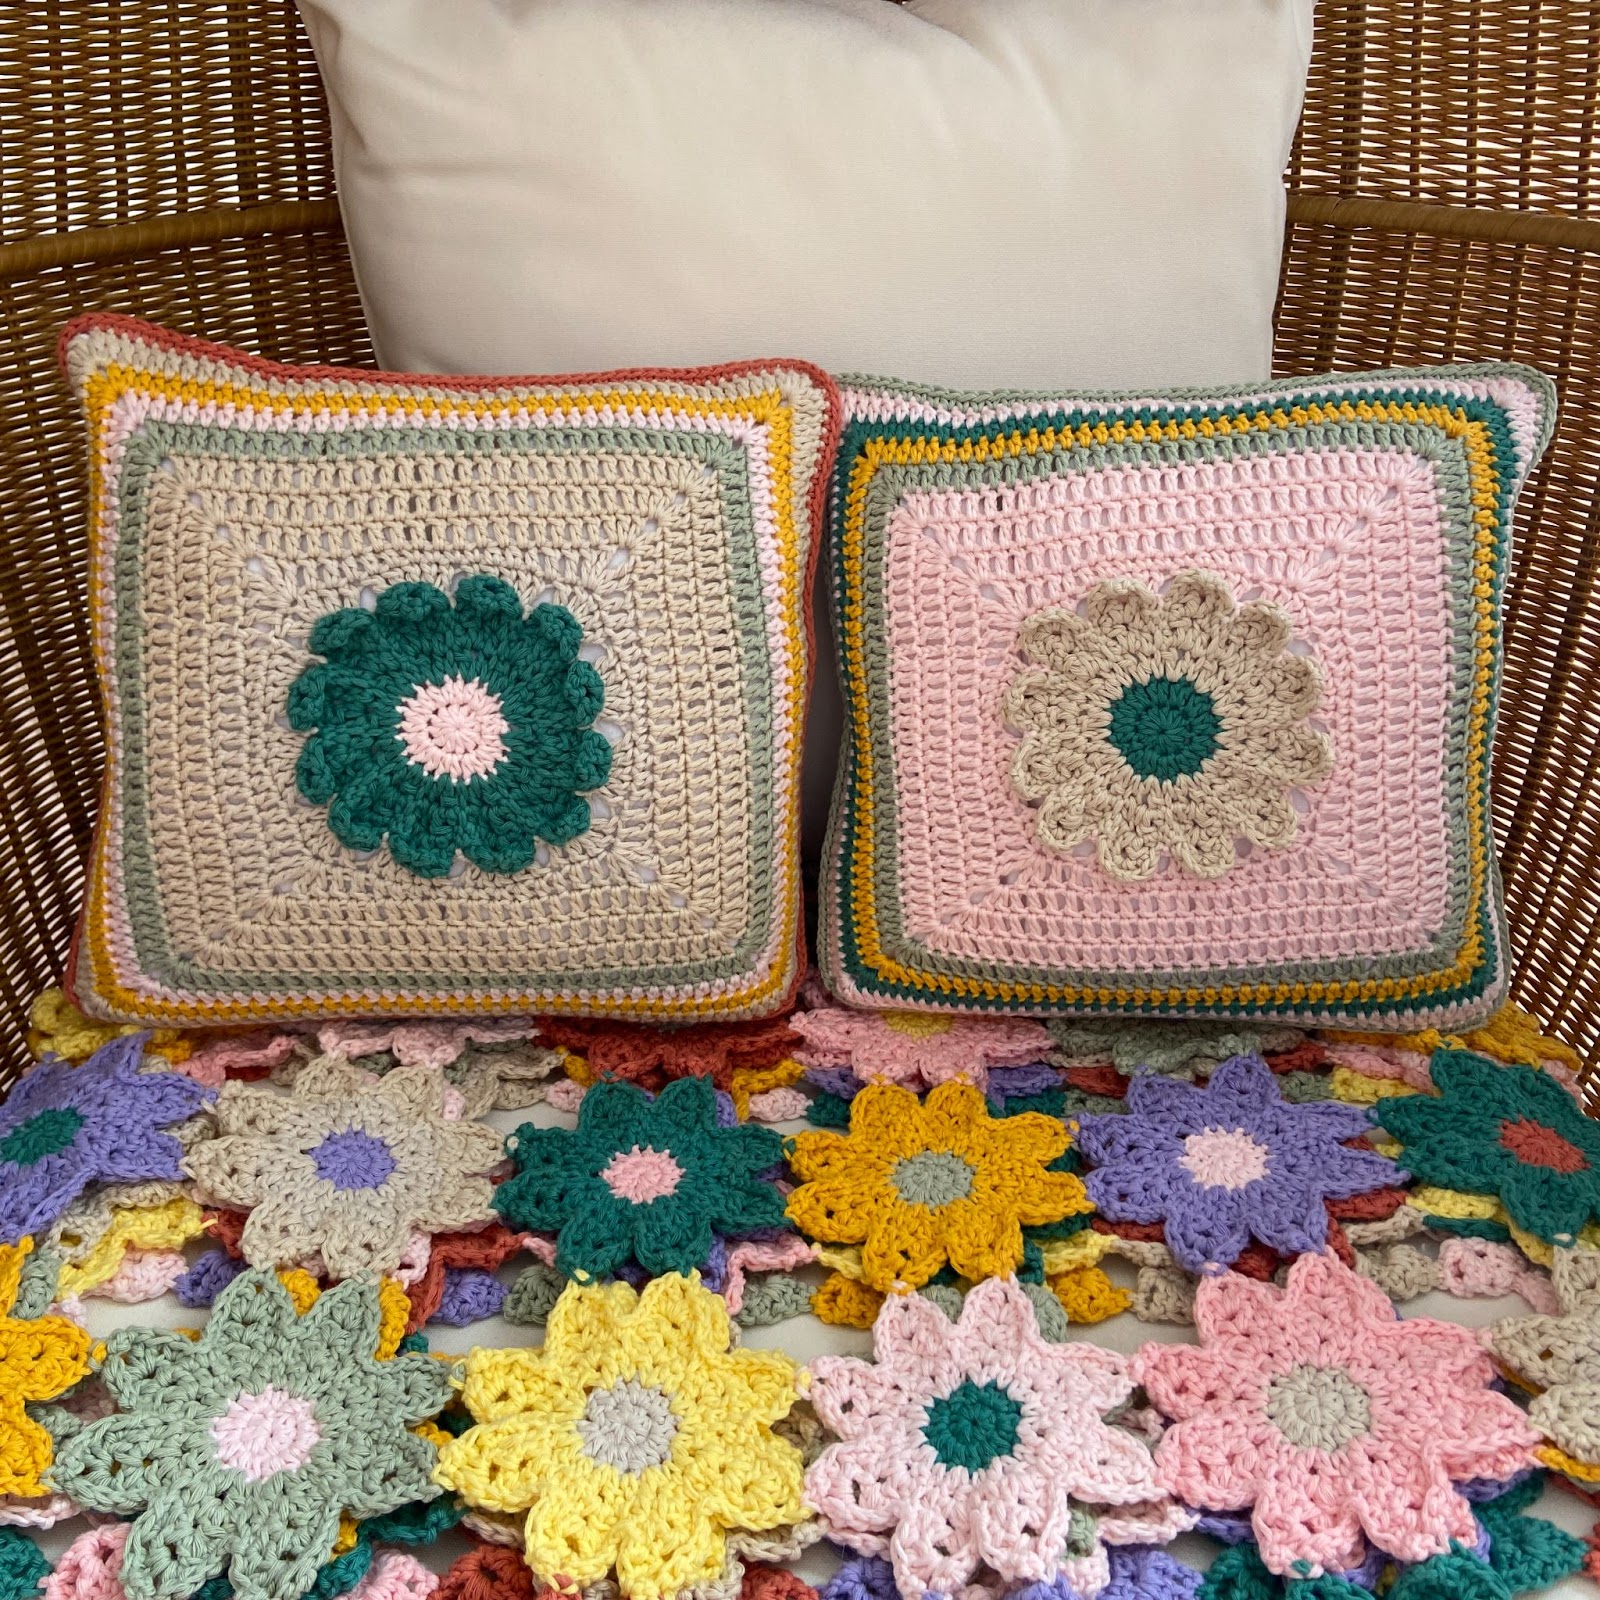
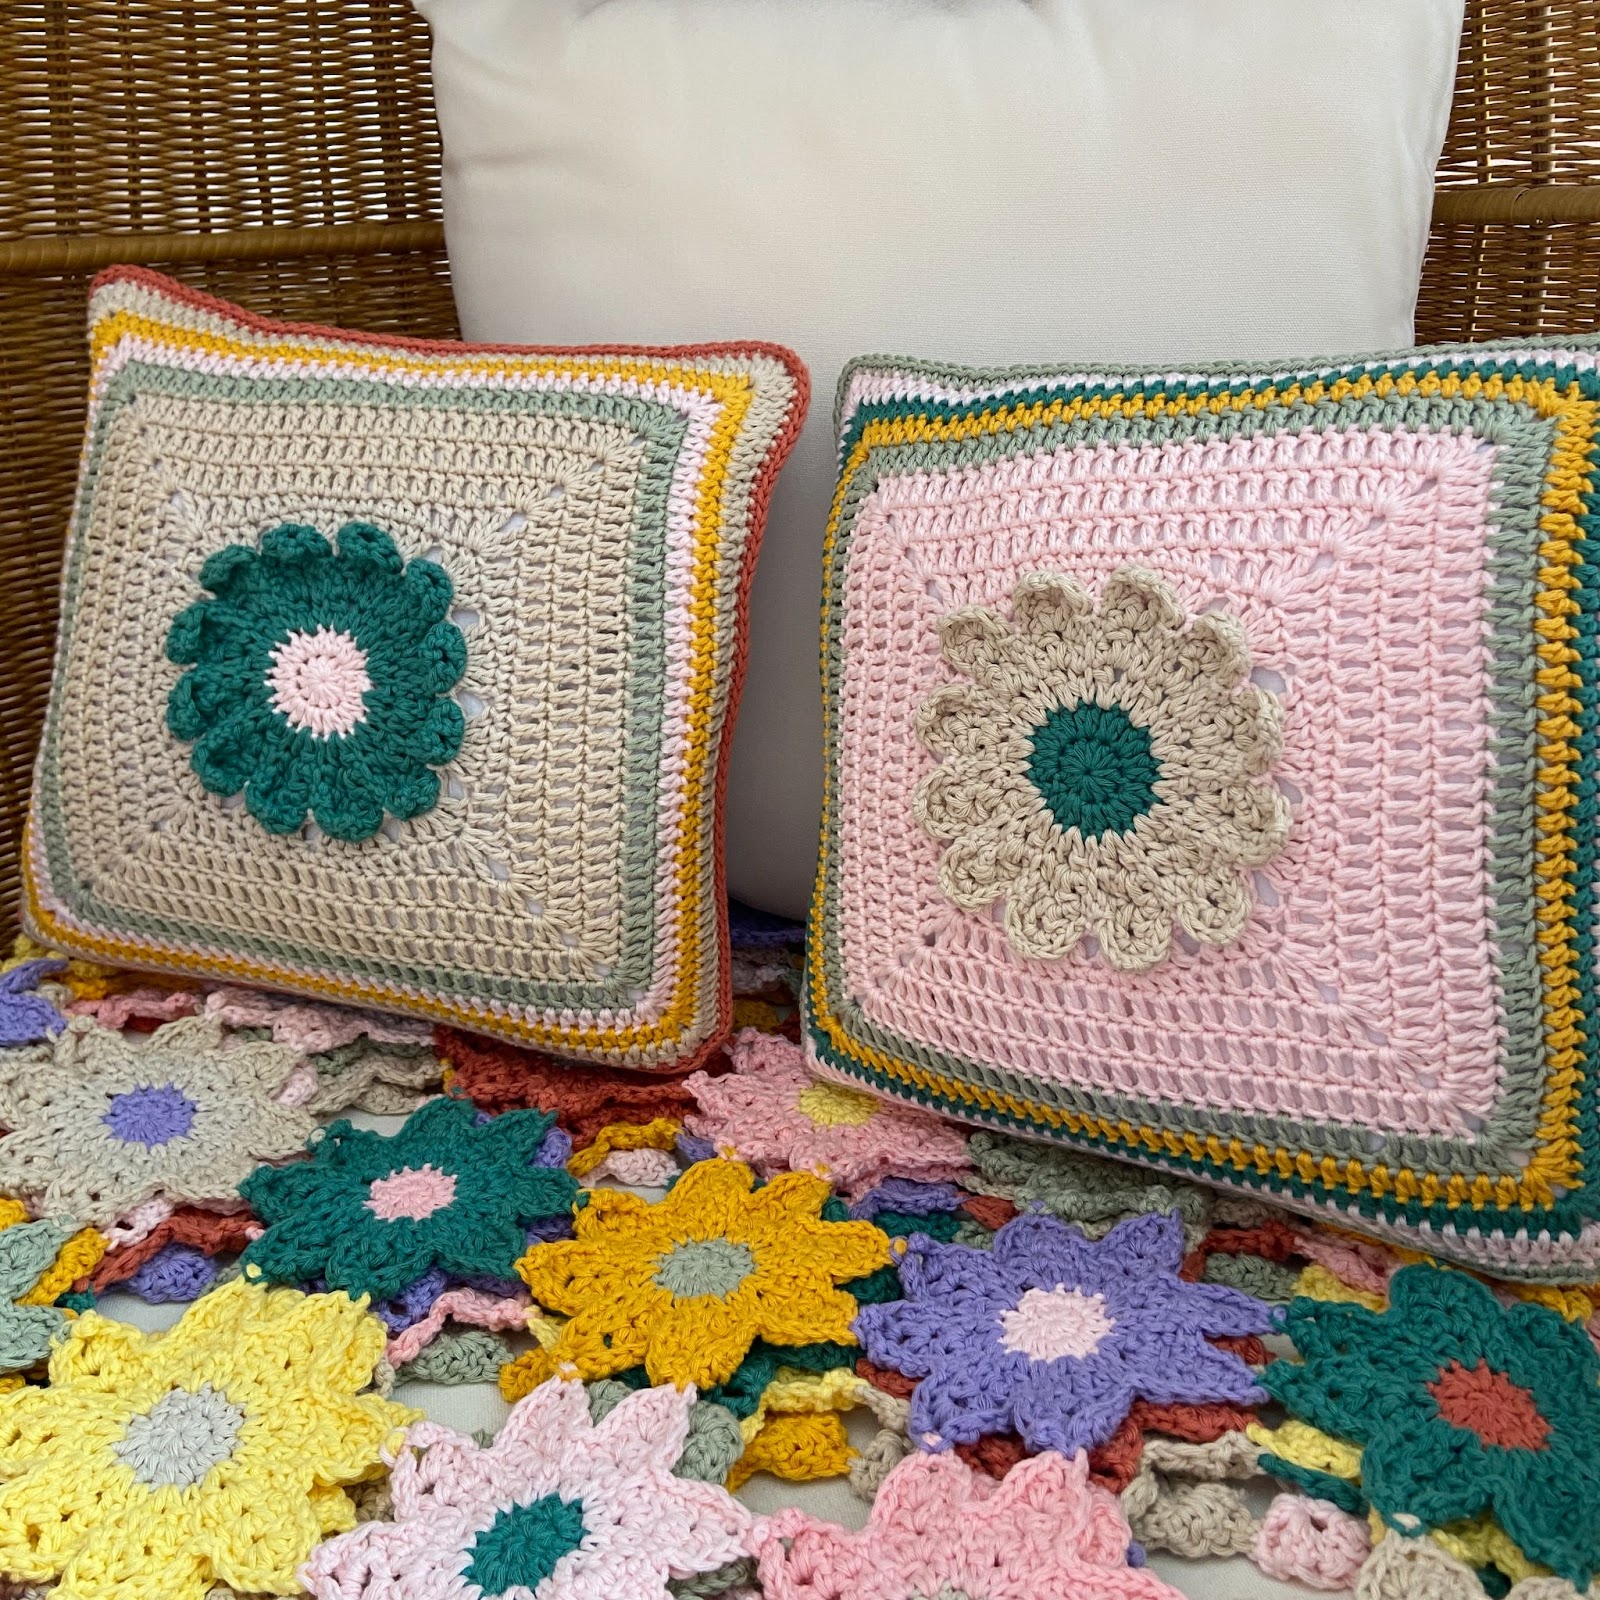
I recently crocheted a blanket entirely out of flowers. The pattern for it is called the Just the Flowers Blanket because when I crochet flower blankets, I usually turn the flowers into granny squares before joining them. After I finished the blanket, I made this pillow to match it! The pattern for the flower is a little bit different than the ones in the blanket as it is larger. I used the same yarn and colors that were in the blanket, and I ended up making this pillow twice because I made a second one while filming the video tutorial! I have listed out the colors that I used for both pillows, but I can’t wait to see the colors you choose. Enjoy the pattern and let me know if you have any questions (you can email me at maggietrunkhill@daisygirlcrochet.com). I would love to see the pillow that you make, so if you share it on Instagram, please use the hashtag #crochetbydaisygirlcrochet and tag me!

Just the Flowers Blanket
Getting Started
Materials
- 4.00 mm crochet hook
- Scissors and a tapestry needle- for weaving in ends
- 14 by 14 inch (35 by 35 cm) square pillow insert
- 5 buttons (2 cm in diameter)
- Aran weight yarn
Yarn I Used (for the cream pillow)
Paintbox Cotton Aran Yarn (93 yd/ 50 g skeins; 100% cotton)
- 2 pale lilac (purple)
- 1 vanilla cream (cream)
- 1 ballet pink (light pink)
- 1 vintage pink (vintage pink)
- 1 slate green (blue)
- 1 pistachio green (green)
- 1 mustard yellow (mustard)
If you want to make the light pink version, the colors and quantities are the same, but it does not include the vintage pink.
Note about Yarn Substitution
I used Paintbox Cotton Aran yarn (aran weight yarn) with a 4.00 mm crochet hook for this pillow. However, any medium weight yarn should work well for this pillow. After you finish the front side, measure it, and then place it on a pillow insert that is about 1-2 inches larger, so the pillow case is stretched over the insert.
Gauge and Size
18 sts and 7 rows = 4 inches
The gauge provided is measured with double crochet sts worked in rows.
Pillows should always be 1-2 inches smaller than the insert, so they are stretched over the insert. Hence, the front side of this pillow is about 12 by 12 inches (30.5 by 30.5 cm), and the back of the pillow is about 12.5 by 12.5 inches (31.75 by 31.75 cm).
Abbreviations: In U.S. Terms (Translated to UK in parentheses)
st= stitch
sp= space
ch= chain (chain)
ss= slip stitch (slip stitch)
sc= single crochet (double crochet)
hdc= half double crochet (half treble crochet)
dc= double crochet (treble)
tr= treble (double treble)
blo = back loop only
[ ] indicate that the sts are worked into the same space
{ } indicate that the the sts are repeated later in the pattern
* also indicates that stitches are repeated later in the pattern
Special Stitch
Picot stitch: Ch 3, then sc into the first ch of the ch 3. This stitch will create the shape of the flower petals!
Starting Stitches
At the beginning of a round/row, a ch 2 counts as the first hdc st, a ch 3 counts as the first dc st, and a ch 4 counts as the first tr st (unless stated otherwise).
A ch 1 at the beginning of a round usually does not count as a stitch, so I will note if it should be counted.
The Video
There is a video to demonstrate how to make the front side:
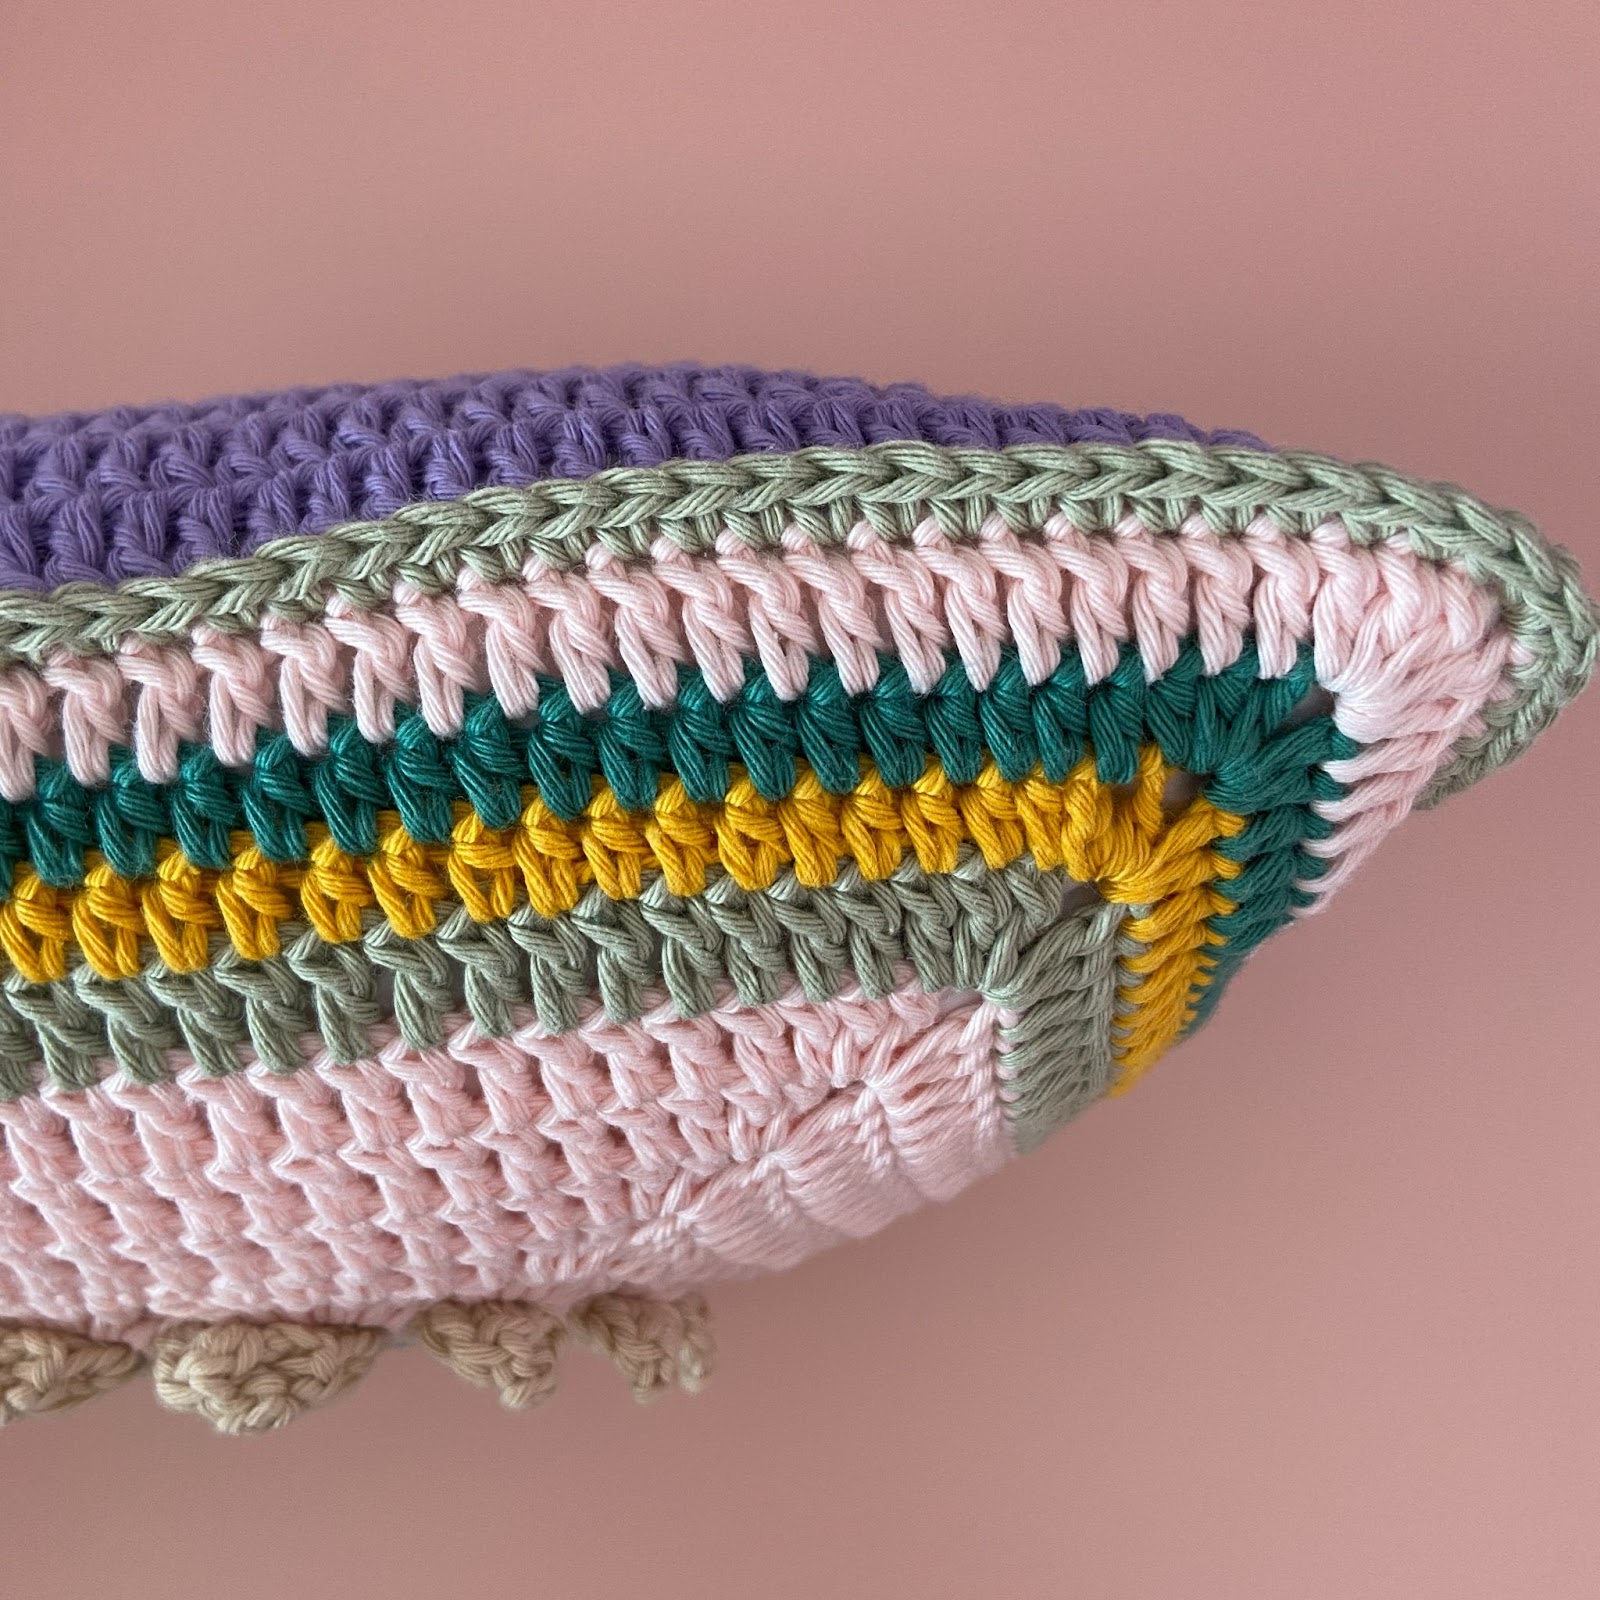
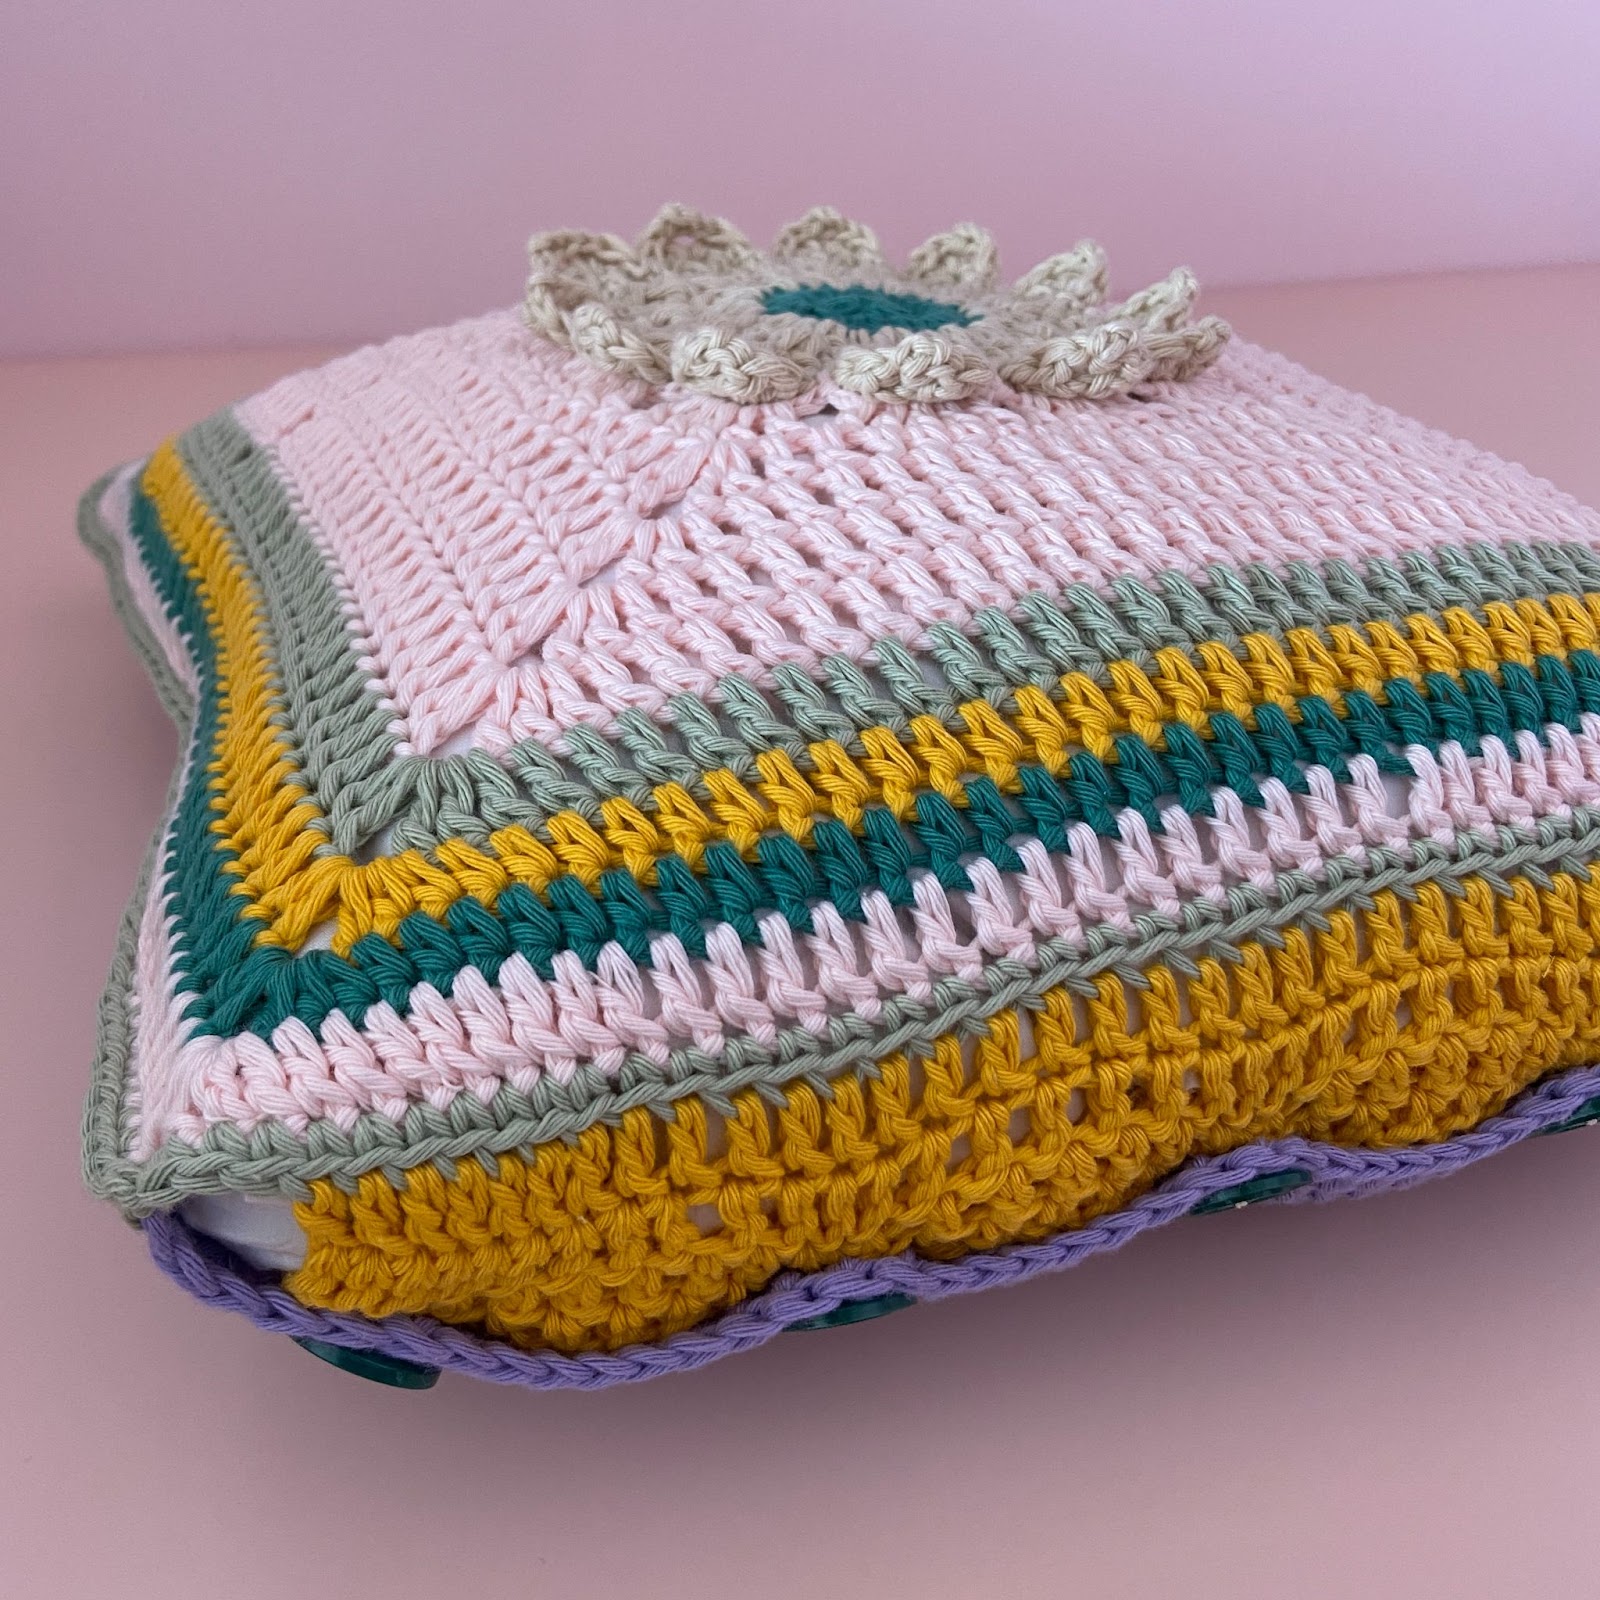
Color Combinations
When I first made this pillow, I made the one with the cream background. When I filmed the video, I made another one with the light pink background. The written pattern includes the colors for the cream one, so I have listed out the colors for the other one here. I can’t wait to see the colors you choose as there are so many possibilities!
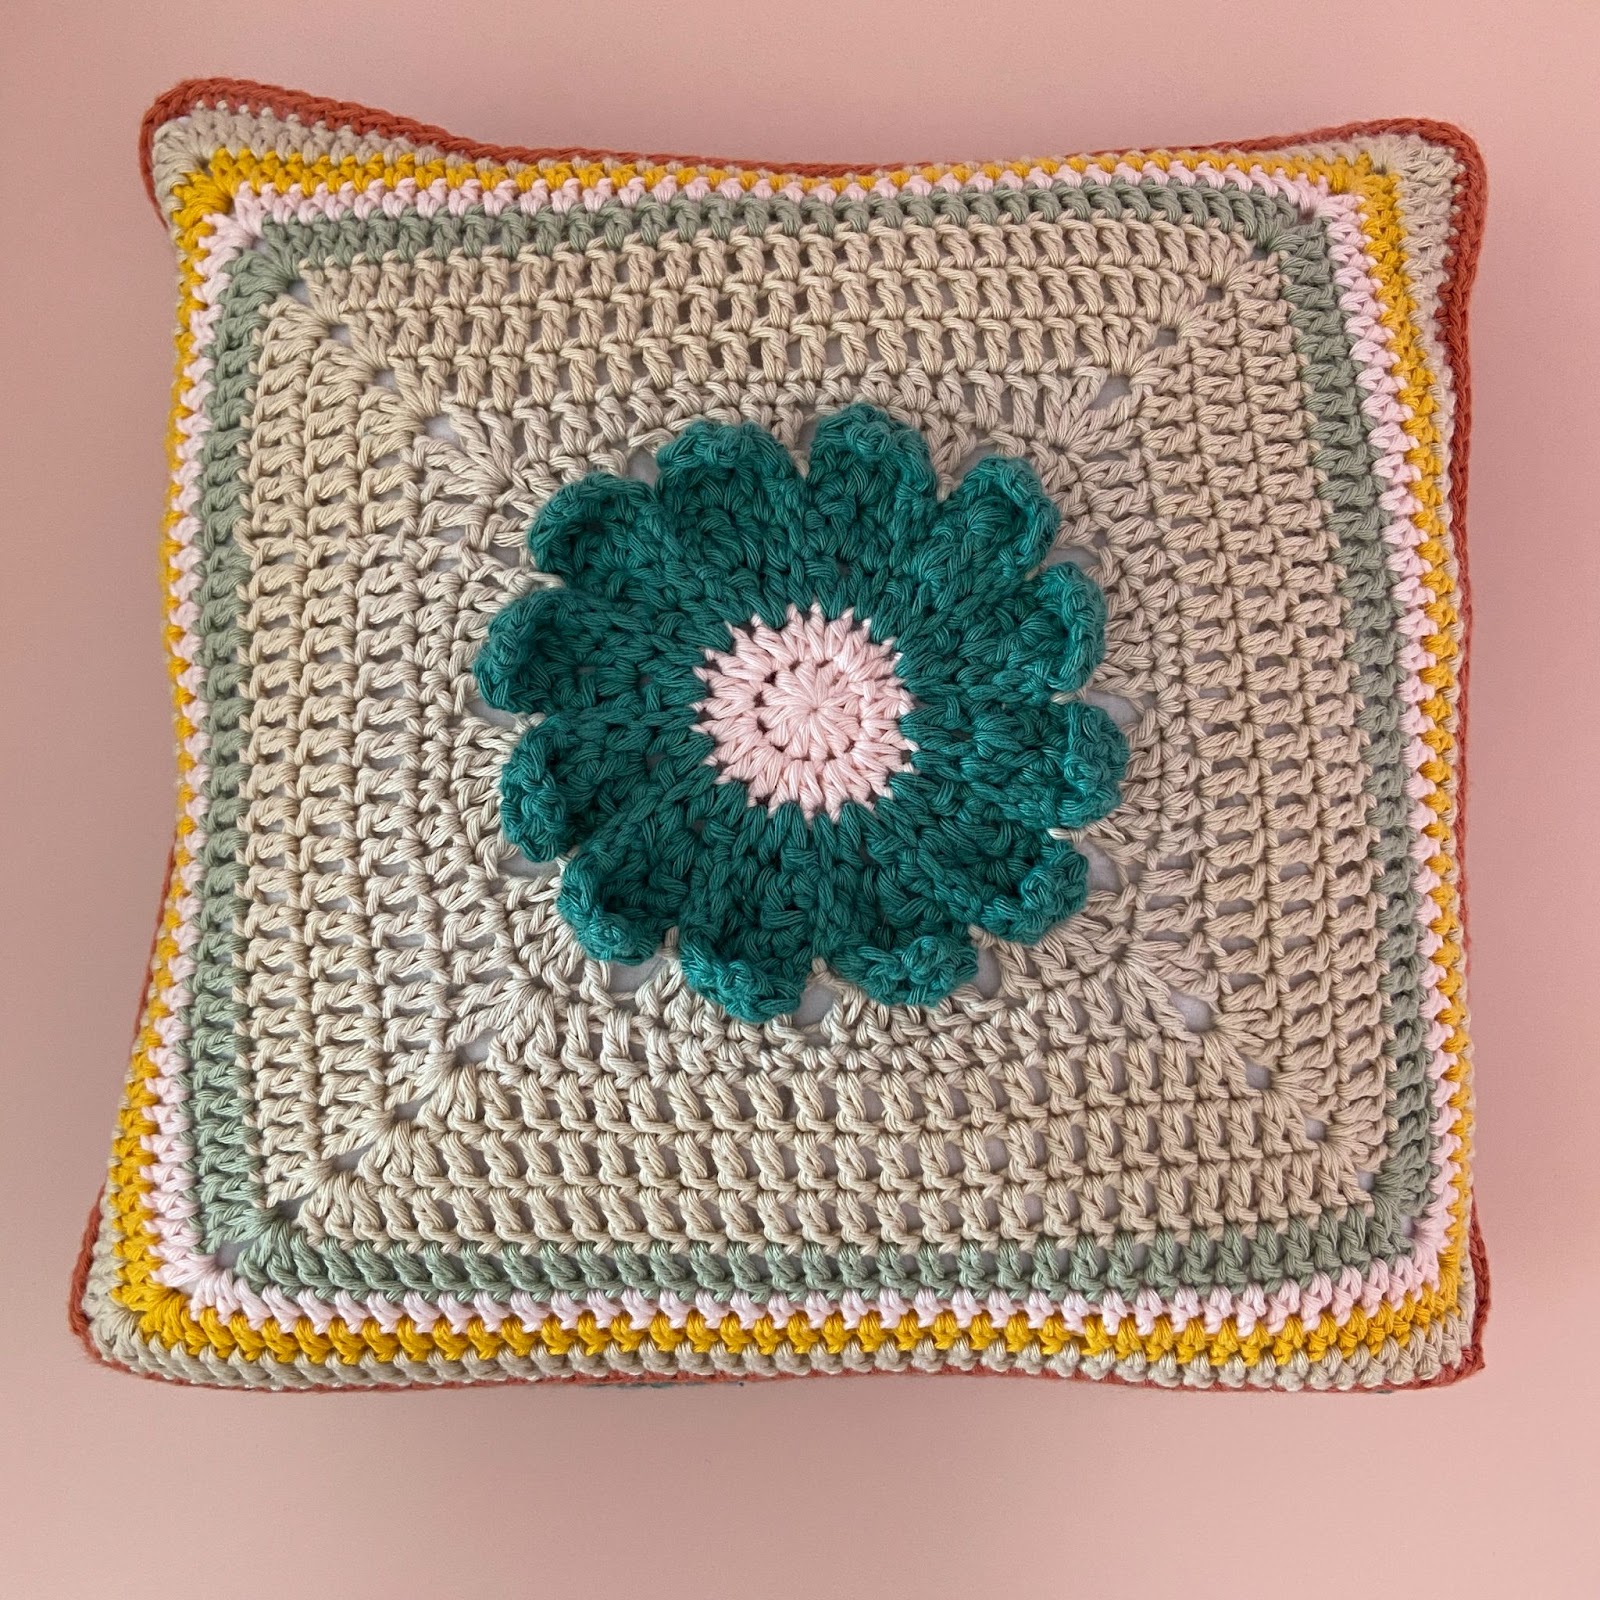
The Cream Pillow
Round 1-2: Light pink
Rounds 3-6: Blue
Rounds 7- 12: Cream
Round 13: Green
Round 14: Light pink
Round 15: Mustard yellow
Round 16: Cream
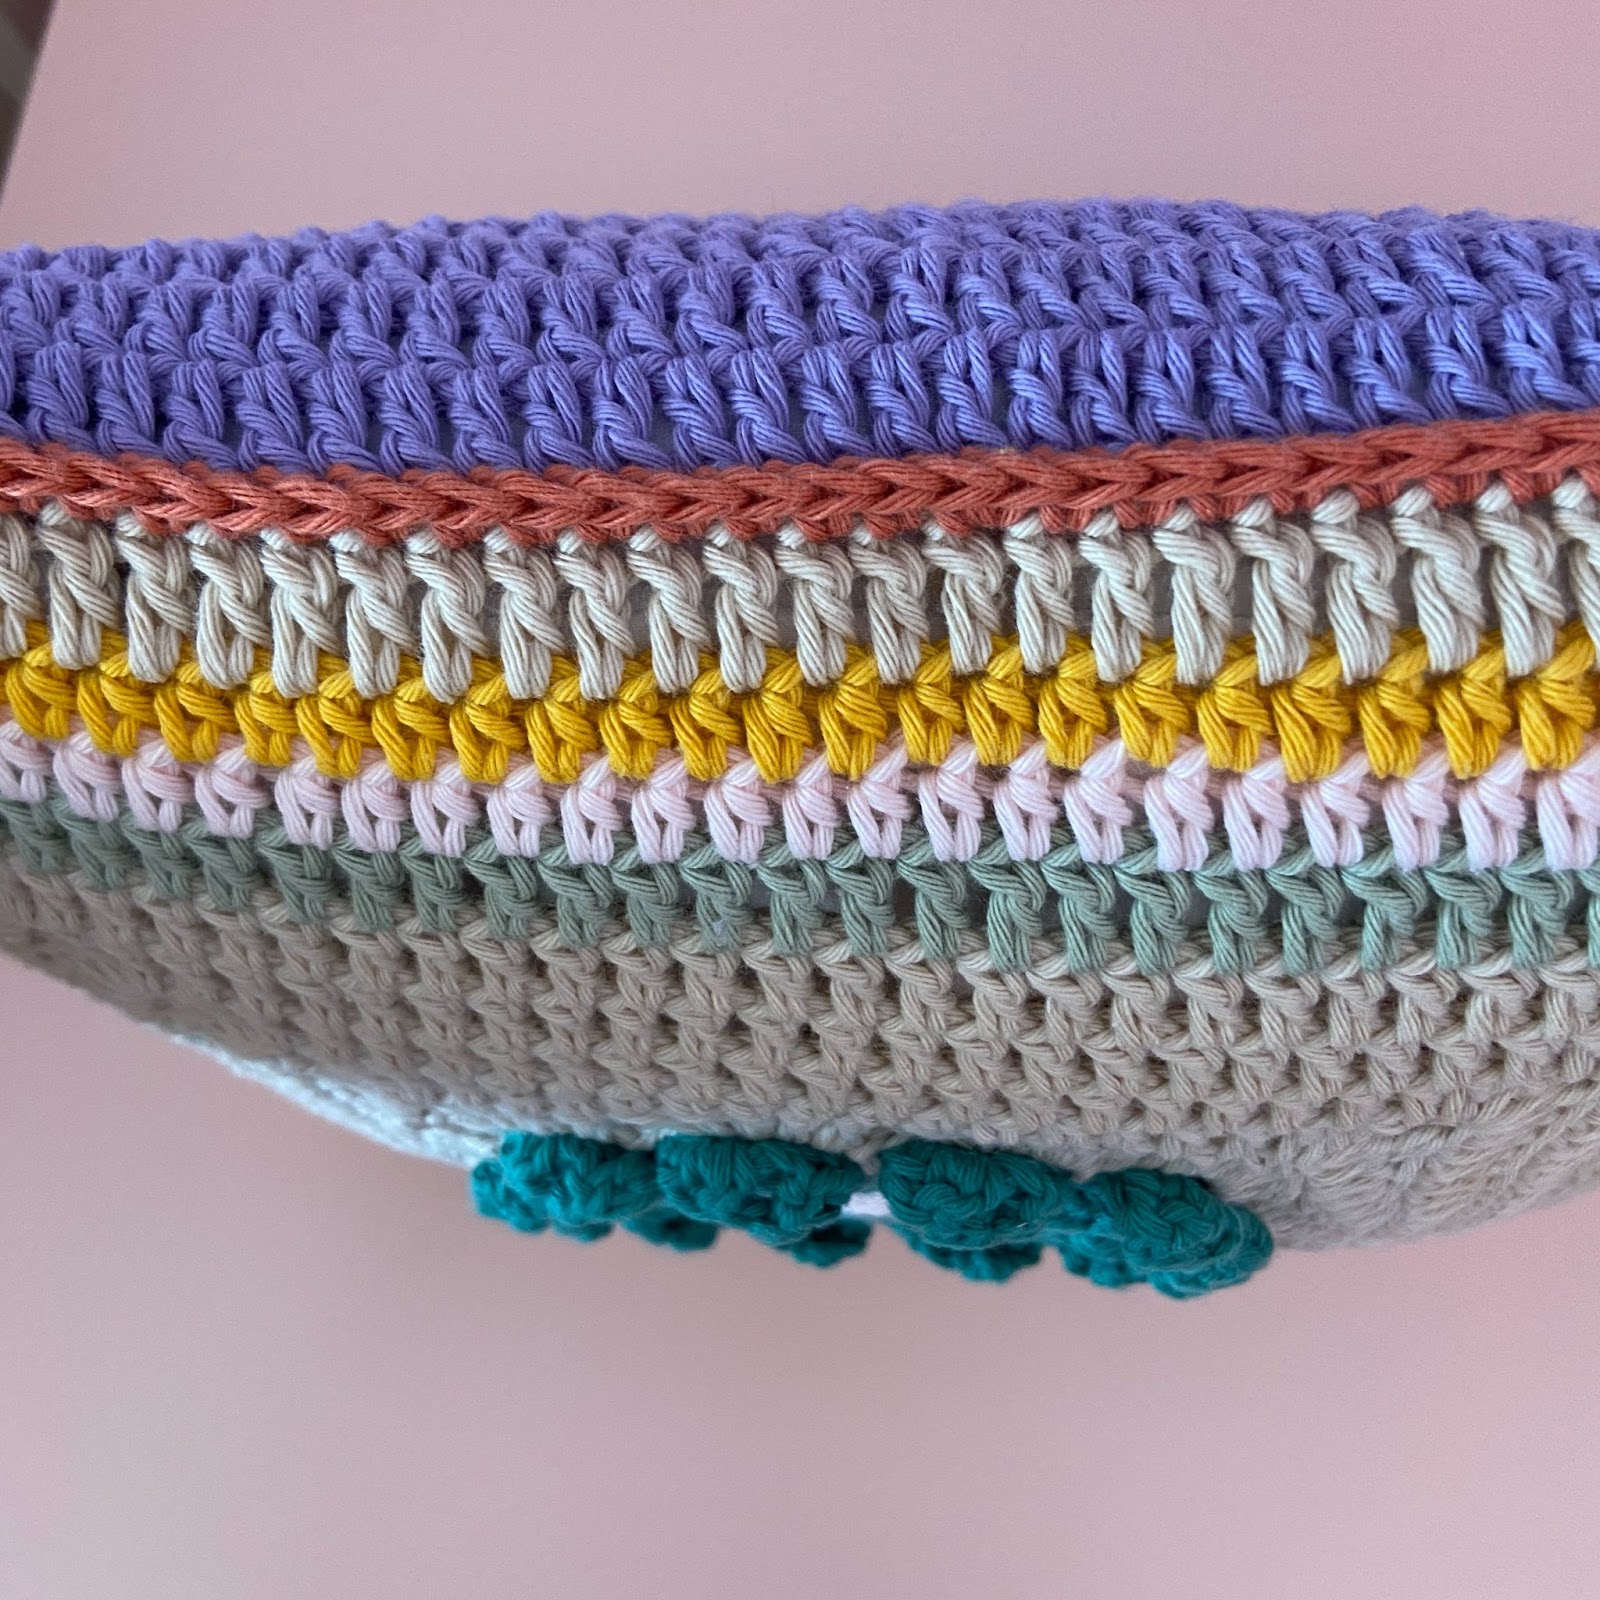
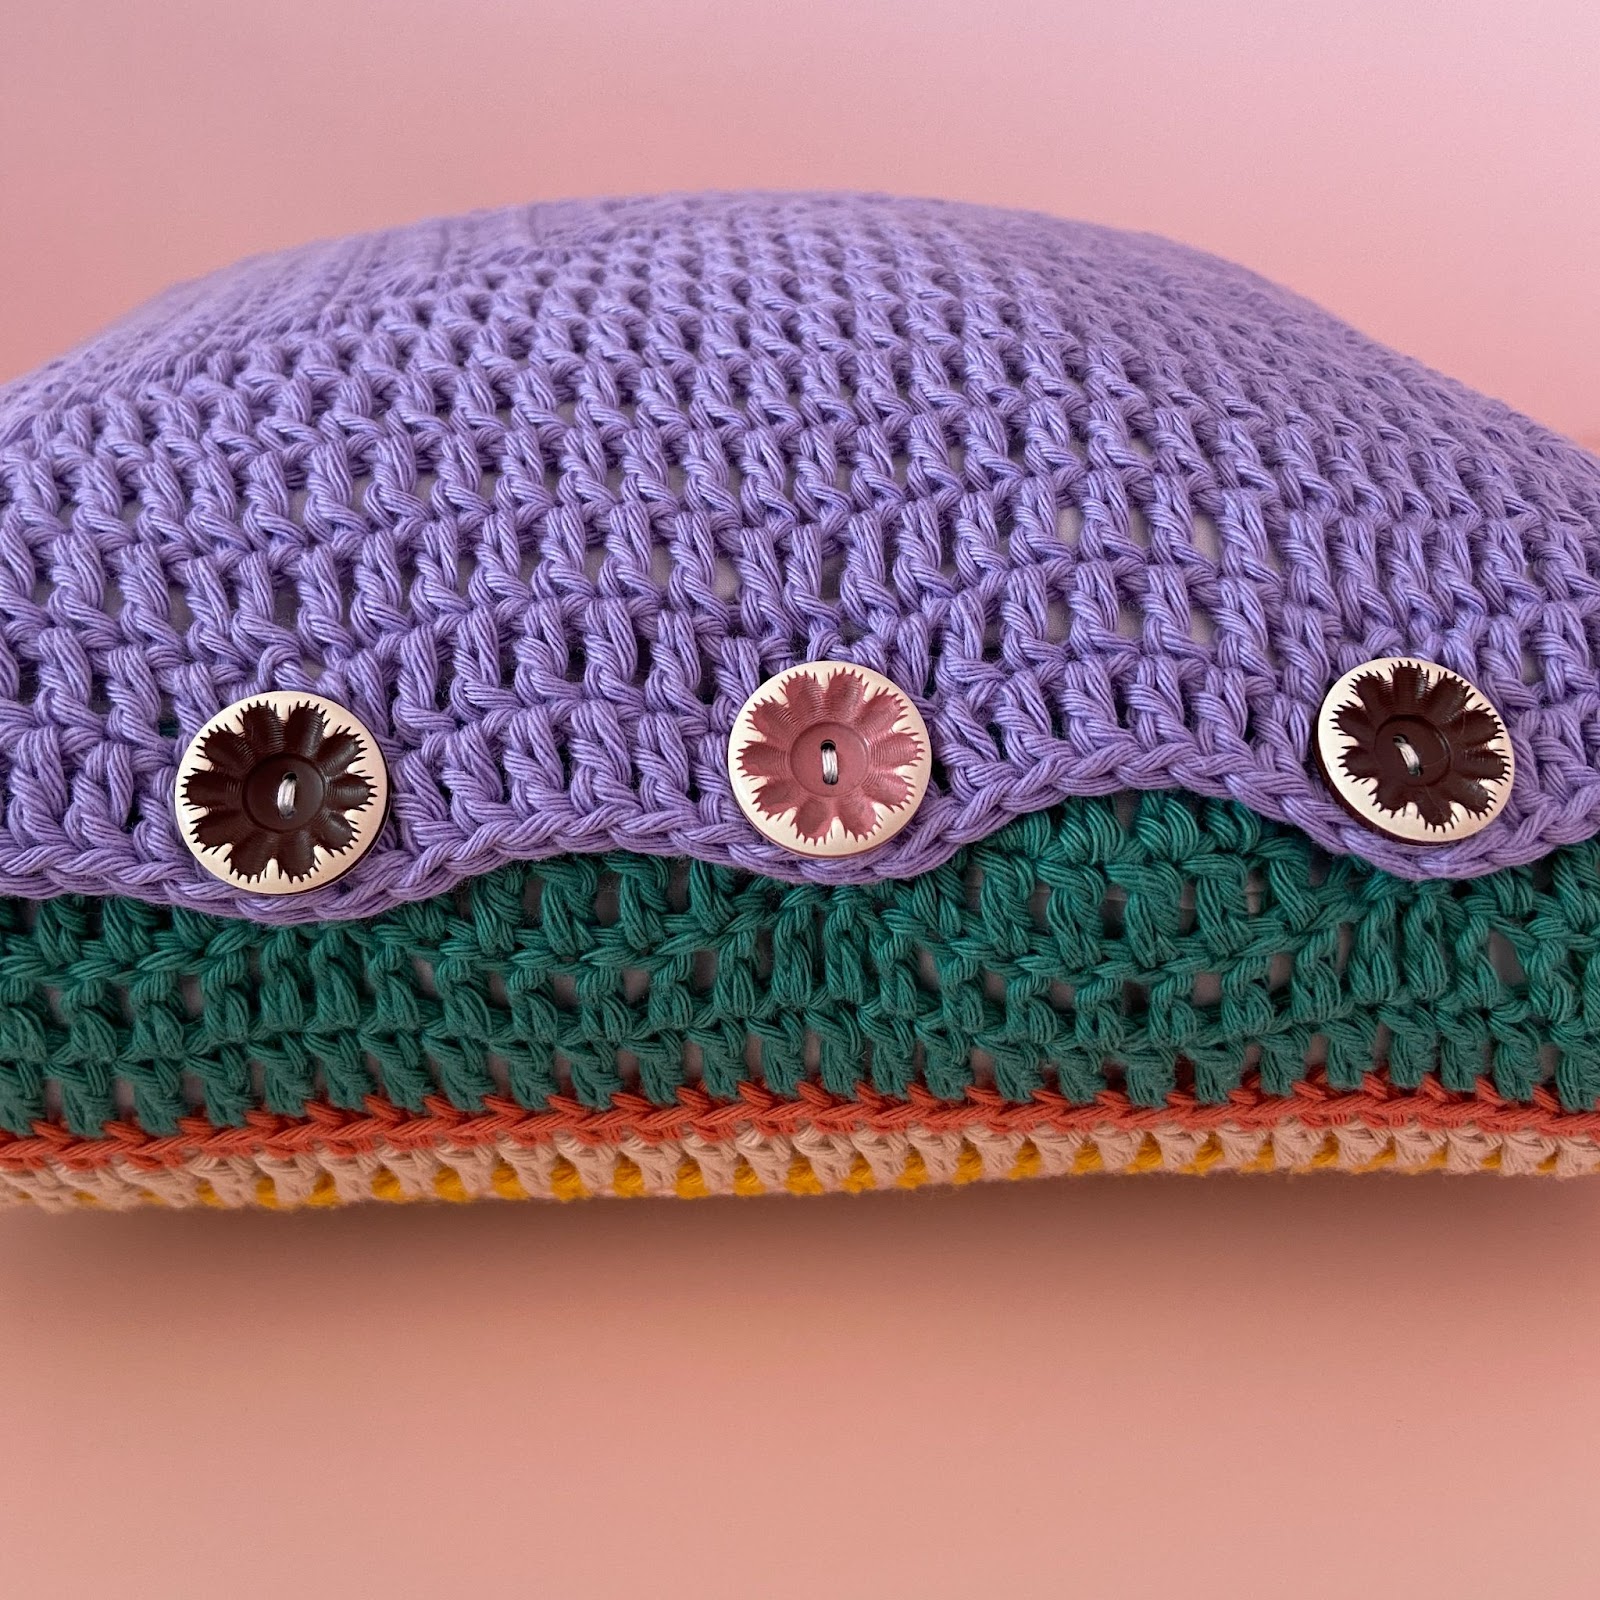
Button flap: Row 1 is vintage pink and rows 2-5 are blue.
The pillow is joined with the vintage pink and the back is purple.


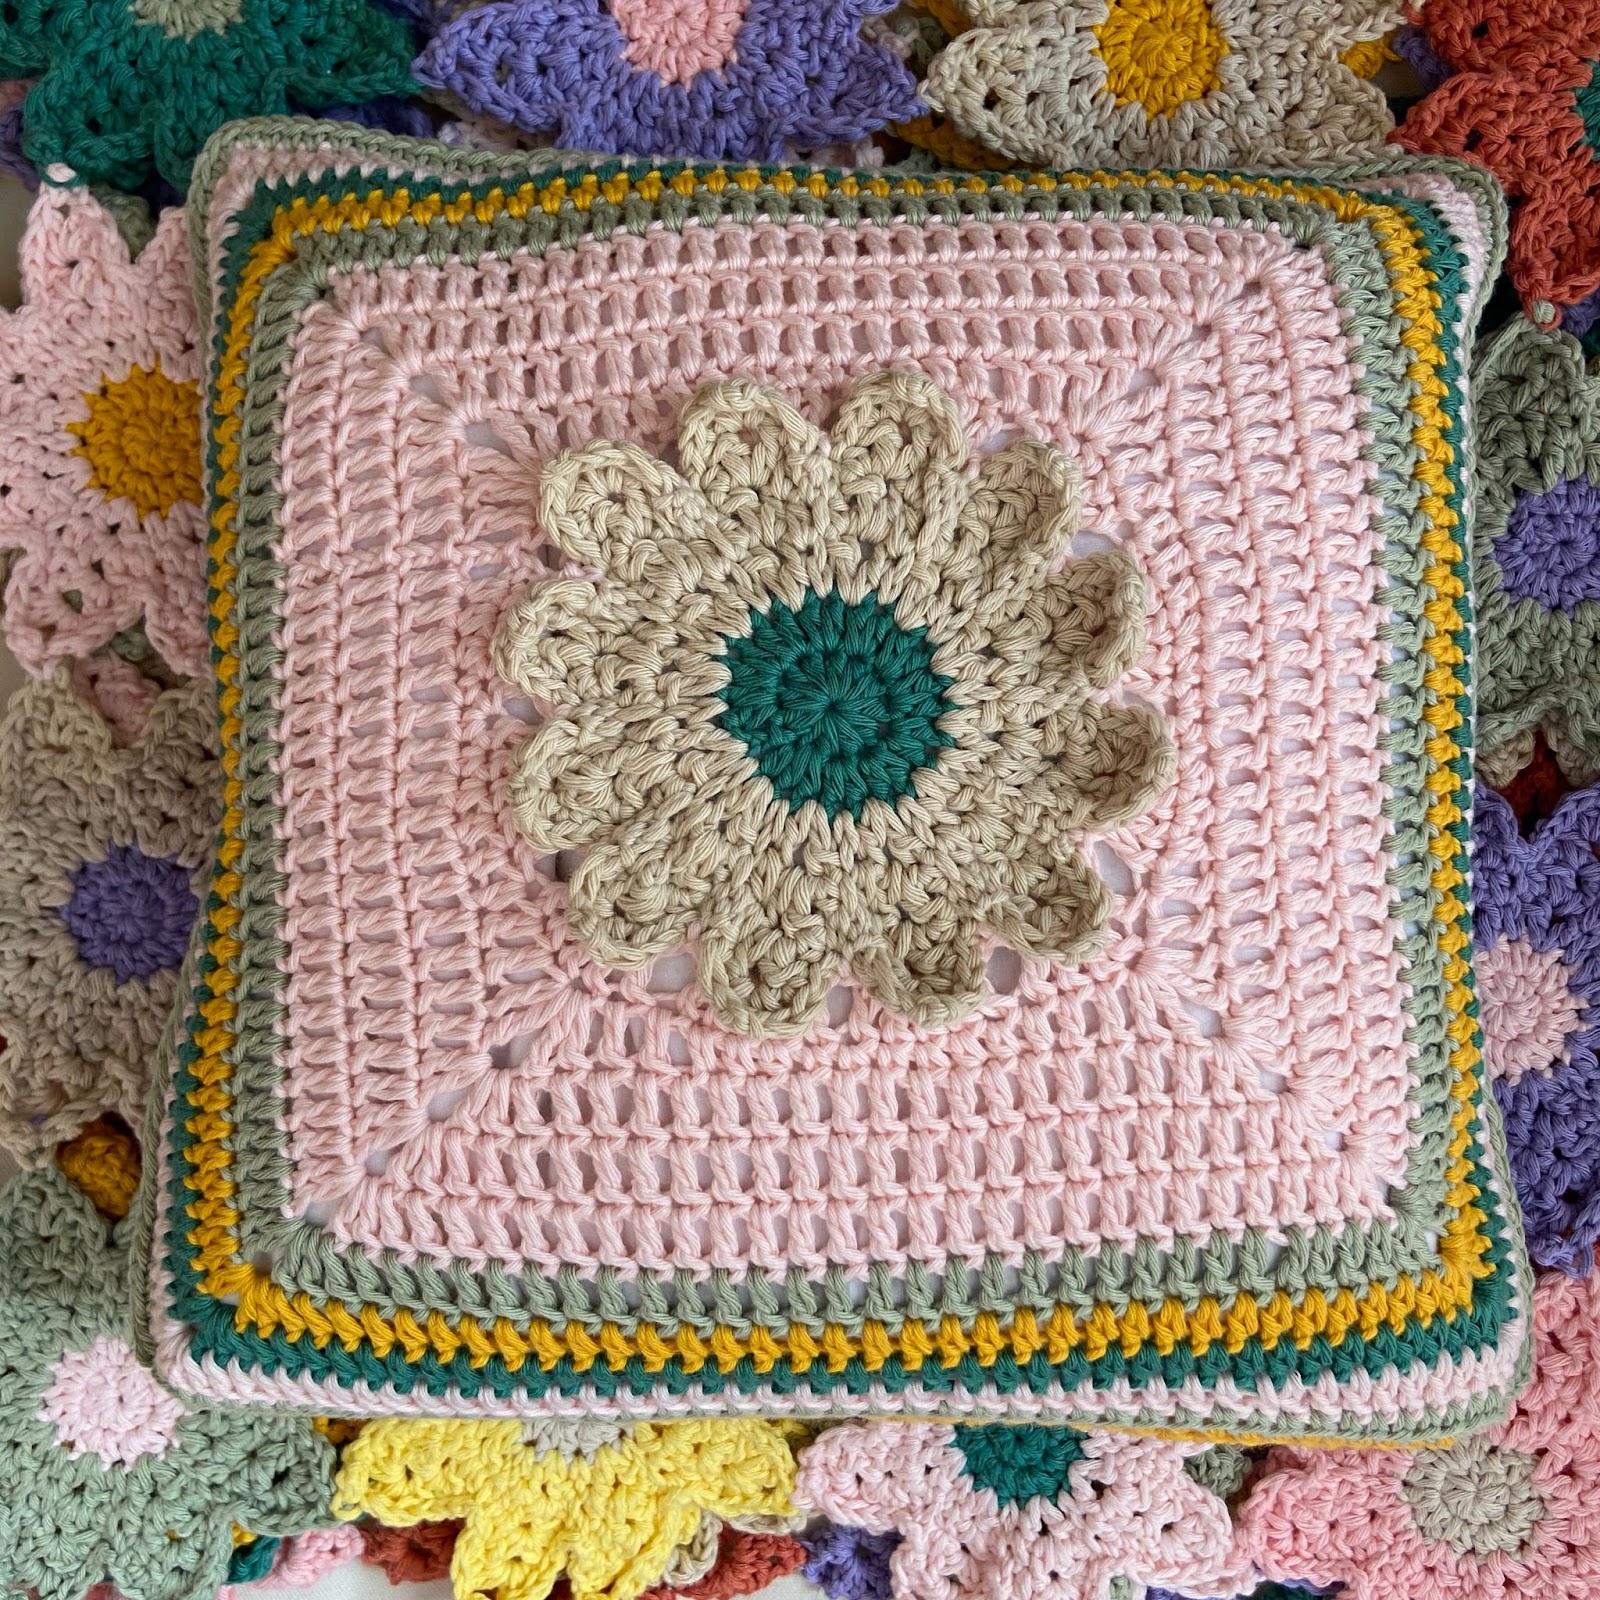
The Light Pink Pillow
Rounds 1-2: Blue
Rounds 3-6: Cream
Rounds 7- 12: Light pink
Round 13: Green
Round 14: Mustard yellow
Round 15: Blue
Round 16: Light pink
Button flap: Row 1 is green and rows 2-5 are mustard.
It is joined with the green, and the back is purple.
The Cream Pillow
The Light Pink Pillow
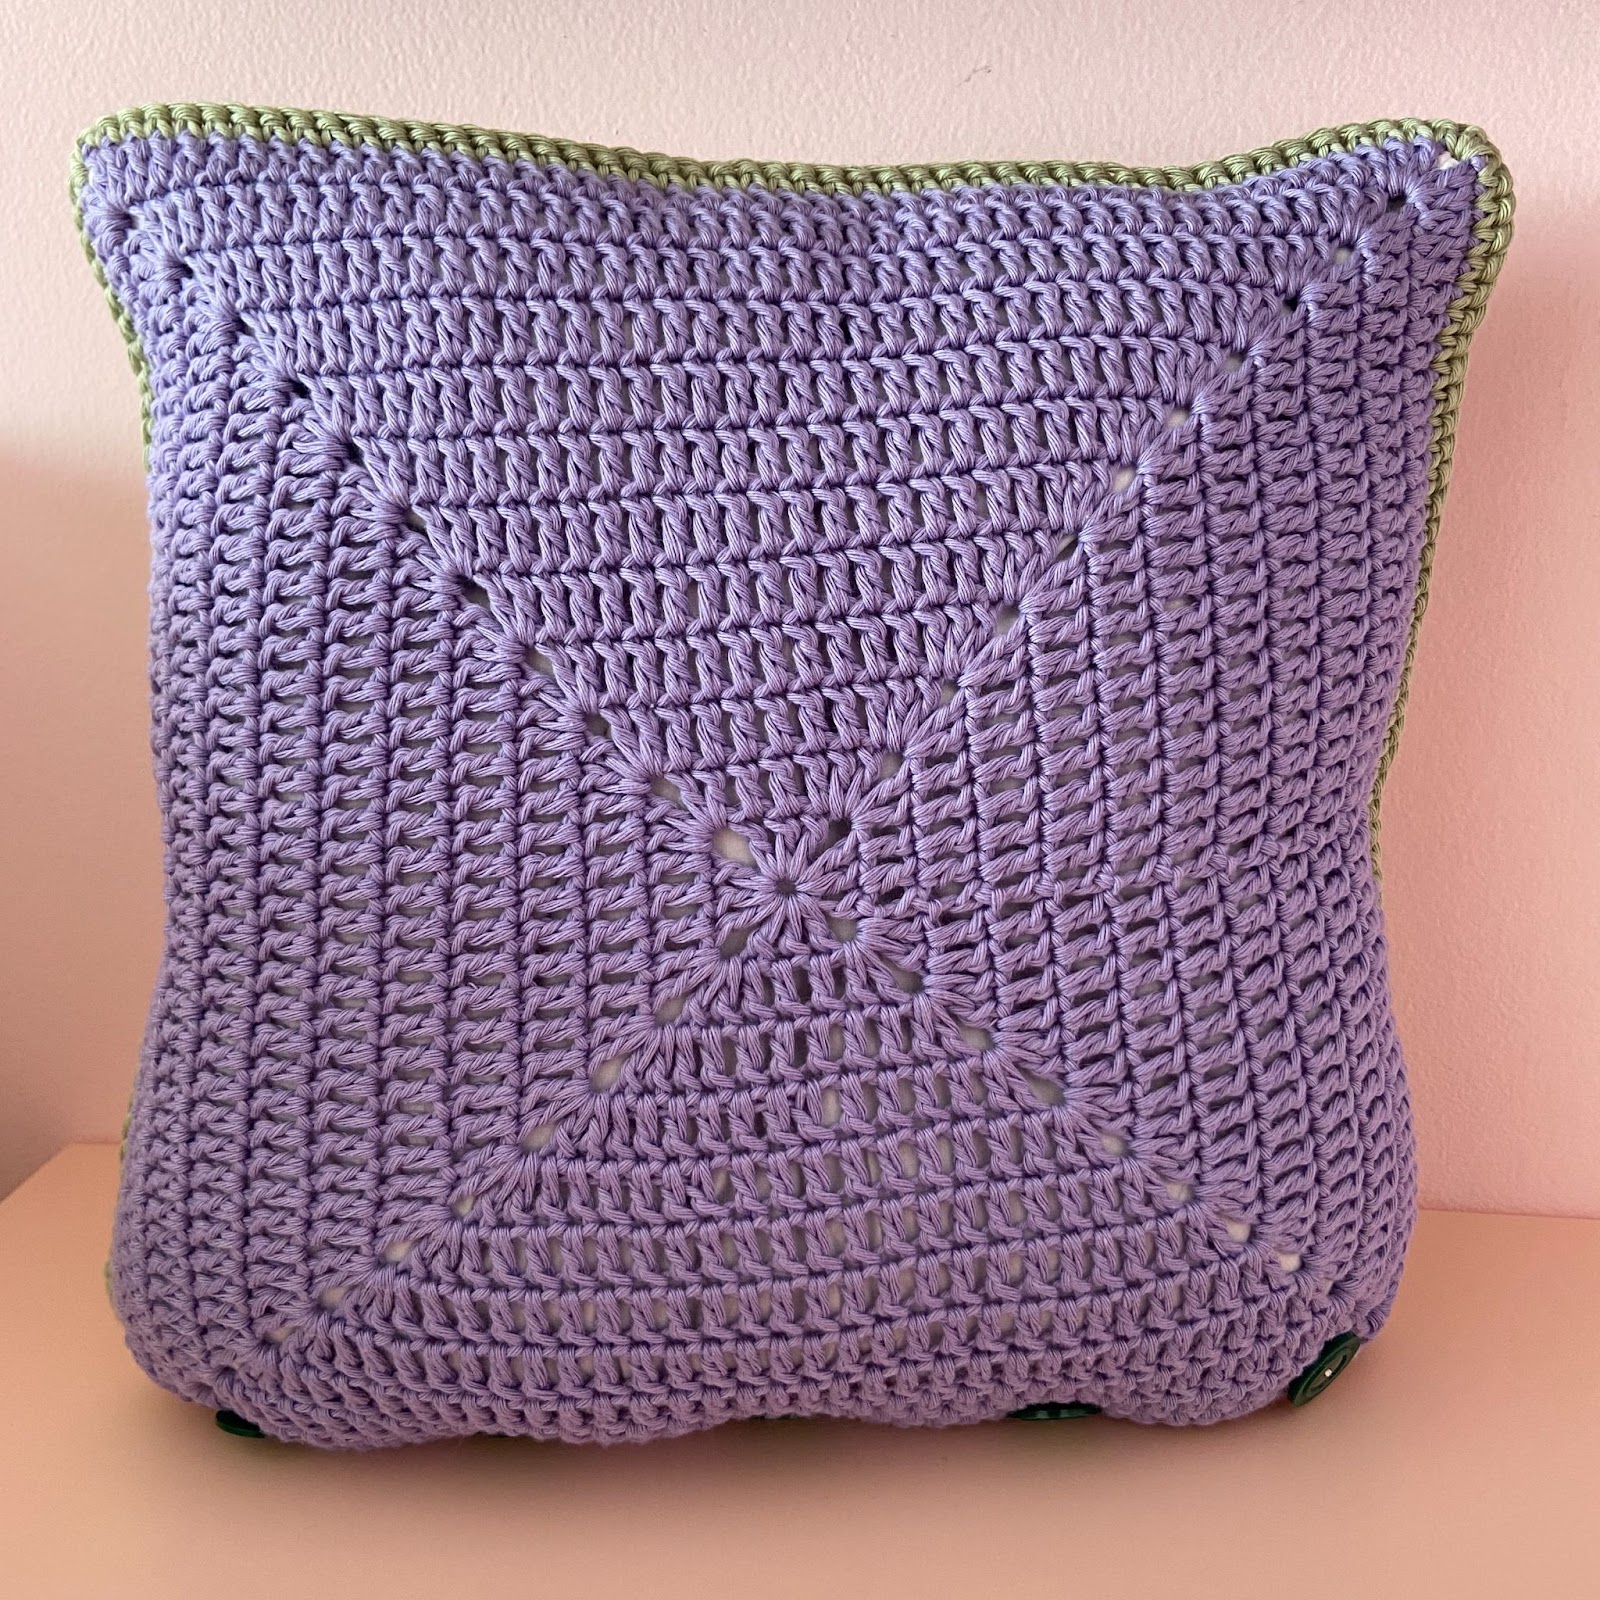
The Front Side
The front side is one large granny square! It is about 12 by 12 inches (30.5 by 30.5 cm).
While crocheting the flower, the work may not lay flat. That’s ok! This creates the shape of the flower petals. When we turn the flower into a granny square, it will lay nicely.
With the light pink, begin with a magic circle.
Round 1: Ch 2 (counts as the first hdc throughout). 11 hdc into the magic circle. Close the magic circle. Ss into the top of the ch 2. (12).
Round 2: [Ch 2, hdc]. [2 hdc] into each of the following hdc sts of the previous round. Then, ss into the top of the ch 2, and fasten off. (24).
Round 3: Join the blue into each st of the previous round. [Ch 1 (does not count as a st), sc], [dc, ch 3, dc]. {Sc, [dc, ch 3, dc] }. Repeat {} 10 more times. Ss into the first sc. (36 sts + 12 ch3-sps).
For rounds 4-6, the ch 1 at the beginning of the round counts as the first ss. You may want to mark it with a stitch marker or a piece of scrap yarn as it can be hard to see.
Round 4: Ch 1 (counts as the first ss), hdc, [dc, ch 3, dc] into the ch3-sp, hdc}. Repeat {} 10 more times. Then, ss into the ch 1. (60 sts + 12 ch3-sps).
Round 5: Ch 1 (counts as first ss), hdc, [dc, ch 3, dc] into the ch3-sp, hdc, ss. {2 ss, hdc, [dc, ch 3, dc] into the ch3-sp, hdc, ss}. Repeat {} 10 more times. Then, ss into the ch 1. (84 sts + 12 ch3-sps).
Round 6: Ch 1 (counts as first ss), 2 ss, hdc, [dc, picot, dc] into the ch3-sp, hdc, 2 ss. {3 ss, hdc, [dc, picot, dc] into the ch3-sp, hdc, 2 ss}. Repeat {} 10 more times. Ss into the ch 1 and fasten off (108 sts + 12 picot sts).
Round 7: Each petal has 5 ss between it and the next petal. Join the cream into the third ss of the 5 ss between any two petals. Ch 7 (counts as the first ss + ch6-sp). {Ss into the third ss of the 5 ss following the next petal. Ch 6}. Repeat {} 10 more times. Then, ss into the first ch of the ch 7. (12 ss + 12 ch6-sps).
Push the ch6-sps from the previous round behind the petals. For this next round, we will work into the ch6-sps.
Round 8: Ss into the ch6-sp. [Ch 3, 4 dc] into the ch6-sp. In each of the following ch6-sps, [5 dc] into each of them. Then, ss into the top of the ch 3. (60).
Round 9: Ch 3, 3 hdc, 4 sc, 3 hdc, 2 dc, [dc, tr, ch 2, tr, dc]. {2 dc, 3 hdc, 4 sc, 3 hdc, 2 dc, [dc, tr, ch 2, tr, dc] }. Repeat {} 2 more times. Dc. Ss into the top of the ch 3. (72 sts + 4 ch2-sps).
Round 10: Ch 3, then dc into each of the following sts of the previous round. Except in the ch2-sps, [2 dc, ch 2, 2 dc]. Then, ss into the top of the ch 3. (88 sts + 4 ch2-sps).
Round 11: Same as round 10. (104 sts + 4 ch2-sps).
Round 12: Same as round 10. At the end, fasten off. (120 sts + 4 ch2-sps).
Round 13: Join the green into any st of the previous round. Then, same as round 10, and at the end, fasten off. (136 sts + 4 ch2-sps).
Round 14: Same as round 10, but with the light pink, and instead of dc sts, use hdc sts (make sure to begin with a ch 2 instead of a ch 3). At the end, fasten off. (152 sts + 4 ch2-sps).
Round 15: Same as round 14, but with the mustard yellow. (168 sts + 4 ch2-sps).
Round 16: Join the cream into any st of the previous round, and then, same as round 10. At the end, fasten off. (184 sts + 4 ch2-sps).
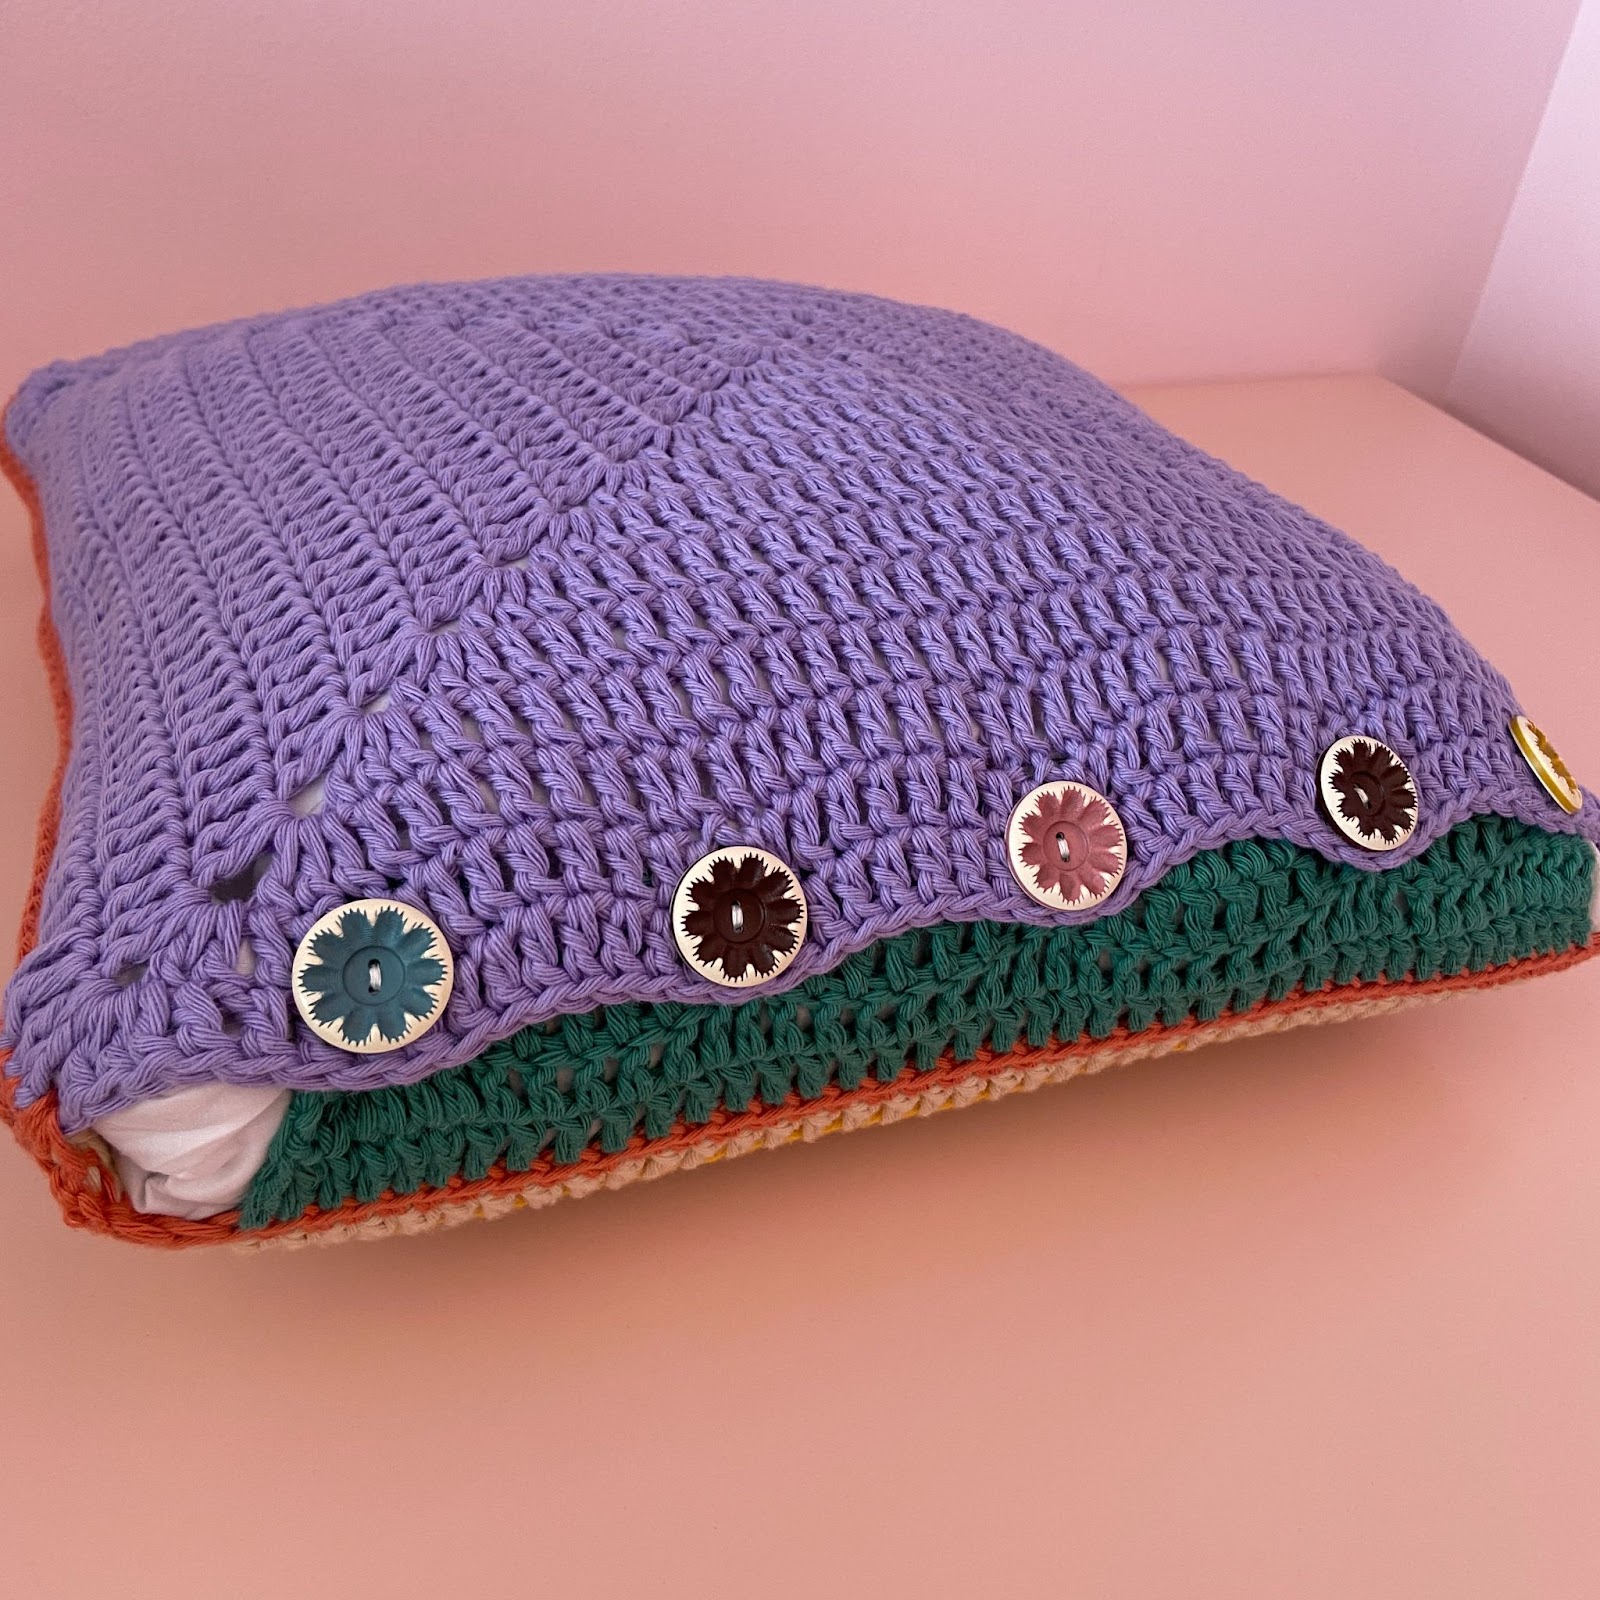
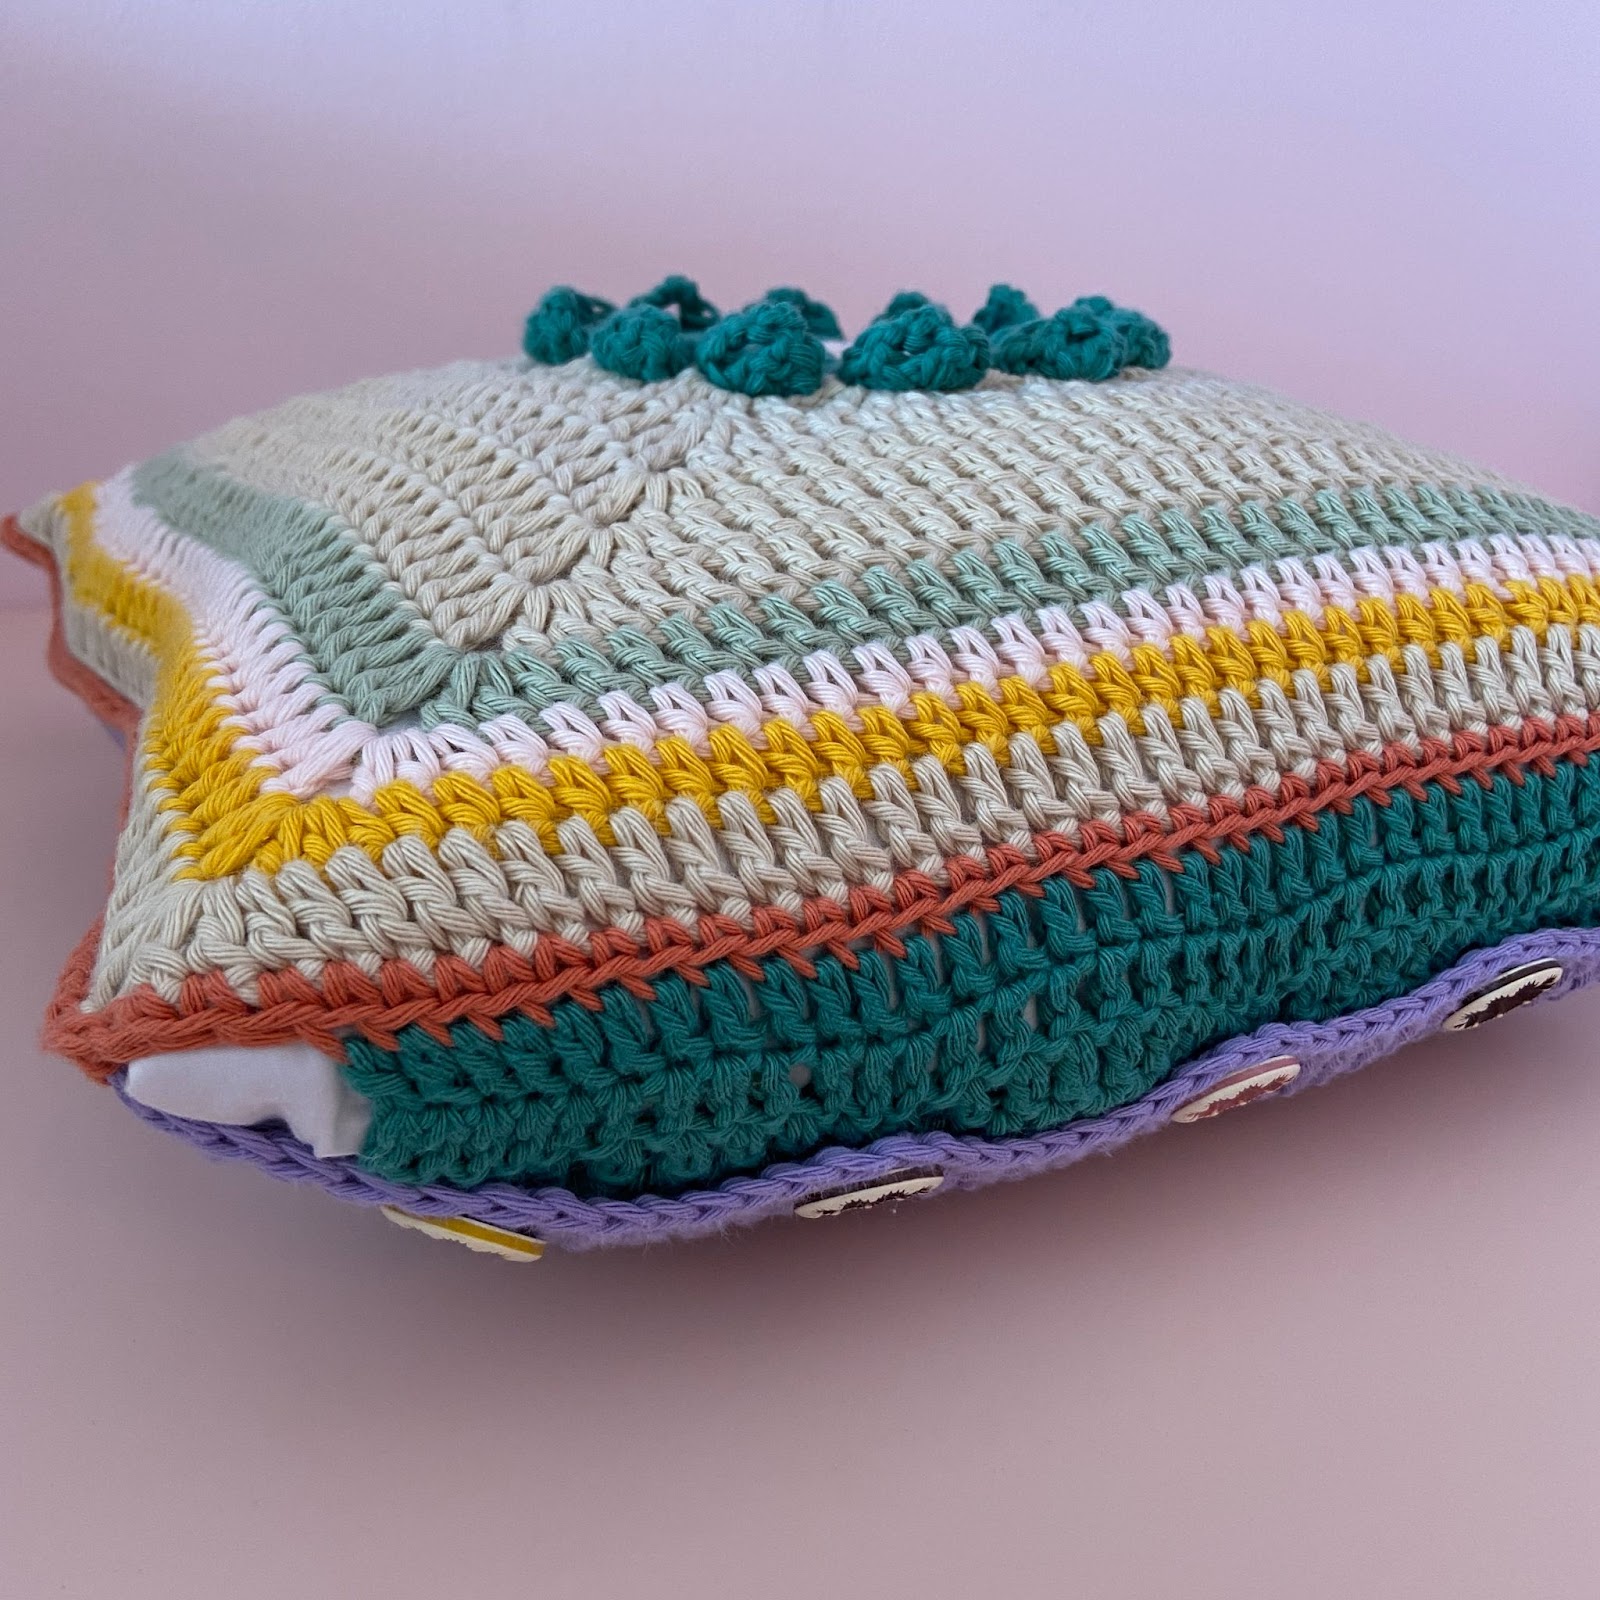
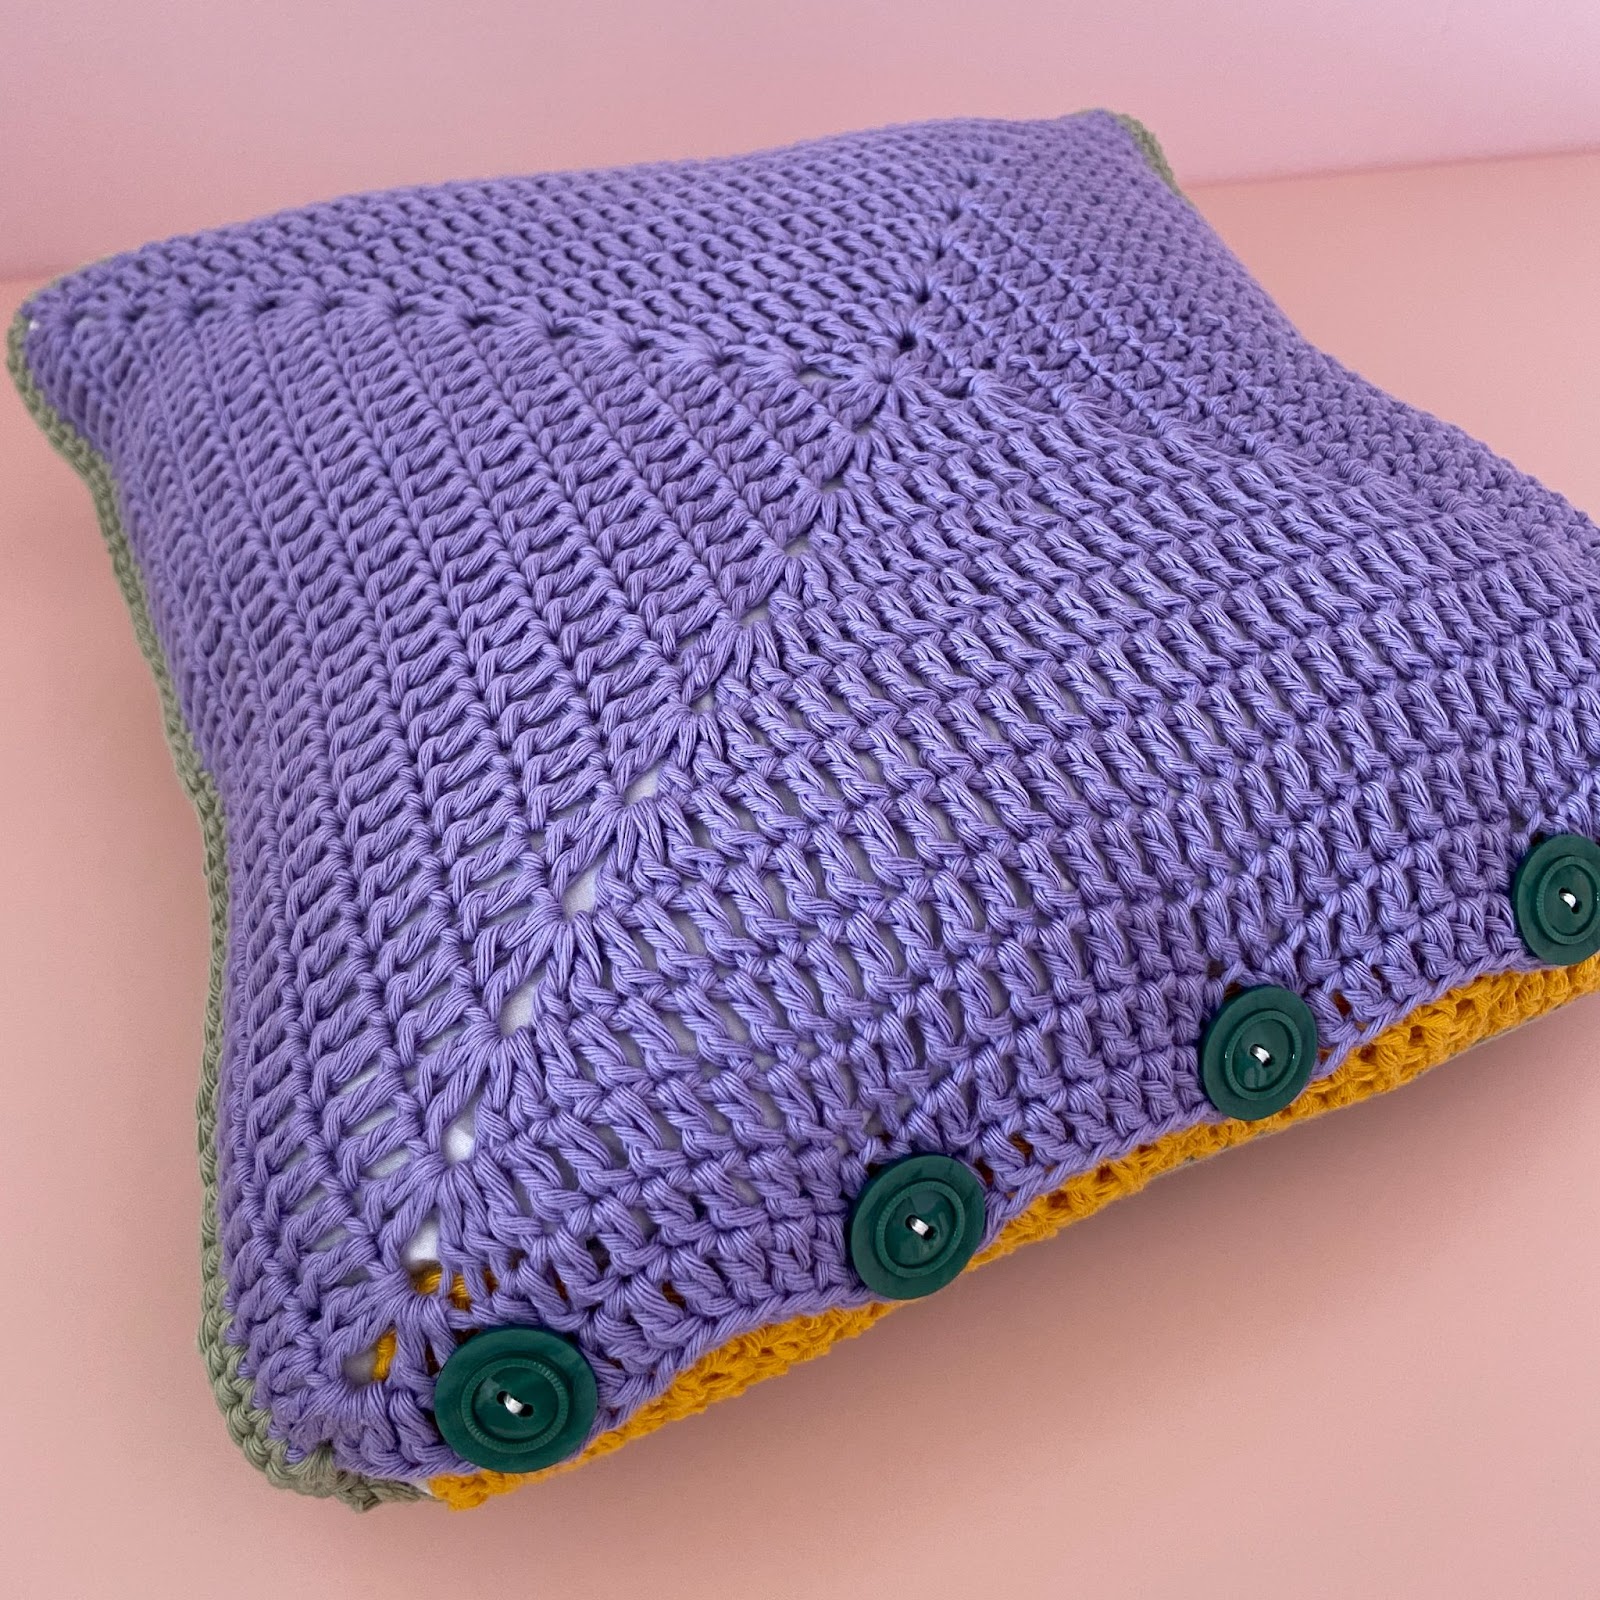
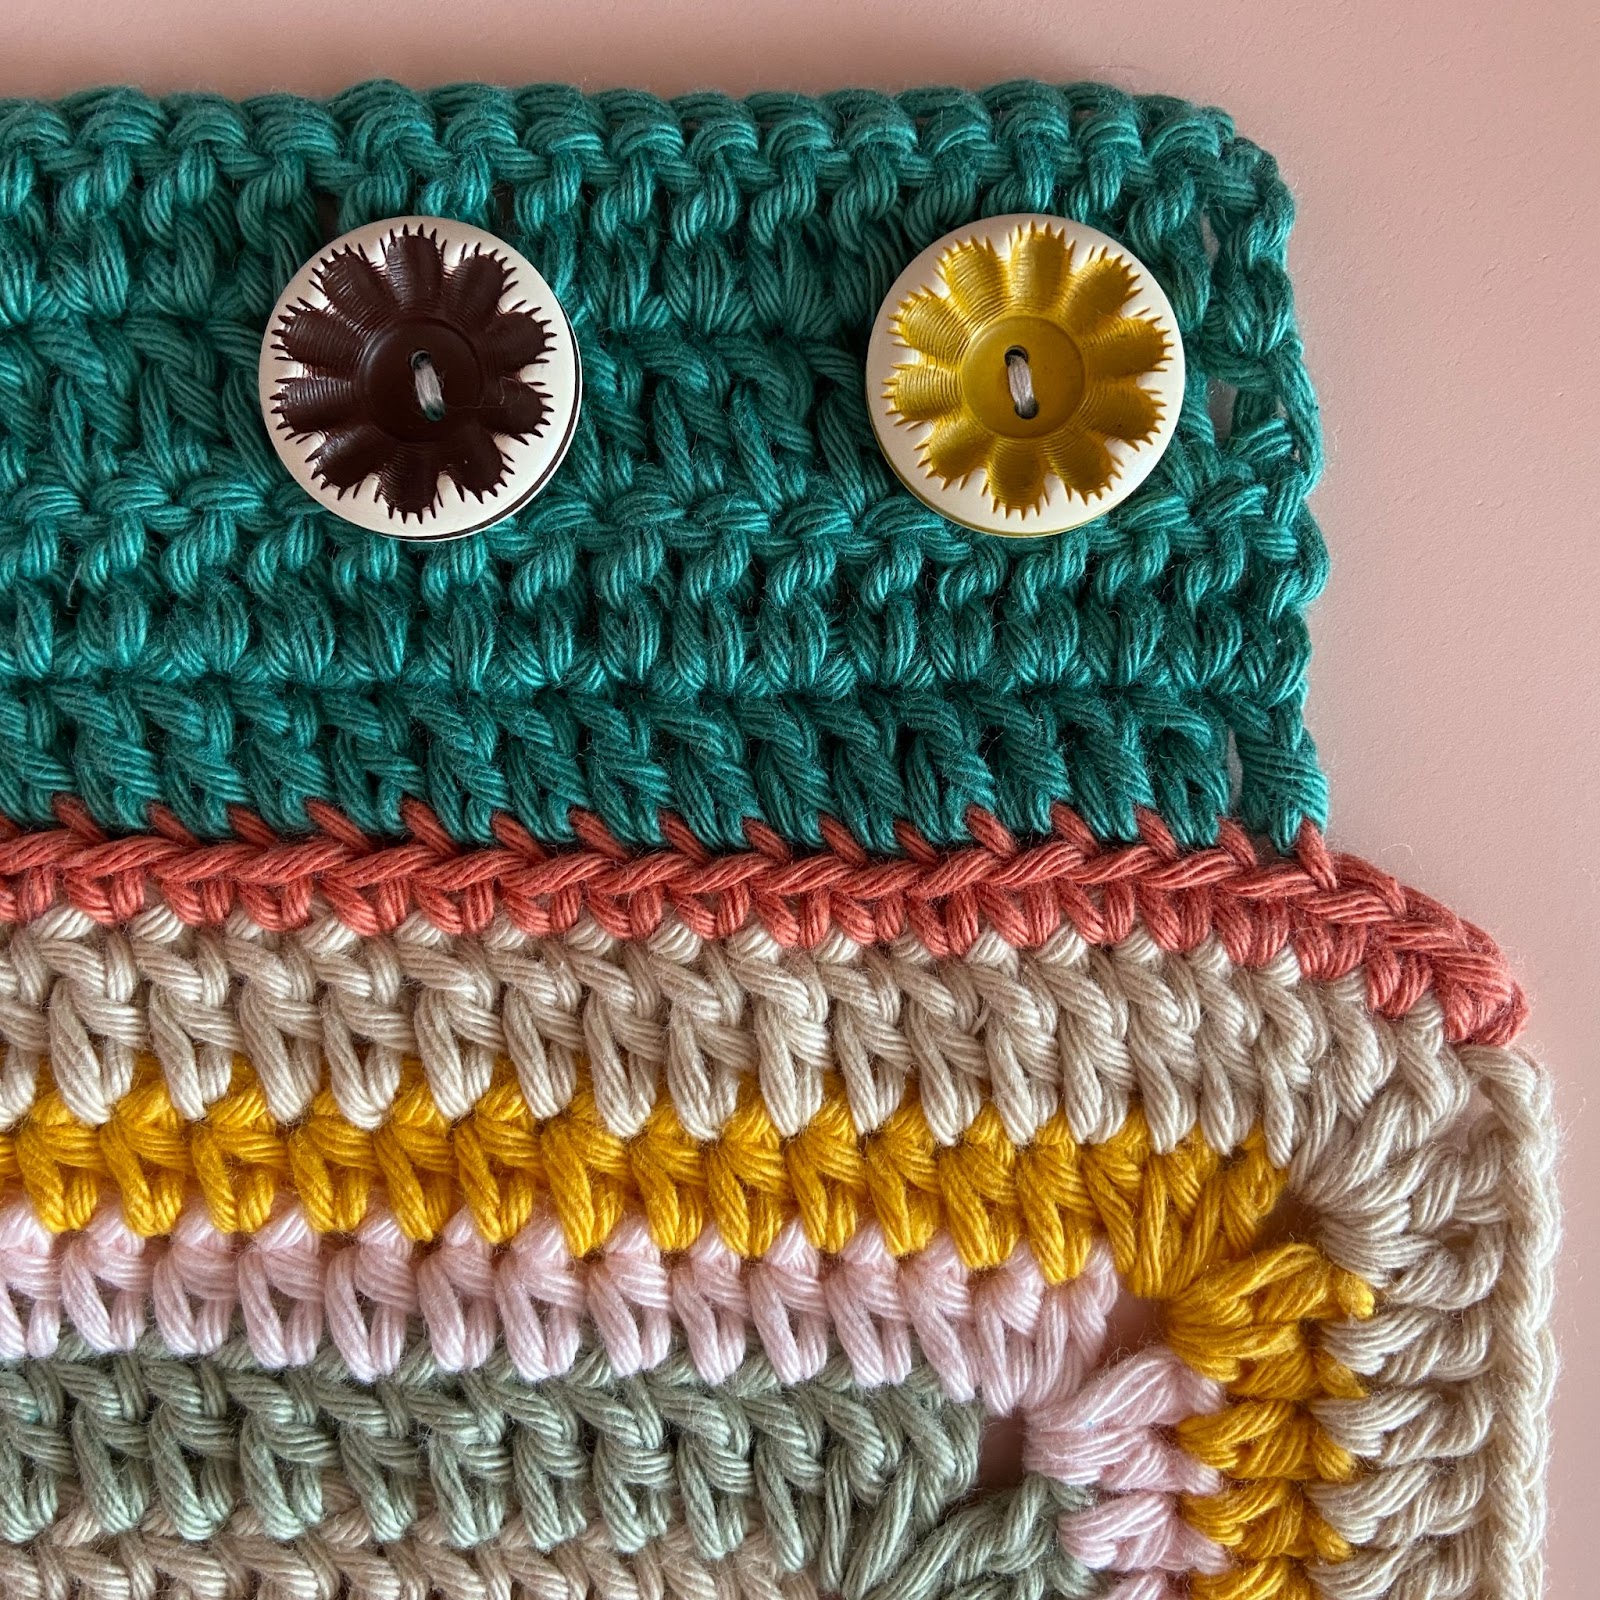
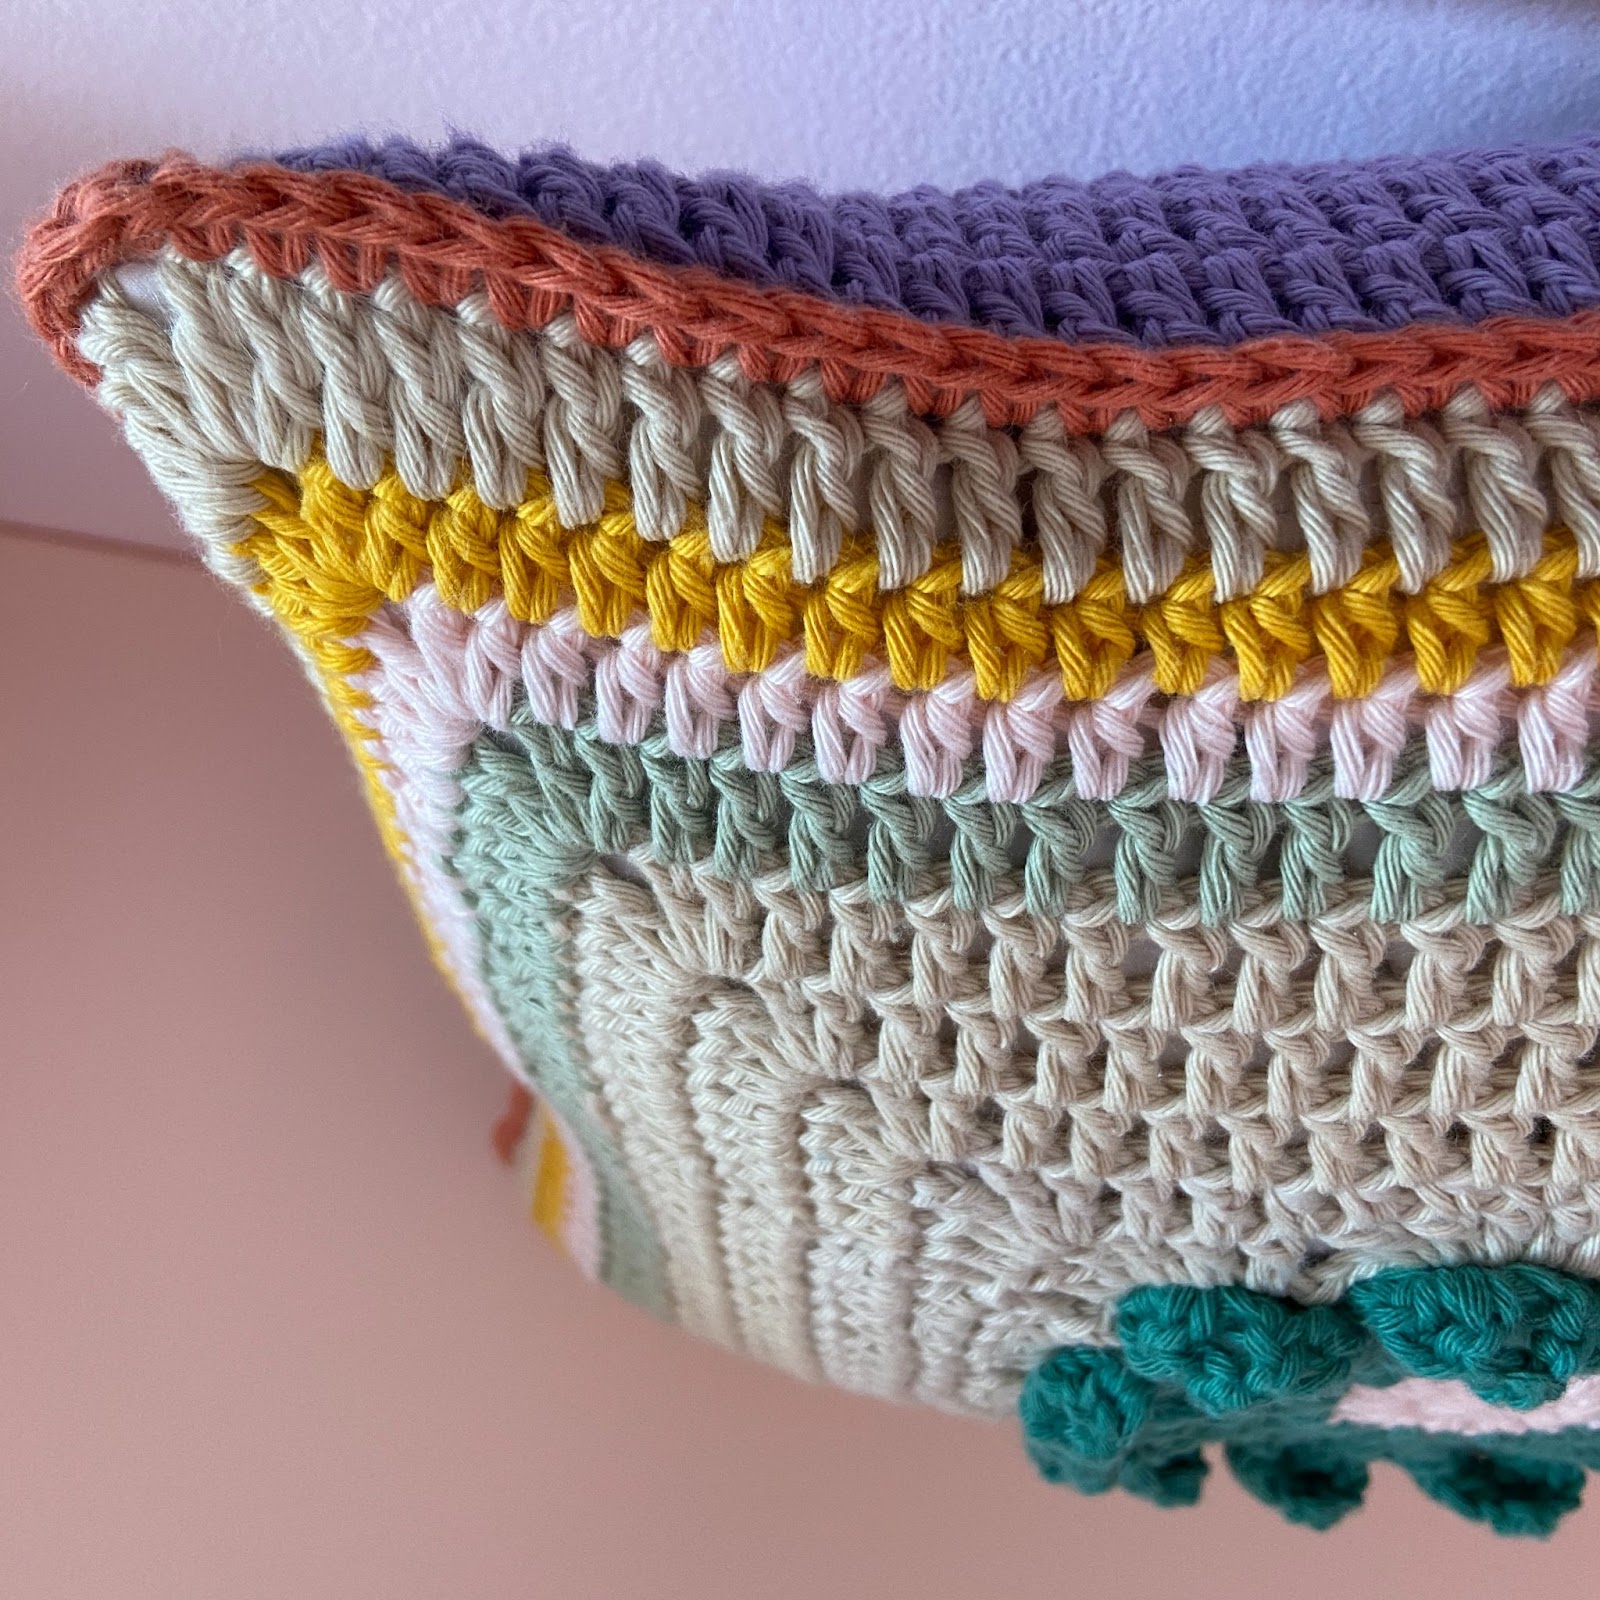
The Button Flap
Five buttons hold the bottom of the pillow together, and allow the pillow to be taken on and off the insert. Hence, a few rows of stitches are added to the bottom of the front side to form the button flap. Later, when the pillow is joined, the back side of the pillow will be pulled over the buttons.
Row 1: Join the vintage pink yarn (the color you would like to join the pillow with) into the dc st after the bottom left corner. [Ch 1 (does not count as a st), sc], sc into each dc st along the side of the pillow. Fasten off. (46).
Row 2: Join the blue yarn into the back loop of the 4th st of row 1. Ch 3, dc into the back loops of the following 39 sts (do not work into the last three sts of row 1). FLIP. (40).
Row 3: Ch 3, dc into each of the following sts from the previous row. FLIP. (40).
Rows 4-5: Same as row 3. At the end of row 5, fasten off.
Then, attach the buttons to the 4th, 12th, 20th, 28th, and 36th st of row 4.
The Back Side

The back of the pillow is a solid granny square.
Foundation ring: With the purple yarn, ch 4, ss into the first ch to form a ring.
Round 1: Ch 3, 2 dc into the ring. Ch 2. {3 dc, ch 2}. Repeat {} 2 more times. Ss into the top of the ch 3. (12 sts + 4 ch2-sps).
Round 2: Ch 3, 2 dc. In the ch2-sp, [2 dc, ch 2, 2 dc]. {3 dc. In the ch2-sp, [2 dc, ch 2, 2 dc]}. Repeat {} 2 more times. Ss into the top of the ch 3. (28 sts + 4 ch2-sps).
Round 3: Ch 3, 4 dc. In the ch2-sp, [2 dc ch 2, 2 dc]. {Dc into each st along the next side. In the ch2-sp, [2 dc, ch 2, 2 dc]}. Repeat {}2 more times. 2 dc. Ss into the top of the ch 3. (44 sts + 4 ch2-sps).
Rounds 4-12: Continue on with the granny square pattern- dc into each st along the sides. In the ch2-spaces (the corners), [2 dc, ch 2, 2 dc]. At the end of round 12, fasten off.
Joining the Pillow
It’s time to join the pillow! It is joined along three sides (the buttons hold the bottom together) with a single crochet stitch into the corresponding stitches of the front and back side. We will simply insert the hook into a st of the front side and into a st of the back side, and then, work a single crochet st. The back has one more dc st per side than the front side, so in the middle of joining each side of the pillow, one st of the front side will correspond to two stitches of the back side. 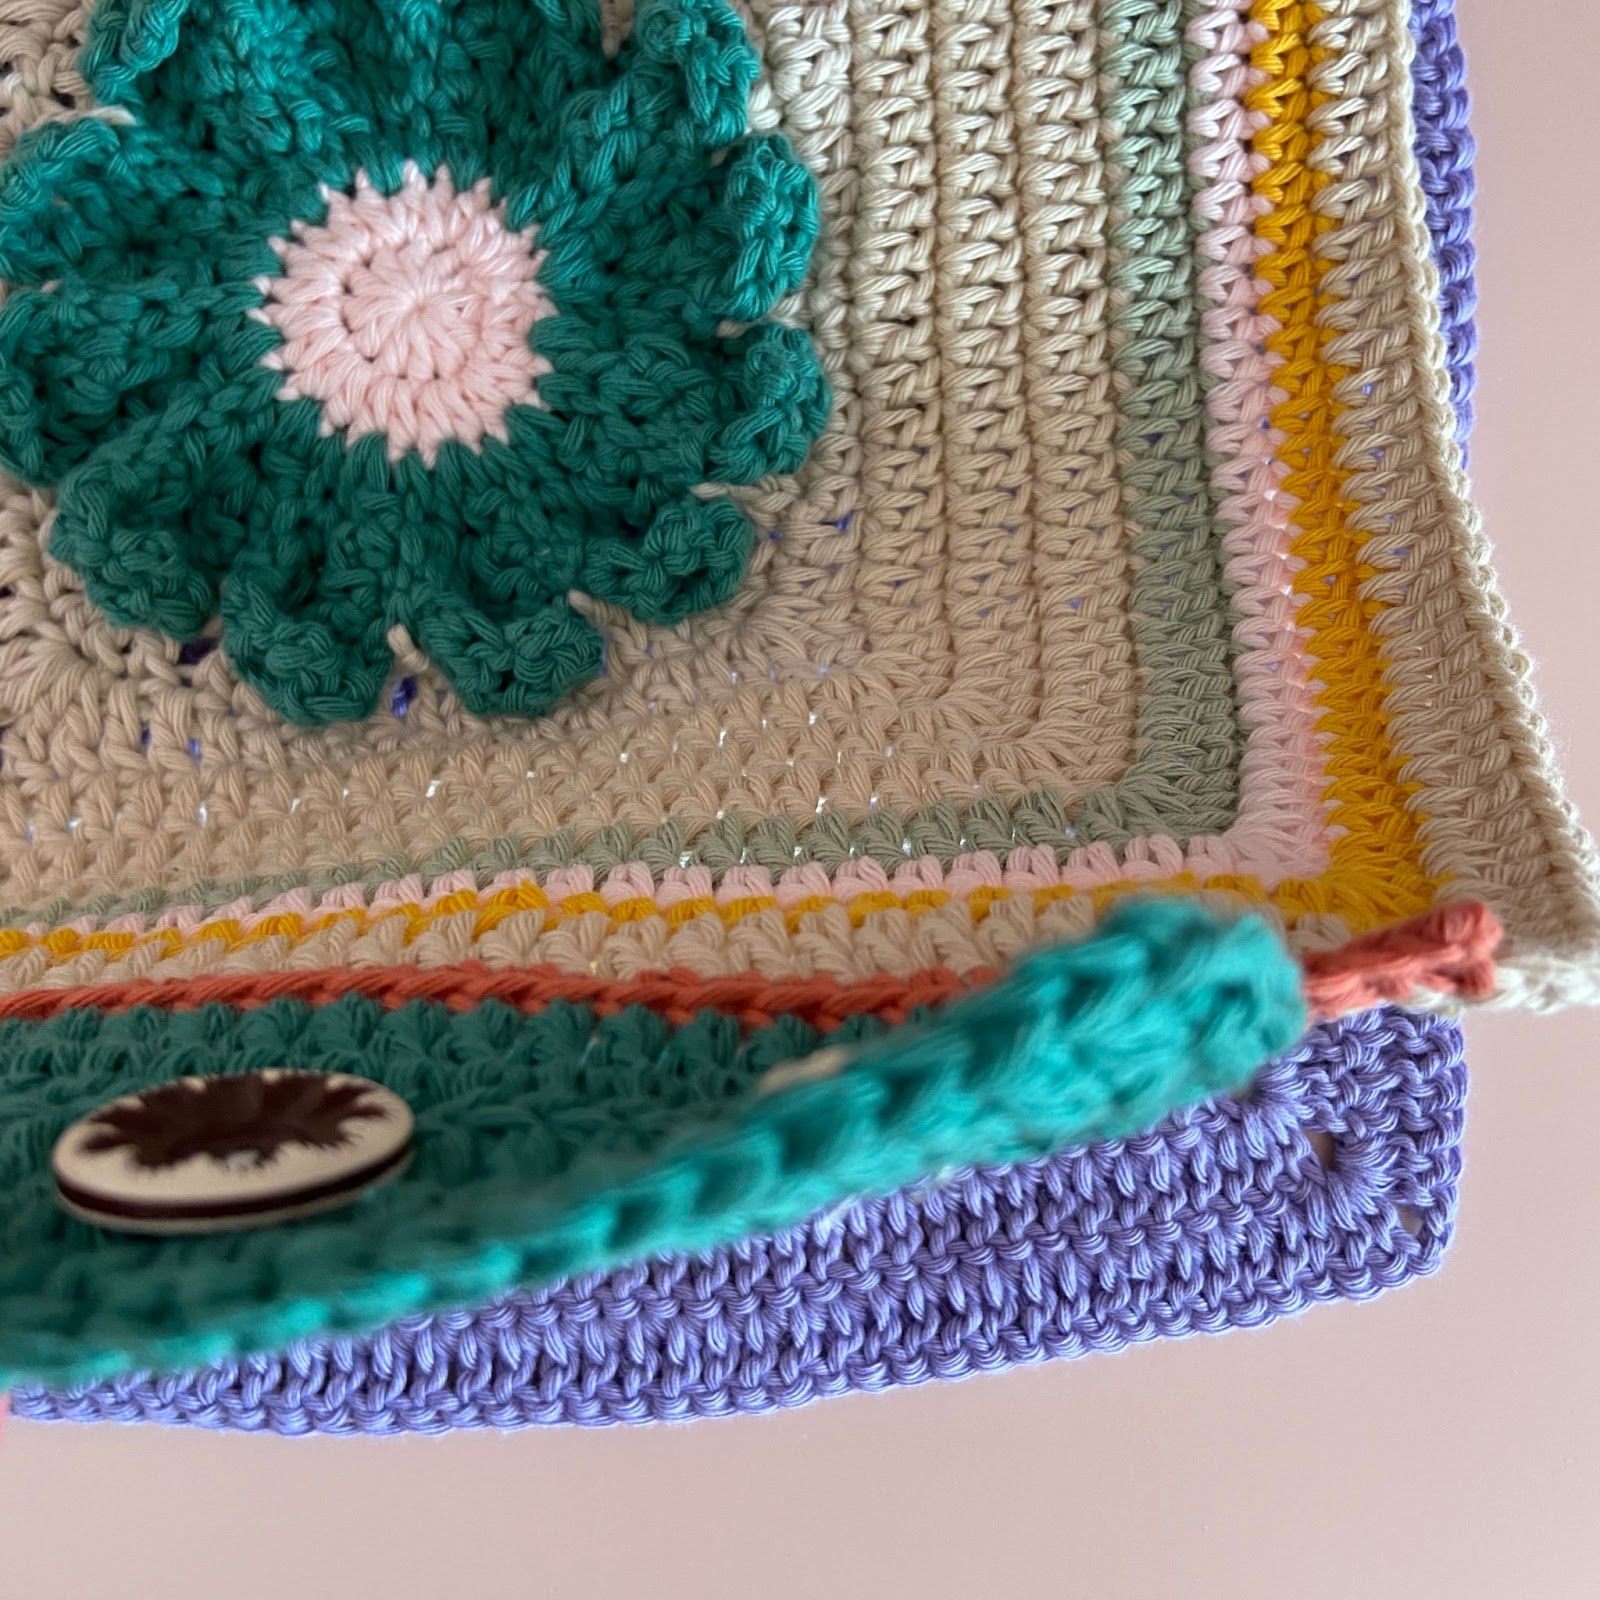
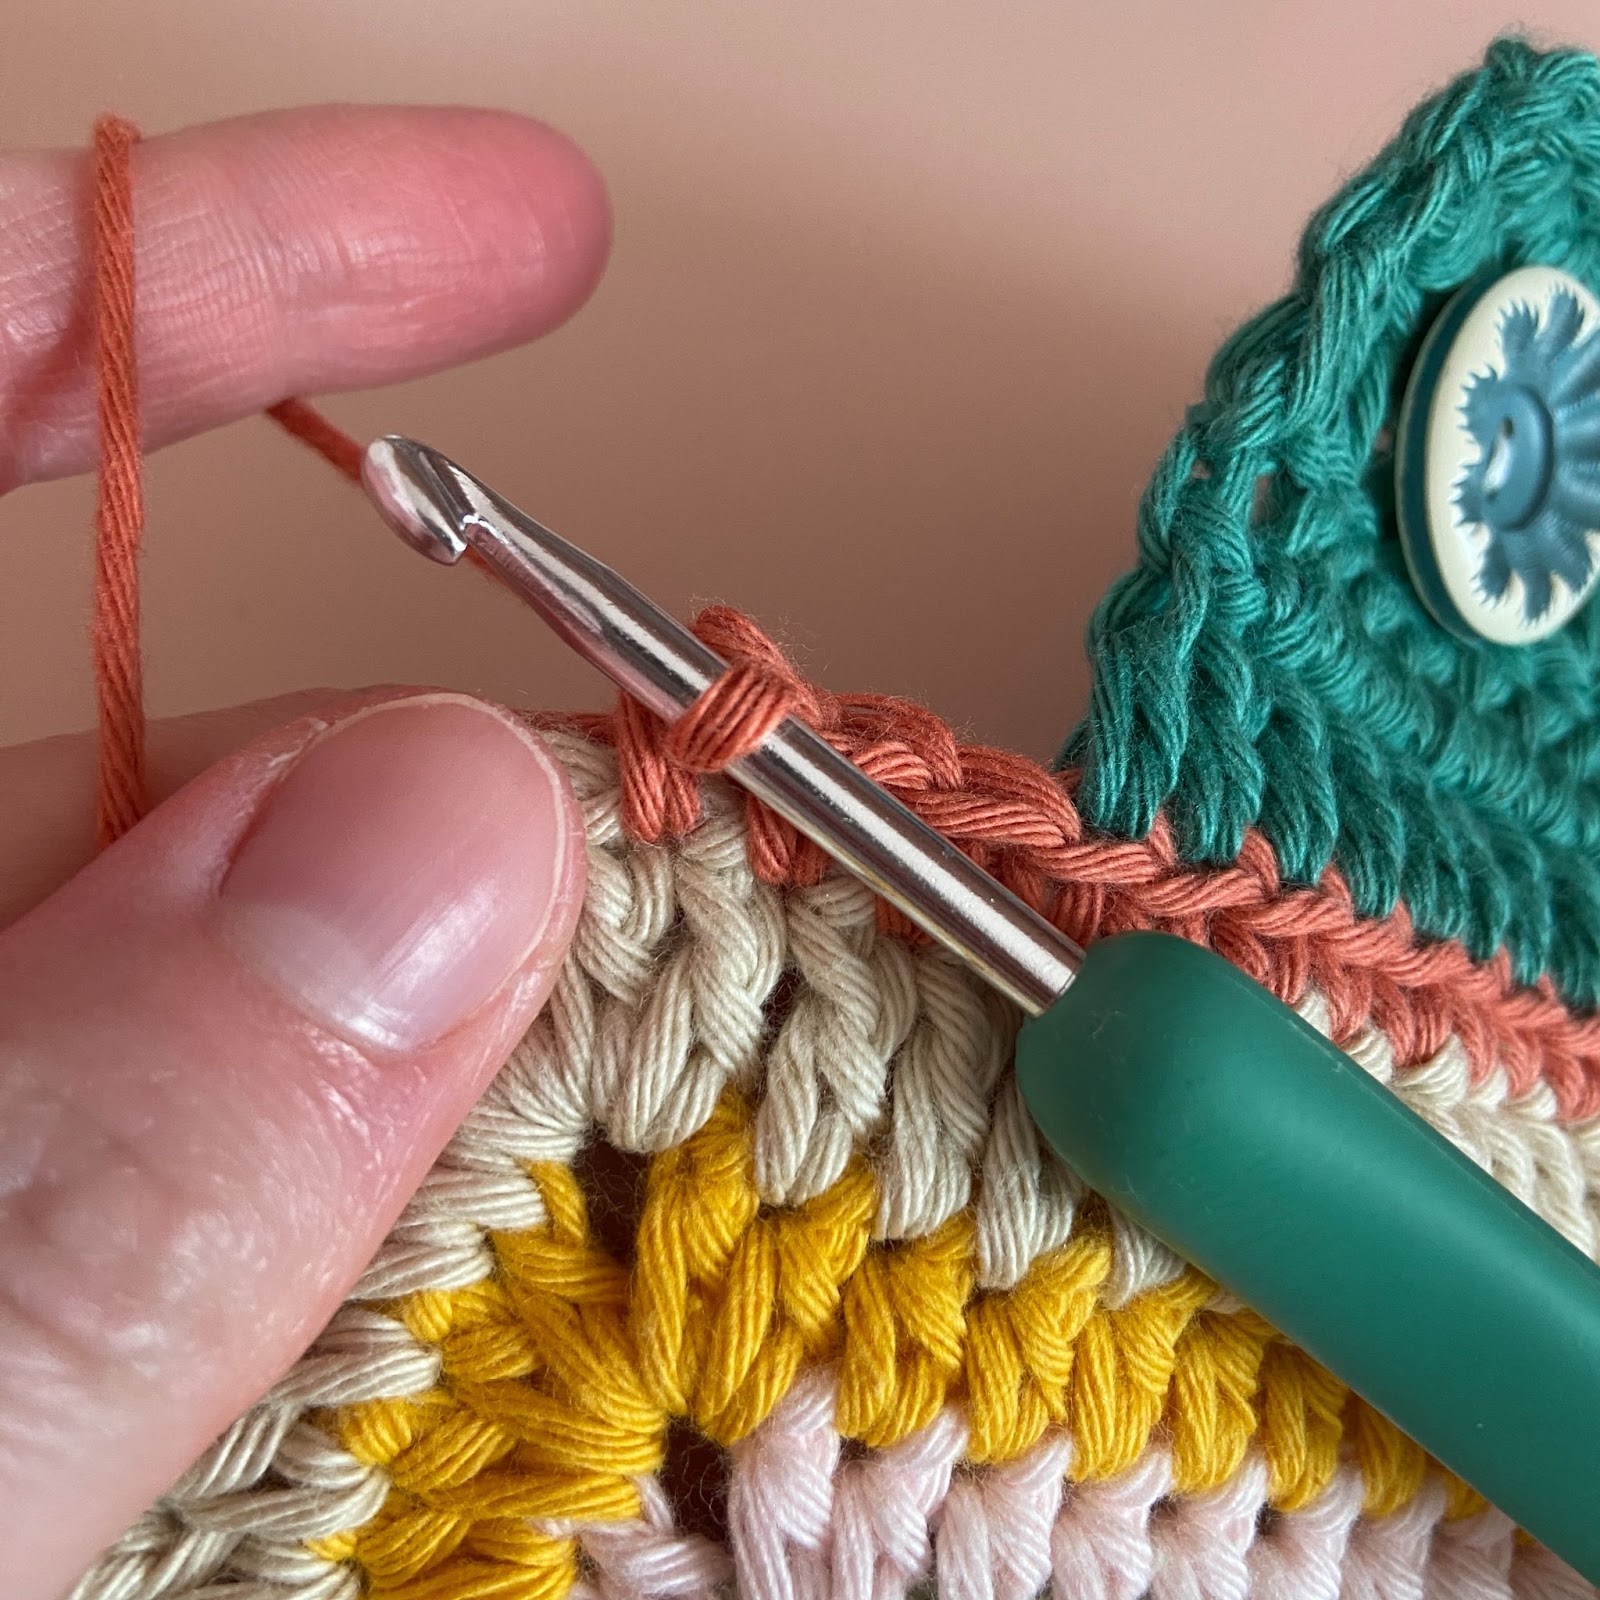
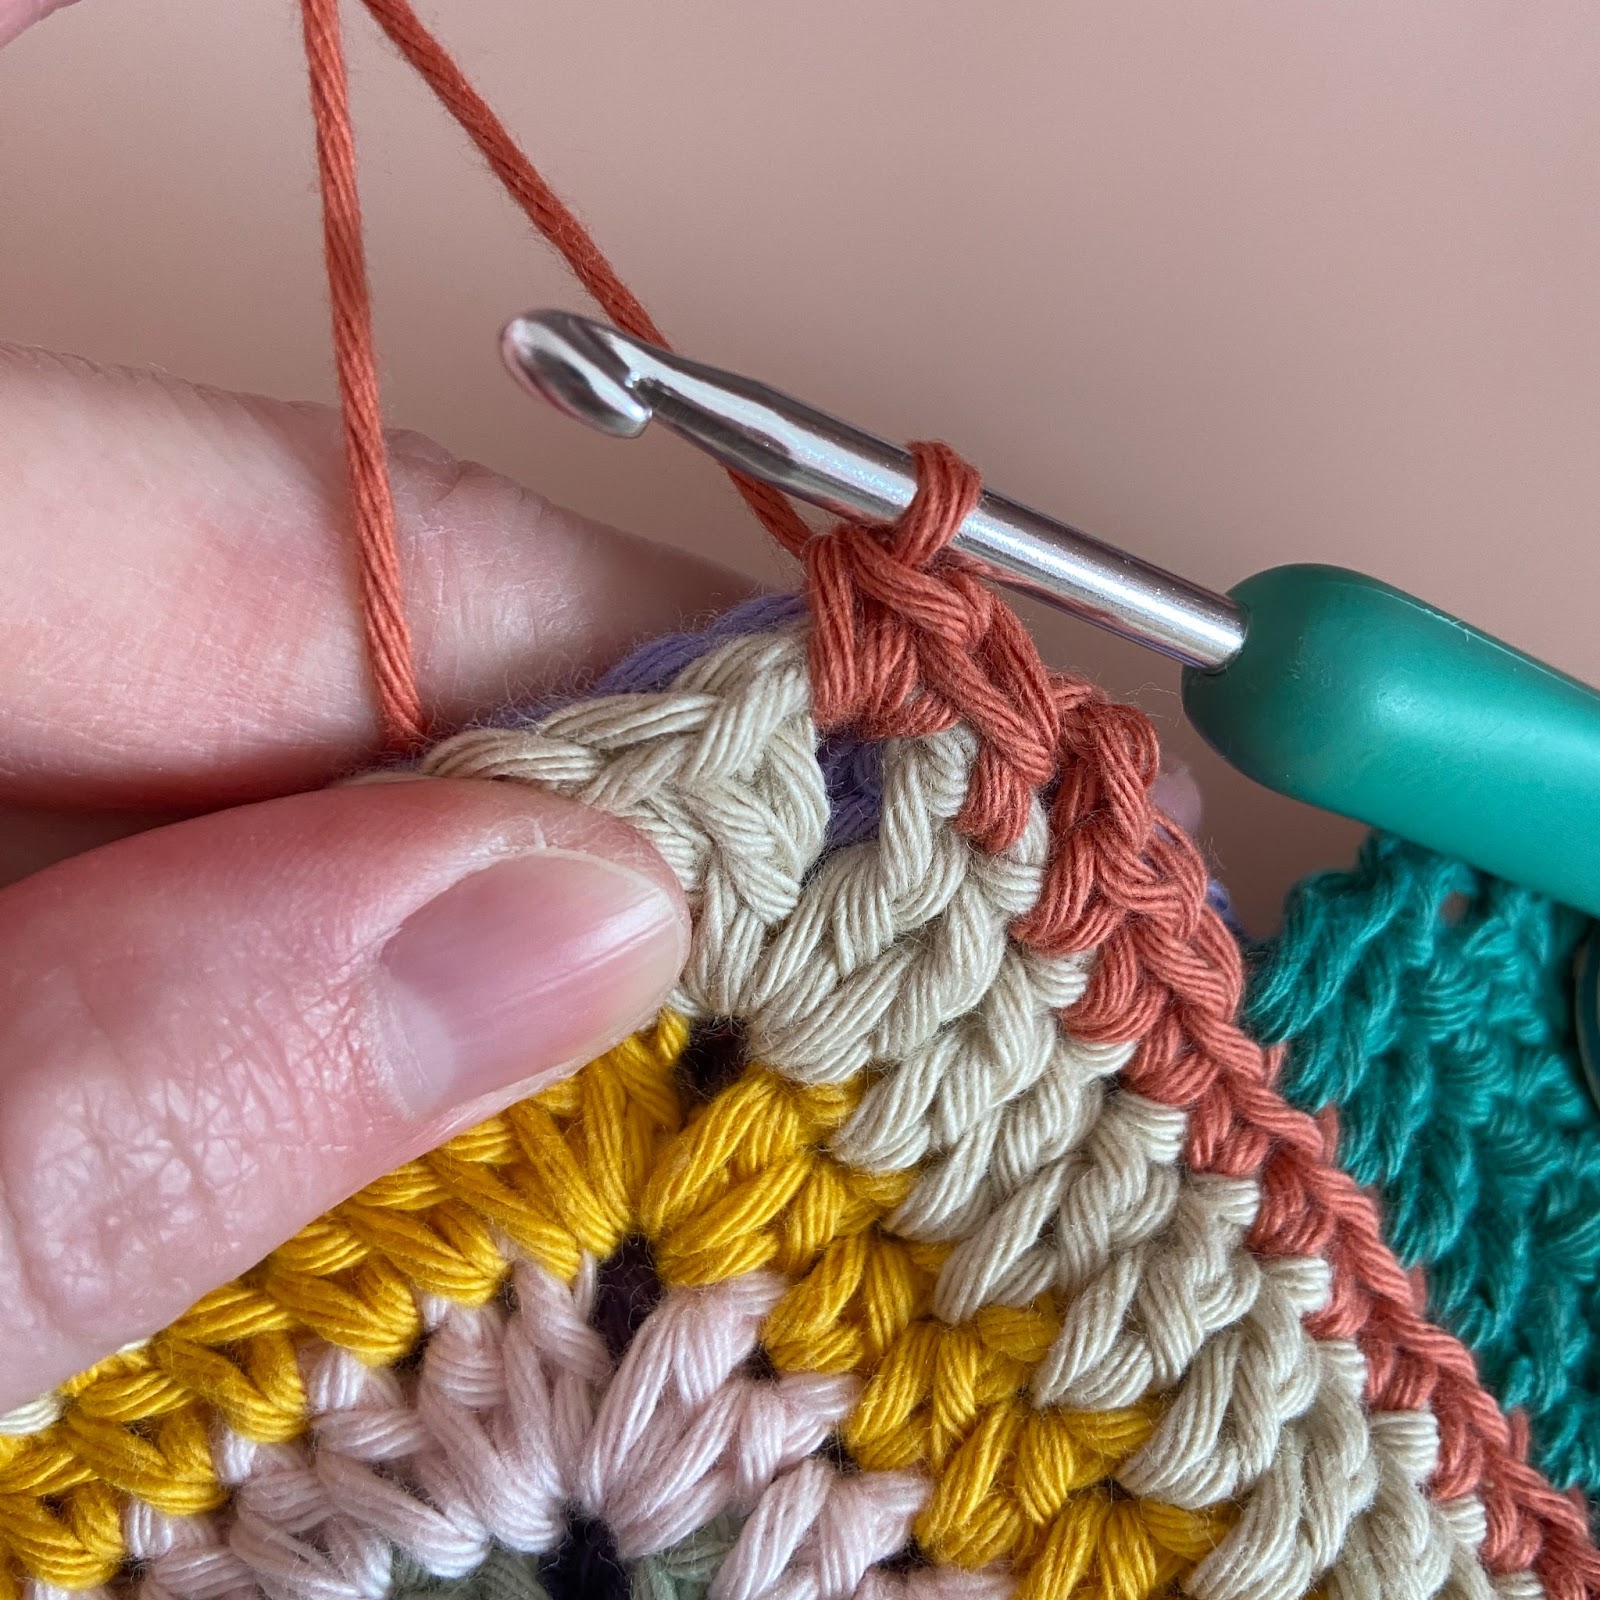
Begin by laying the back side down with the wrong side facing up. Lay the front side on top of it with the right side facing up (picture 1). Join the vintage pink yarn (the color of row 1 of the button flap) into the last sc st of row 1 of the button flap. Pull the yarn through (picture 2). This creates a continuous join between row 1 of the button flap and the joining seam. [2 sc] into the corners (the ch2-sps- picture 3). 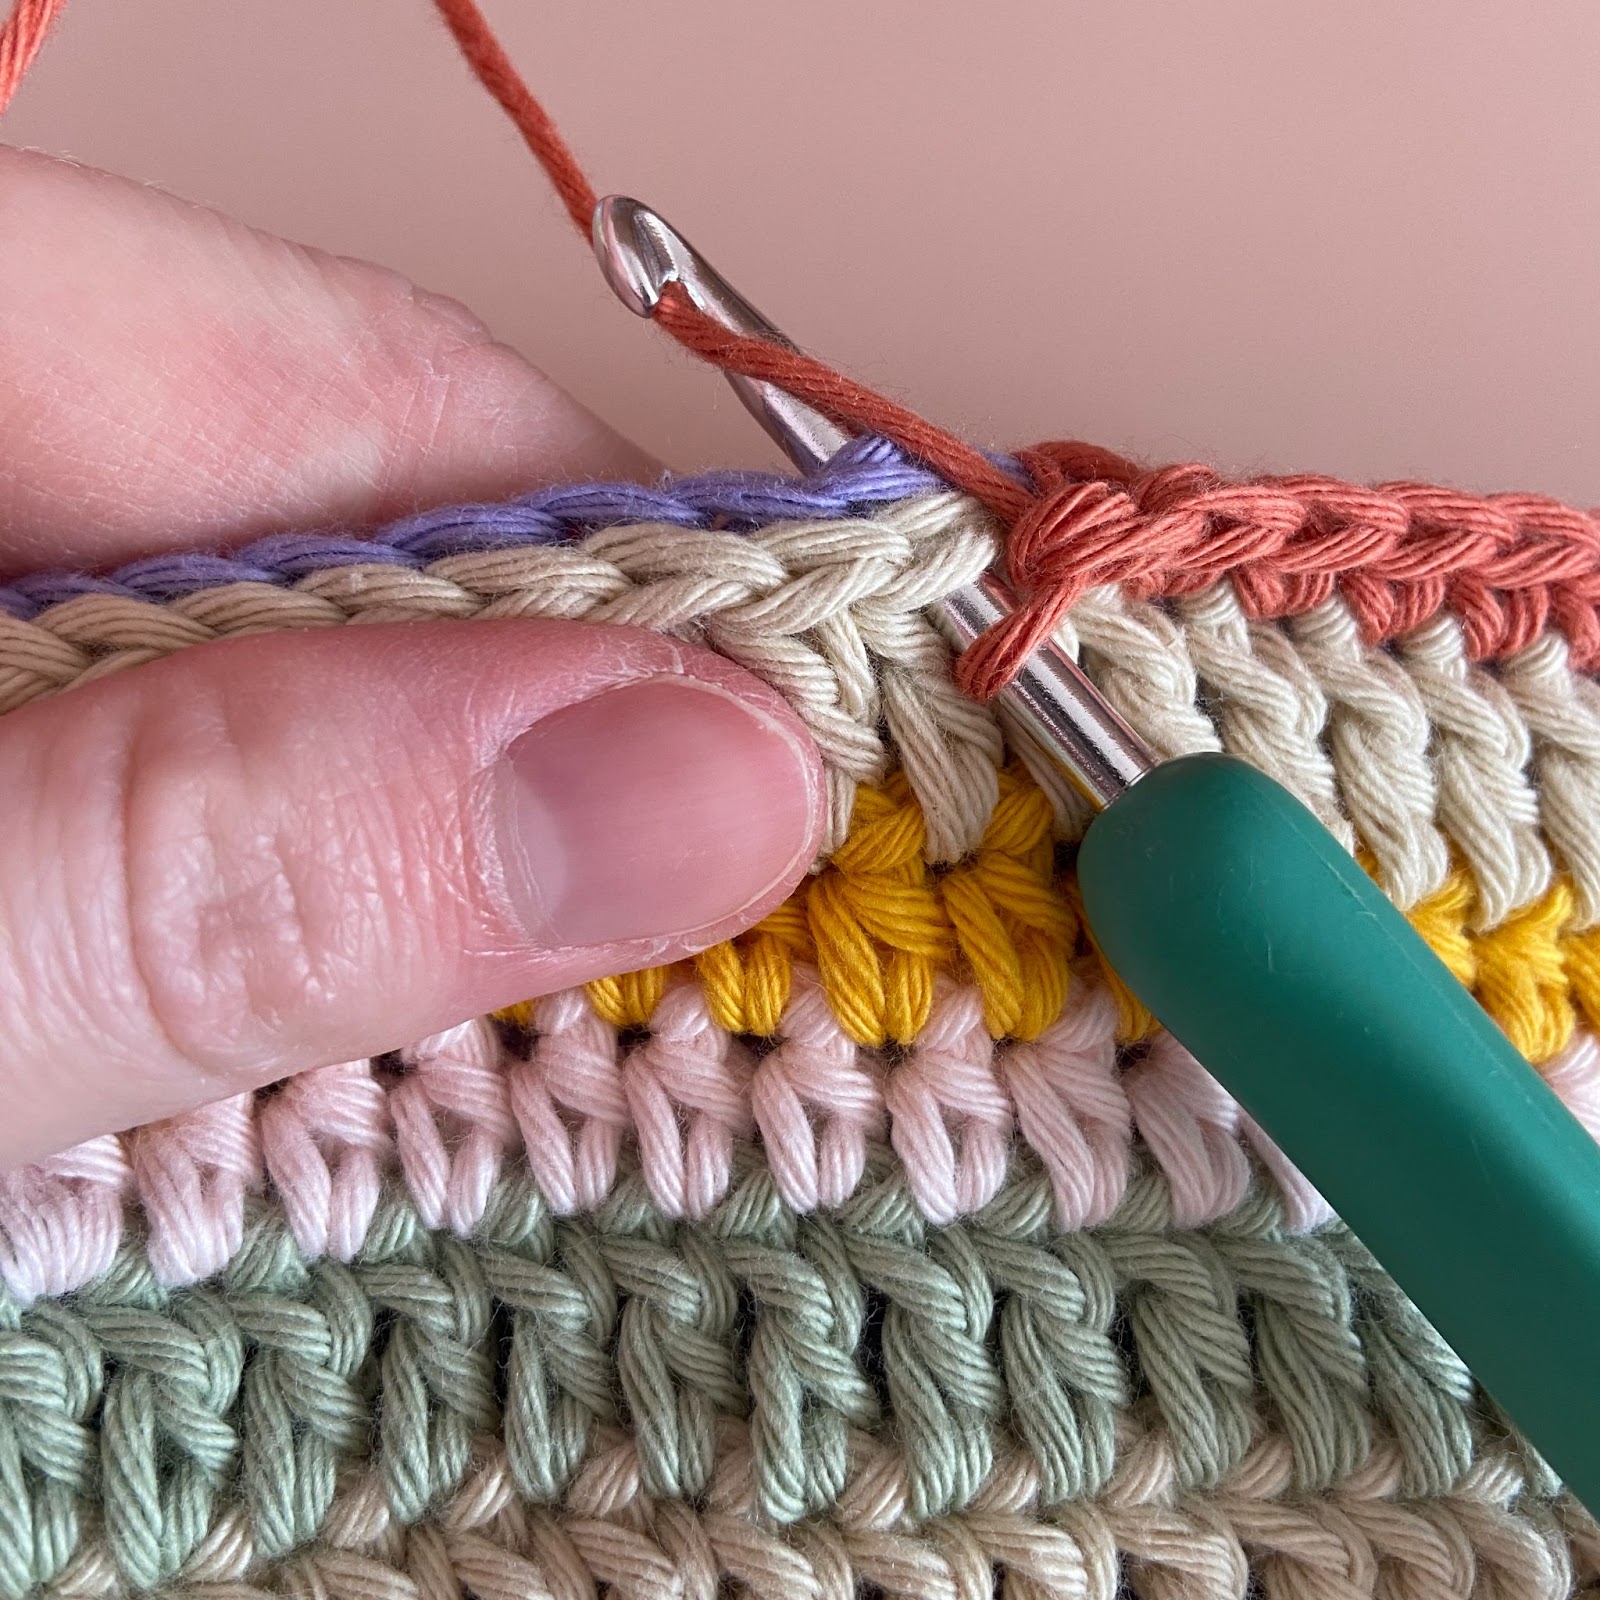
{Going up the side, sc into the following stitches (picture 1): 23 corresponding sts, then the next st of the back will correspond to the previous st of the front, 23 corresponding sts. Then, [2 sc] into the corners}.
Repeat {} two more times to join the other two sides. Then, ss into the first st of row 1 of the button flap, and fasten off.
Then, slide the insert into the pillow. Pull the back over the buttons. The buttons should end up between the dc sts of the second to last round of the back of the pillow.
Then, the pillow is finished! I hope you enjoyed this pattern! If you make it and post it on Instagram, make sure you tag me, so I can see it! You can also email me a picture at maggietrunkhill@daisygirlcrochet.com.
*If you would like to make the pillow and sell the pillow, please give me (Maggie Trunkhill) credit as the pattern designer. Do not reproduce this pattern in any form without my permission.