

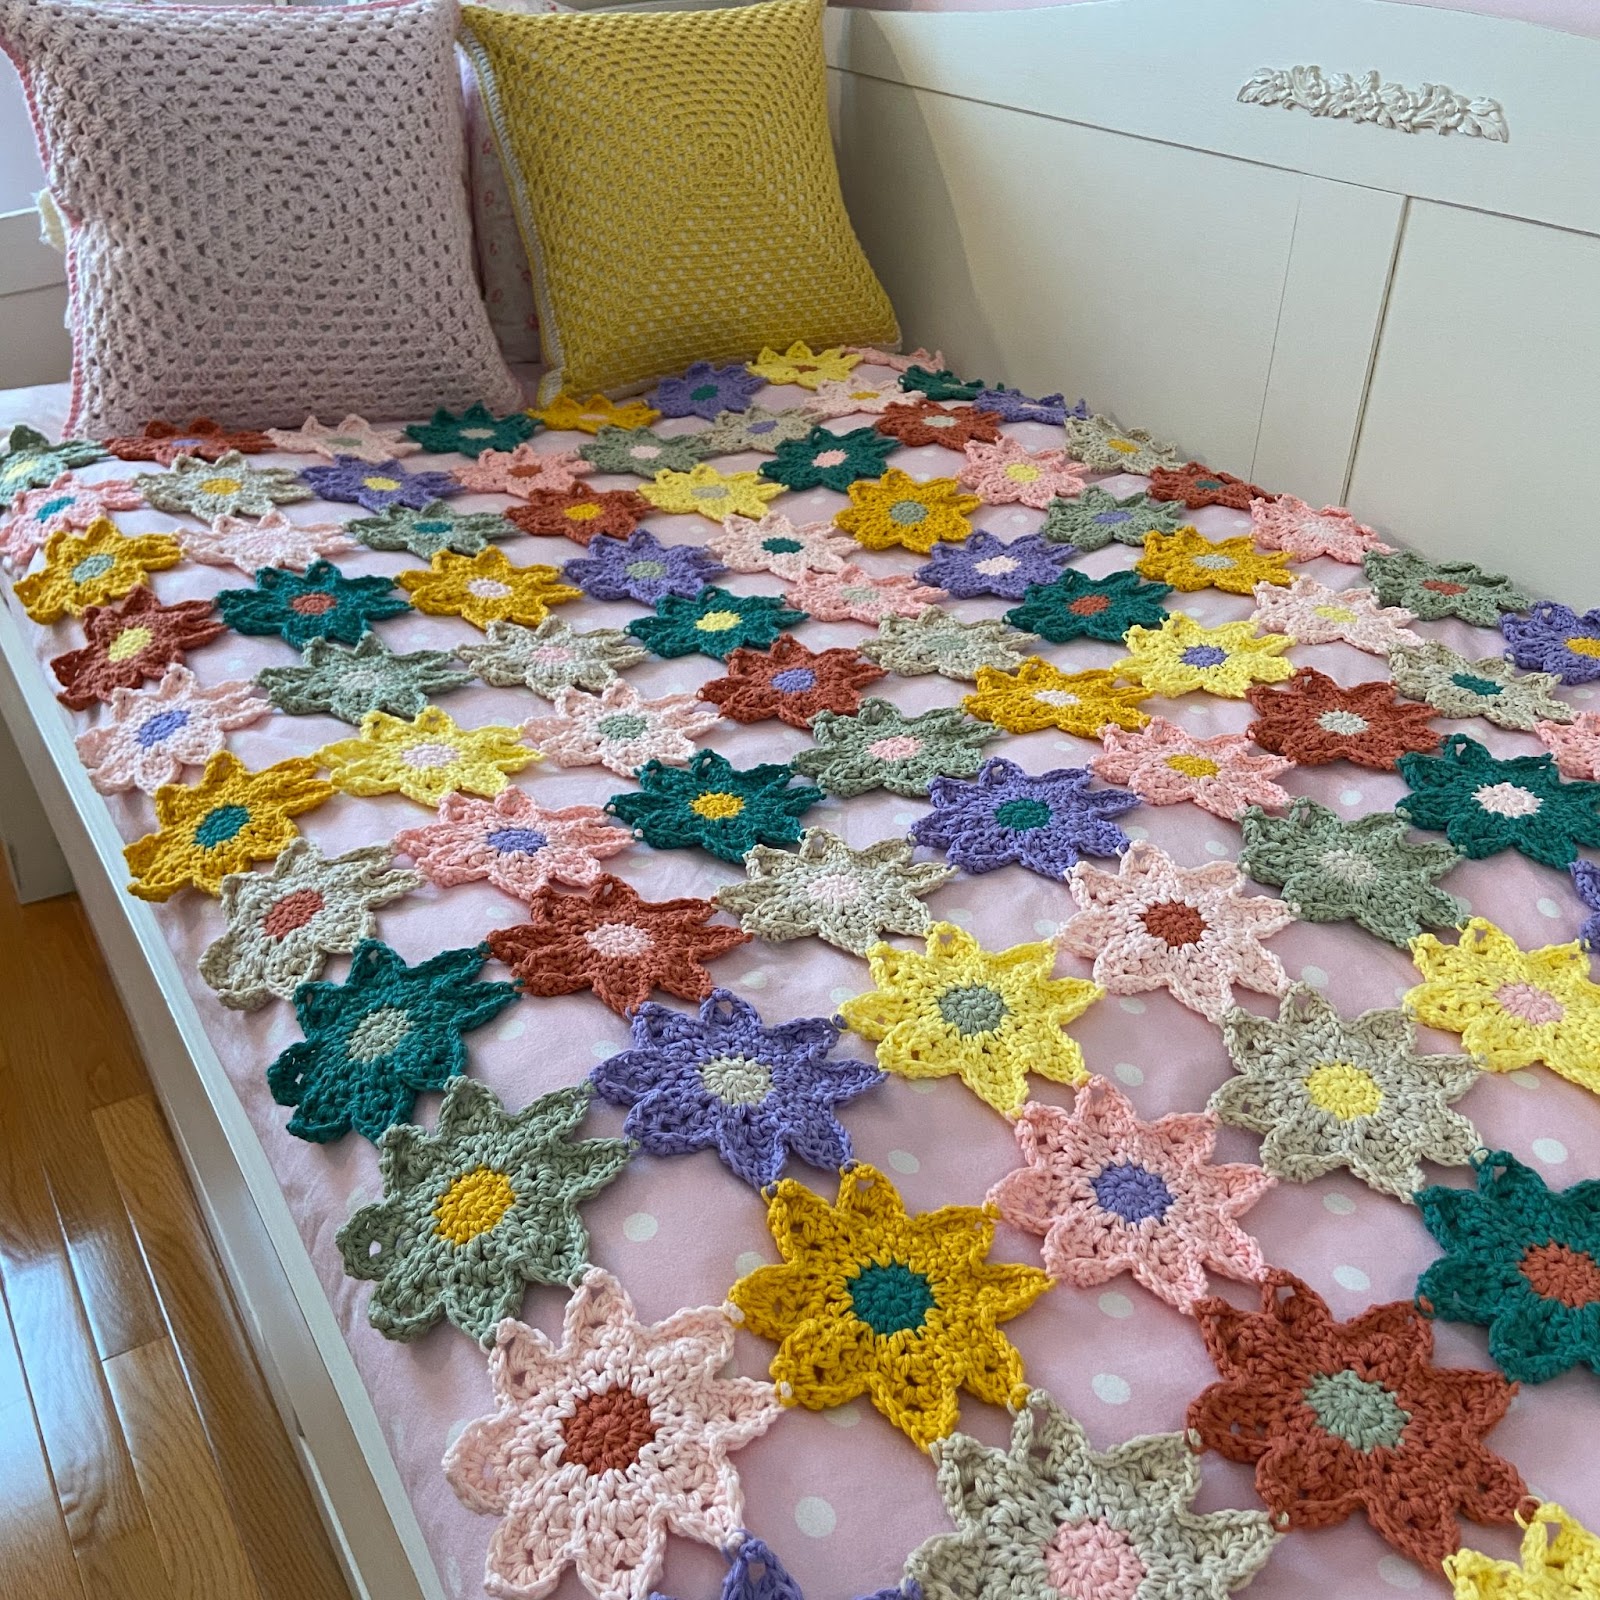
Last summer, I wanted to try to crochet a blanket entirely out of flowers and I am so excited to share the pattern! In my previous post, I explained how to crochet the flowers, so now it is time to join them! As always, if you have any questions, you can send me an email at maggietrunkhill@daisygirlcrochet.com. If you make this blanket and share pictures of it on Instagram, make sure you tag me, so I can see it!

Part 1
Make sure to view part 1 of the pattern first for the flower pattern and details about the yarn, materials, size, etc.
There is a video on my YouTube channel to demonstrate how to join the flowers:
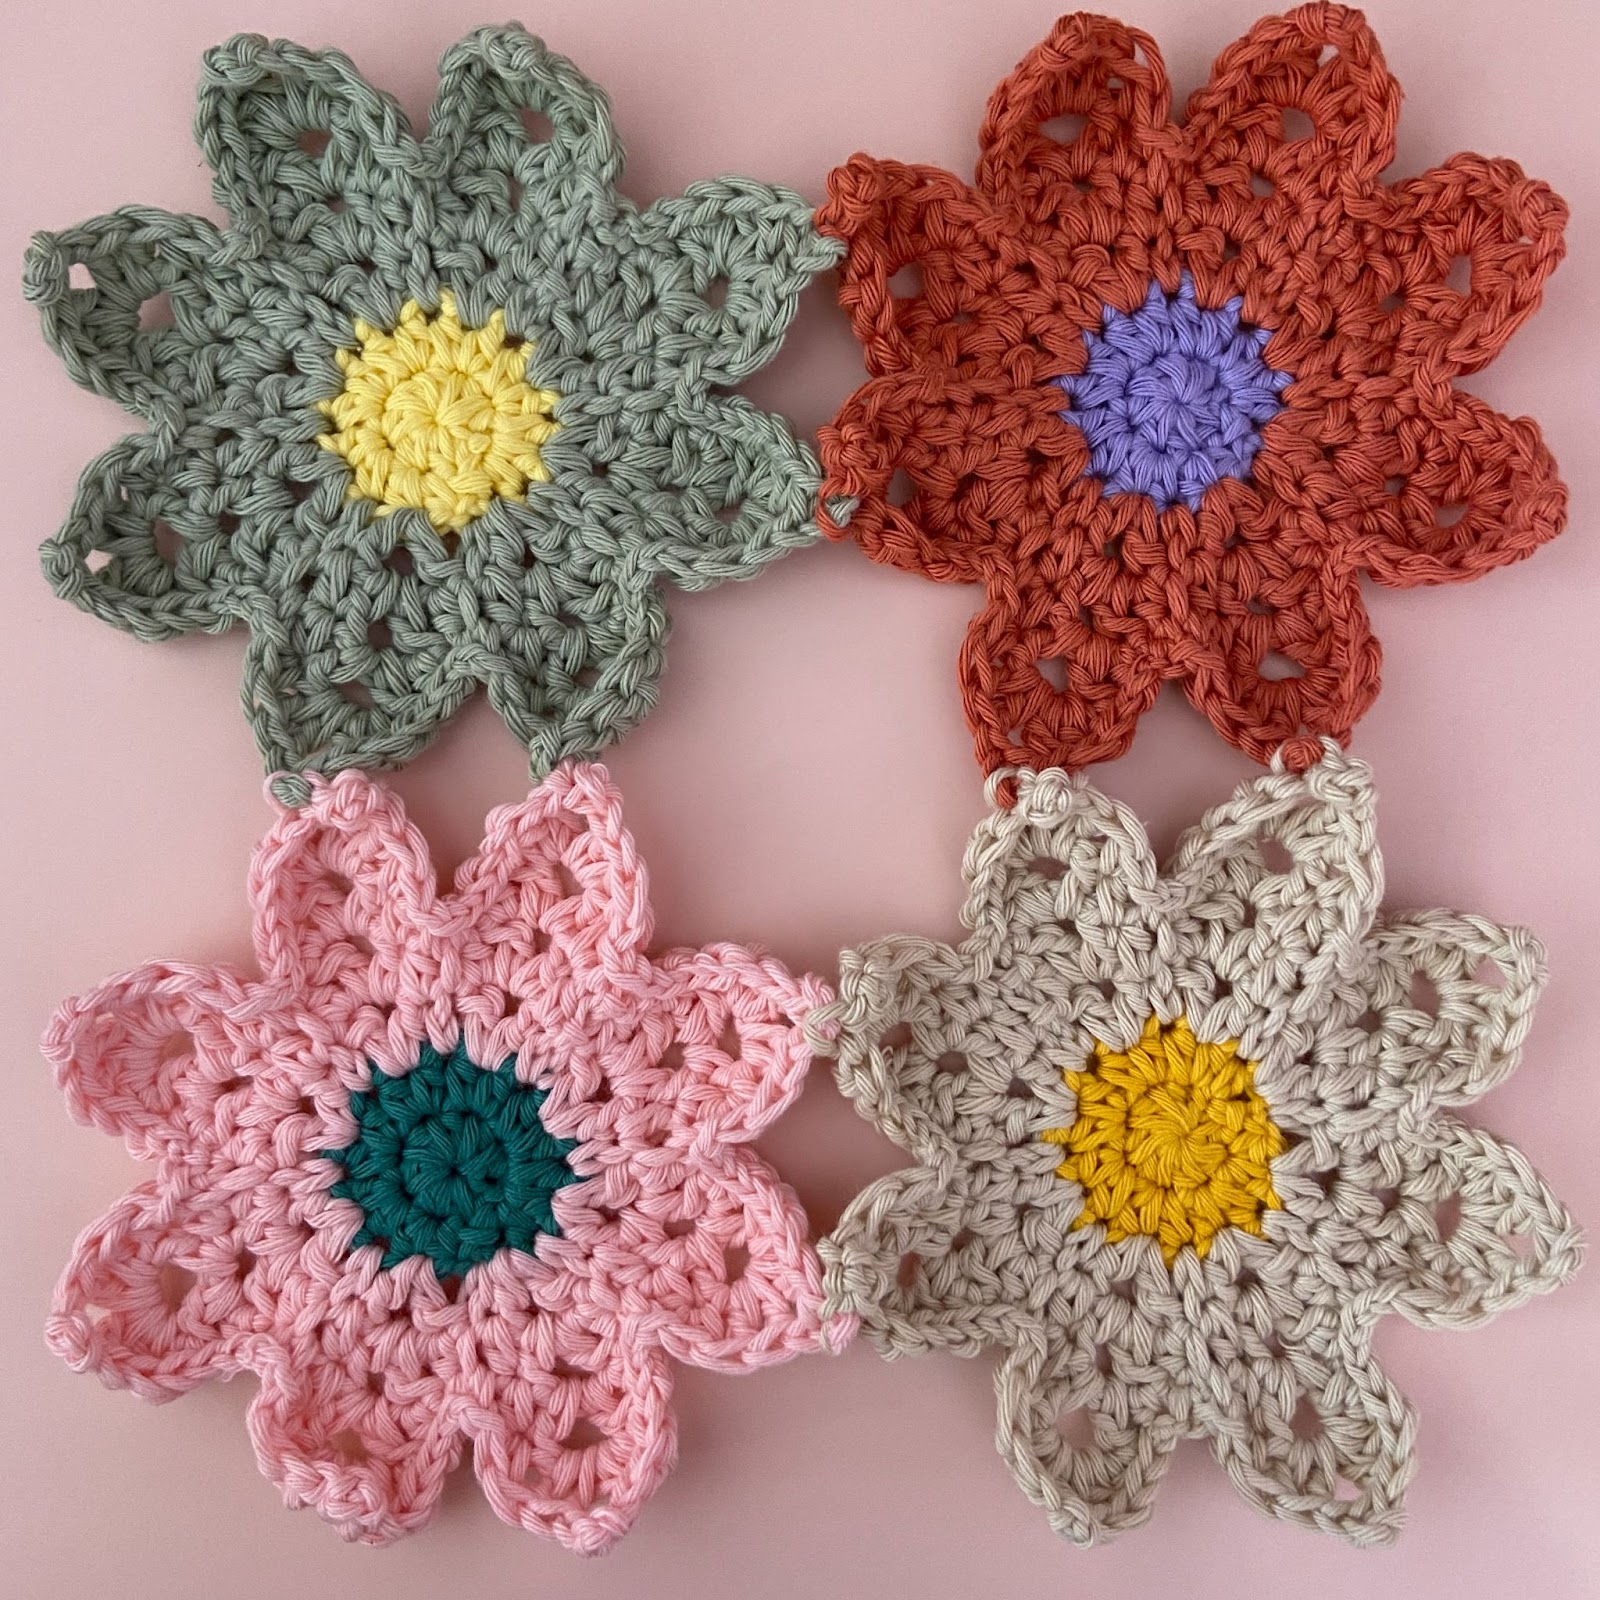
This chart was in part 1, but here it is again for reference! The flowers are joined in the following order. We will use the join as you go method to join them. With this method, we will join each flower to the blanket while adding round 6 to the flower.
*Note: “yellow with green” means a yellow center with green petals.
| Row 1 | yellow with green | purple with vintage pink | green with light pink | cream with blue | medium pink with mustard | blue with purple | vintage pink with yellow | cream with pink |
| Row 2 | blue with pink | mustard with cream | yellow with purple | vintage pink with pink | light pink with green | purple with cream | mustard with light pink | green with blue |
| Row 3 | green with mustard | pink with light pink | blue with green | mustard with vintage pink | cream with yellow | pink with blue | cream with vintage pink | pink with purple |
| Row 4 | yellow with vintage pink | vintage pink with blue | light pink with mustard | green with purple | blue with light pink | green with mustard | yellow with pink | mustard with cream |
| Row 5 | purple with light pink | cream with green | pink with cream | yellow with blue | cream with pink | light pink with purple | purple with green | blue with vintage pink |
| Row 6 | blue with mustard | light pink with yellow | green with light pink | purple with vintage pink | green with cream | vintage pink with blue | cream with mustard | light pink with pink |
| Row 7 | vintage pink with cream | purple with pink | mustard with blue | pink with green | light pink with mustard | purple with yellow | yellow with light pink | vintage pink with green |
| Row 8 | green with blue | pink with vintage pink | light pink with cream | blue with purple | mustard with pink | cream with vintage pink | blue with cream | mustard with purple |
| Row 9 | mustard with green | cream with purple | green with yellow | vintage pink with light pink | cream with green | light pink with blue | green with pink | yellow with mustard |
| Row 10 | vintage pink with light pink | blue with mustard | purple with pink | yellow with cream | pink with yellow | vintage pink with purple | pink with vintage pink | light pink with cream |
| Row 11 | light pink with purple | pink with cream | green with vintage pink | vintage pink with blue | purple with mustard | mustard with light pink | yellow with green | purple with blue |
| Row 12 | green with blue | mustard with pink | blue with yellow | cream with light pink | pink with green | blue with cream | vintage pink with mustard | pink with light pink |
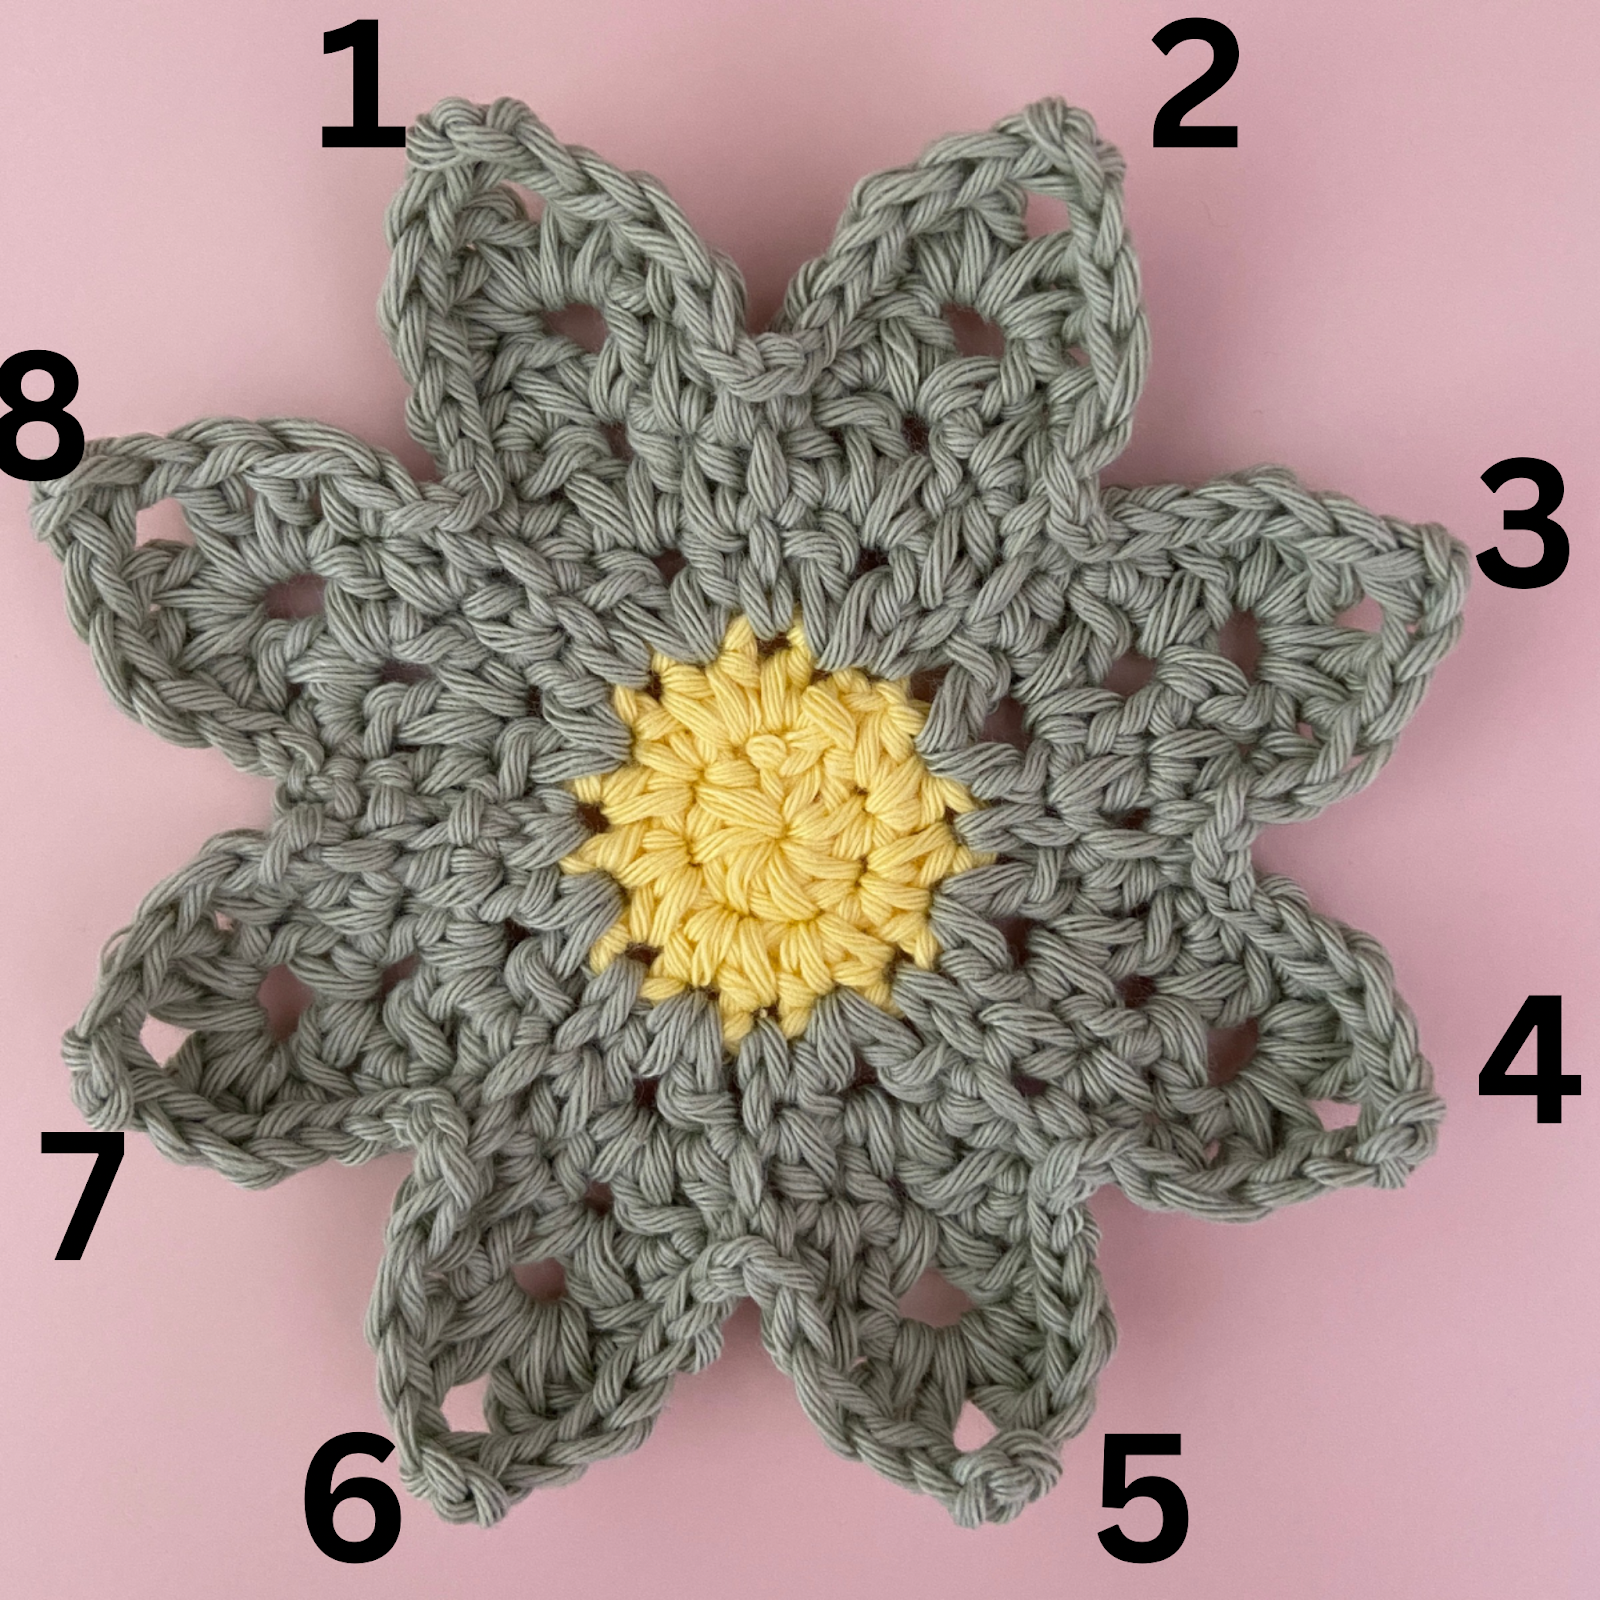
Trying to explain how to join these flowers is a little tricky; therefore, I will refer to the petals of the flowers as follows, so hopefully it is a little clearer! There is also a video on my YouTube channel to show how to join them. 🙂
Joining the Flowers
Joining the first row is a little different than the rest of the rows. The first flower of the blanket is the one placed at the top left corner.
Row 1
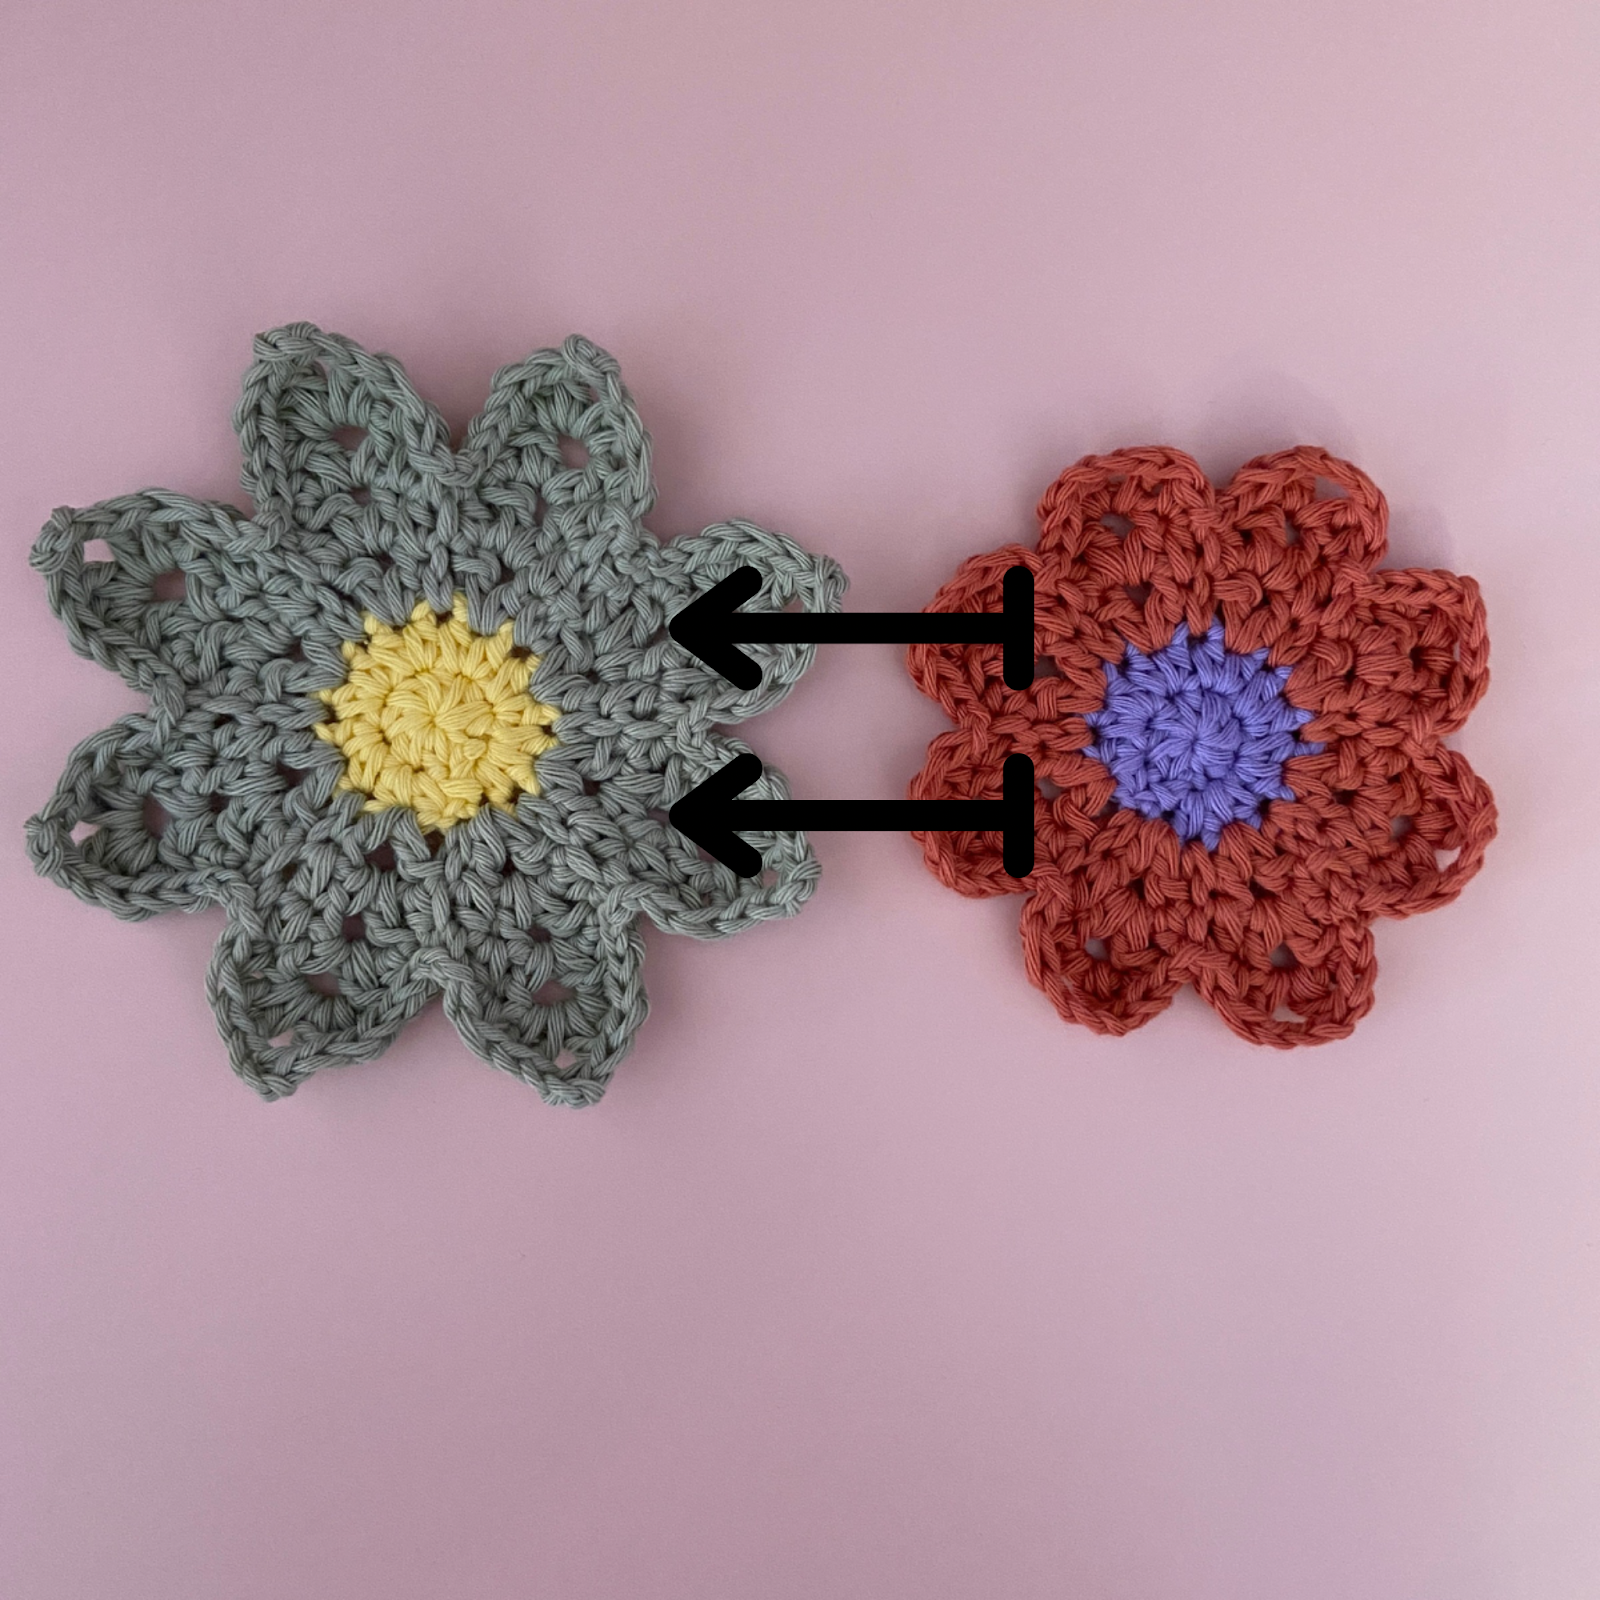
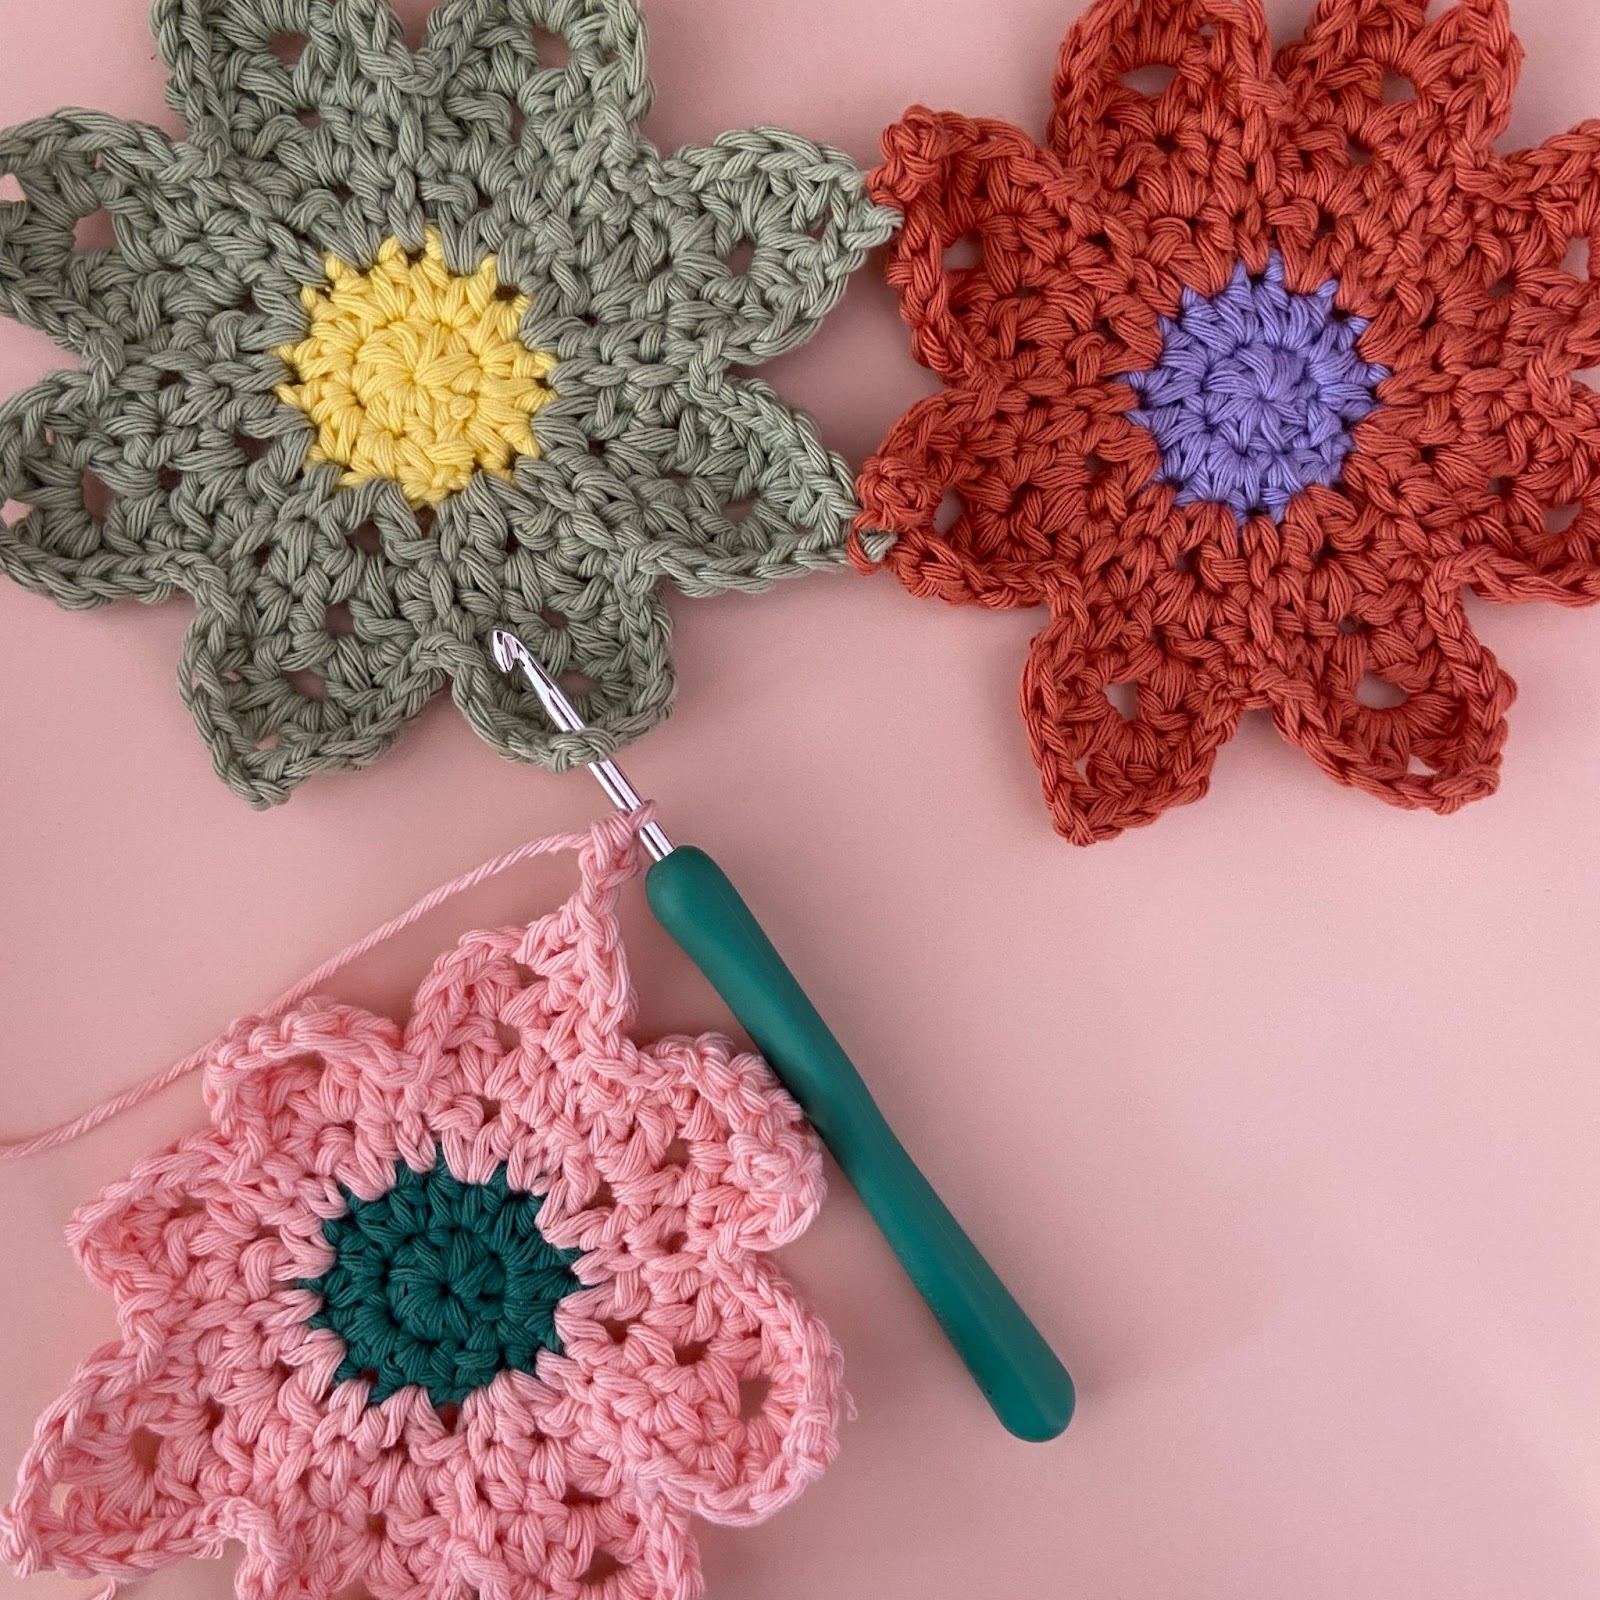
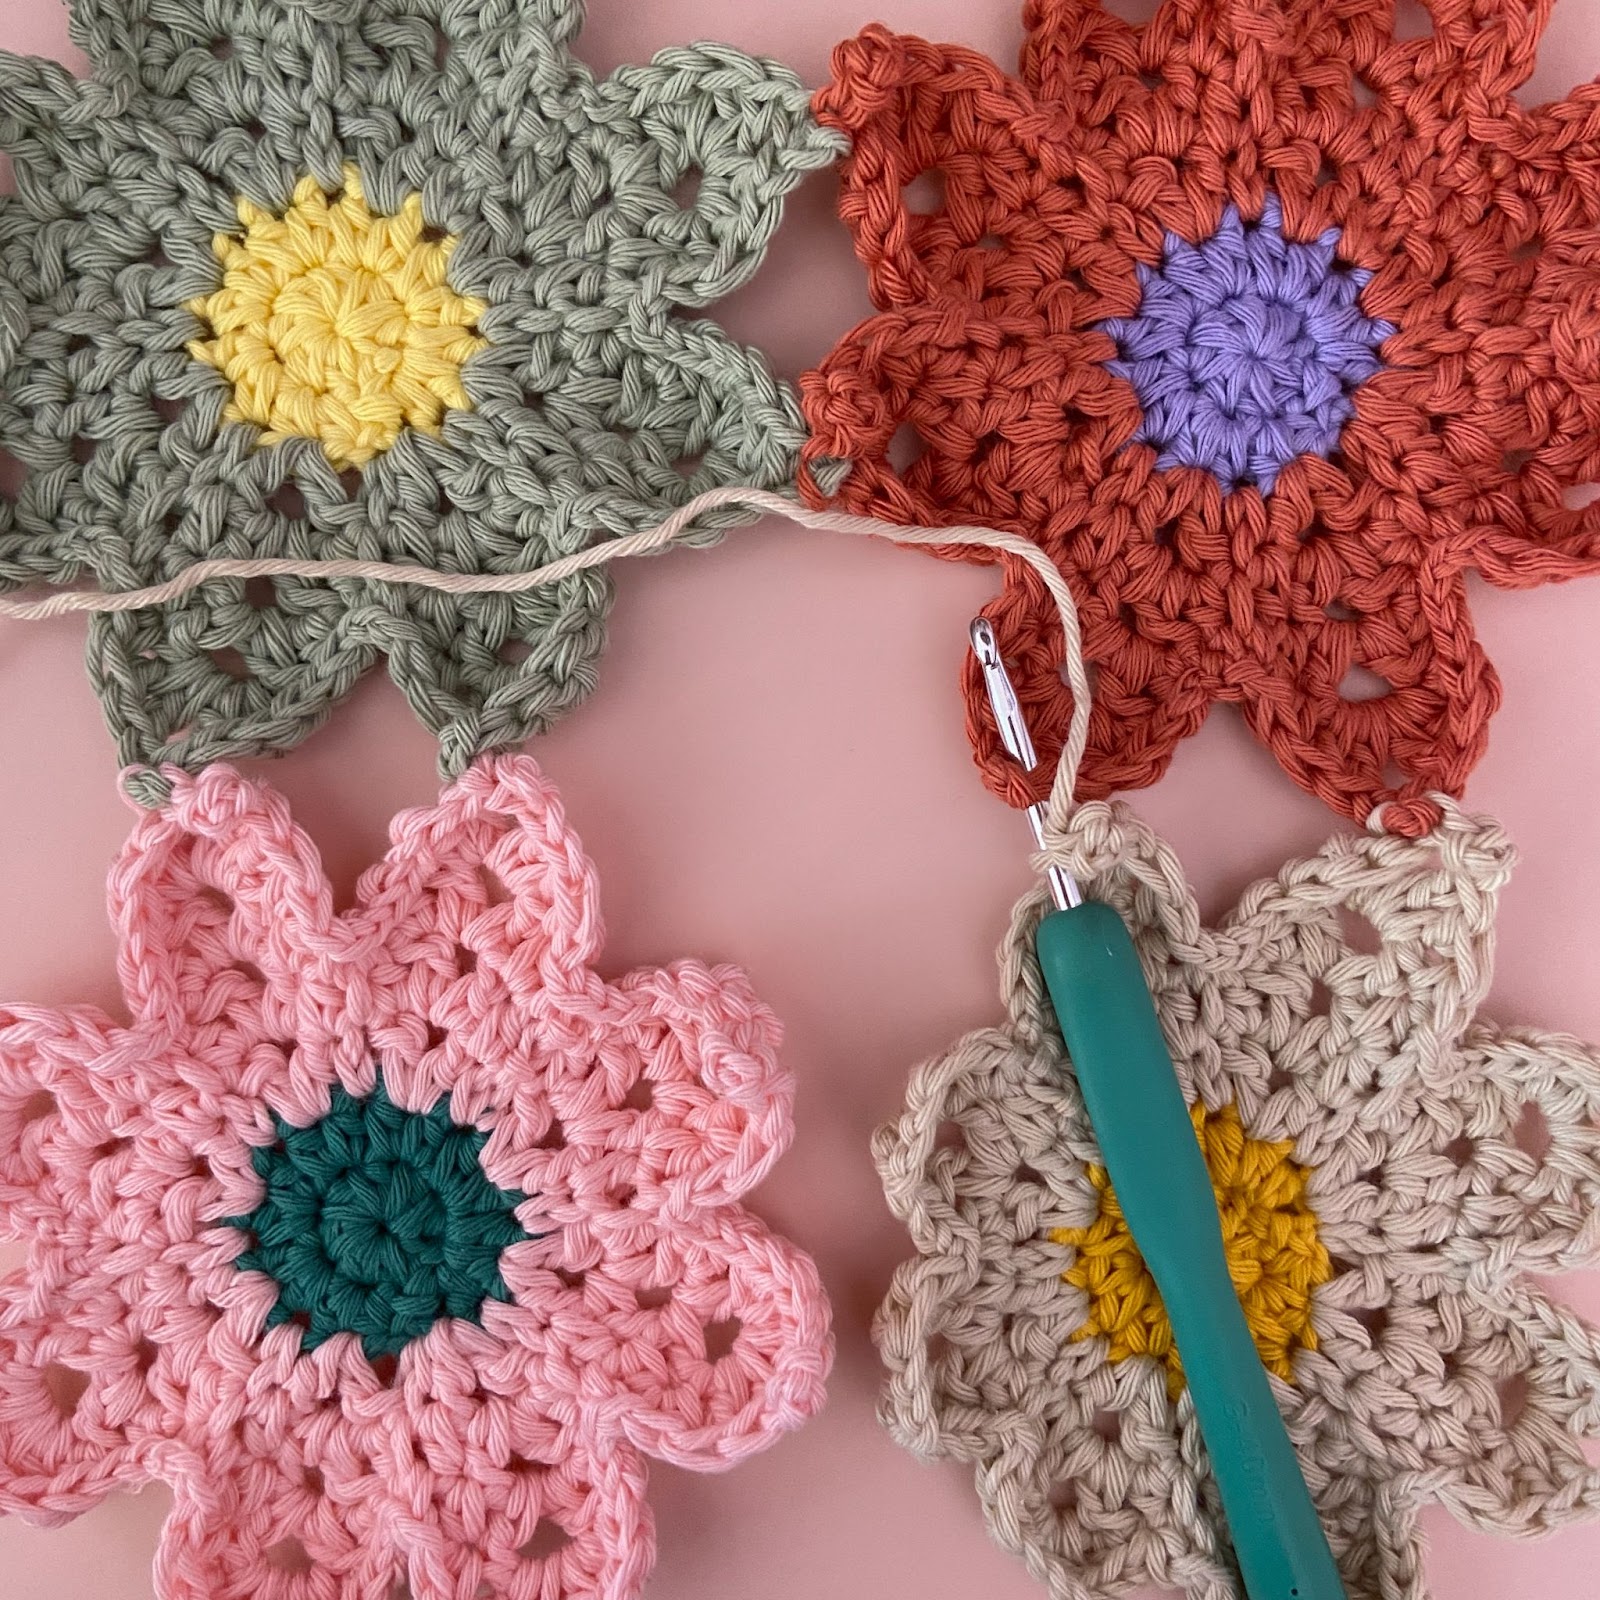
Row 1: Joining the second flower to the first flower
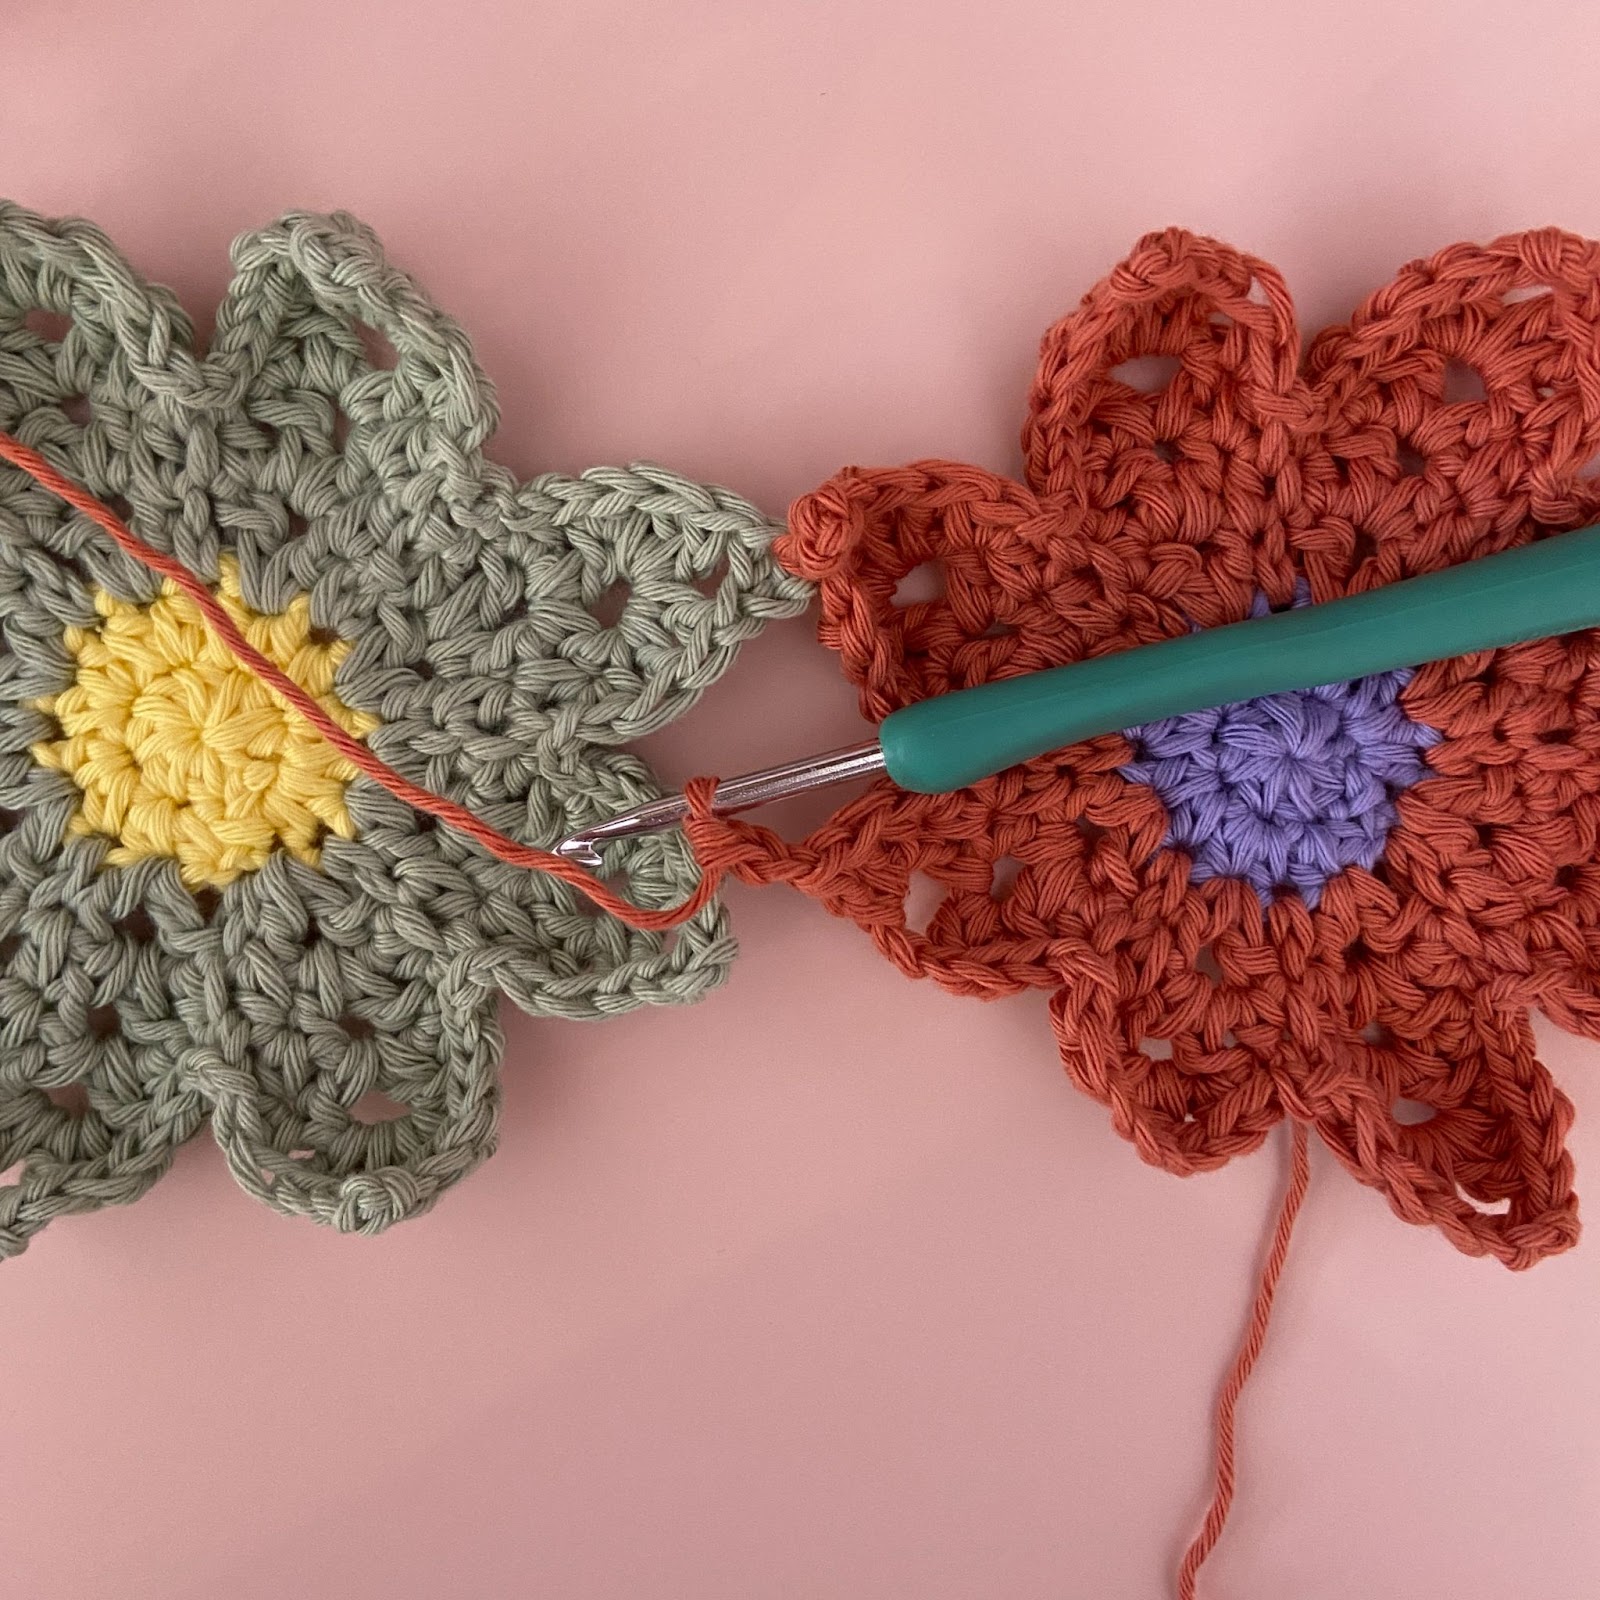
The second flower is joined to petals 3 and 4 of the first flower. Between any two petals of the second flower, there are 3 slip stitches. Join the color of the petals into the 2nd of the 3 slip stitches. Then, work round 6 (page 4), but stop after the picot st of the sixth petal.


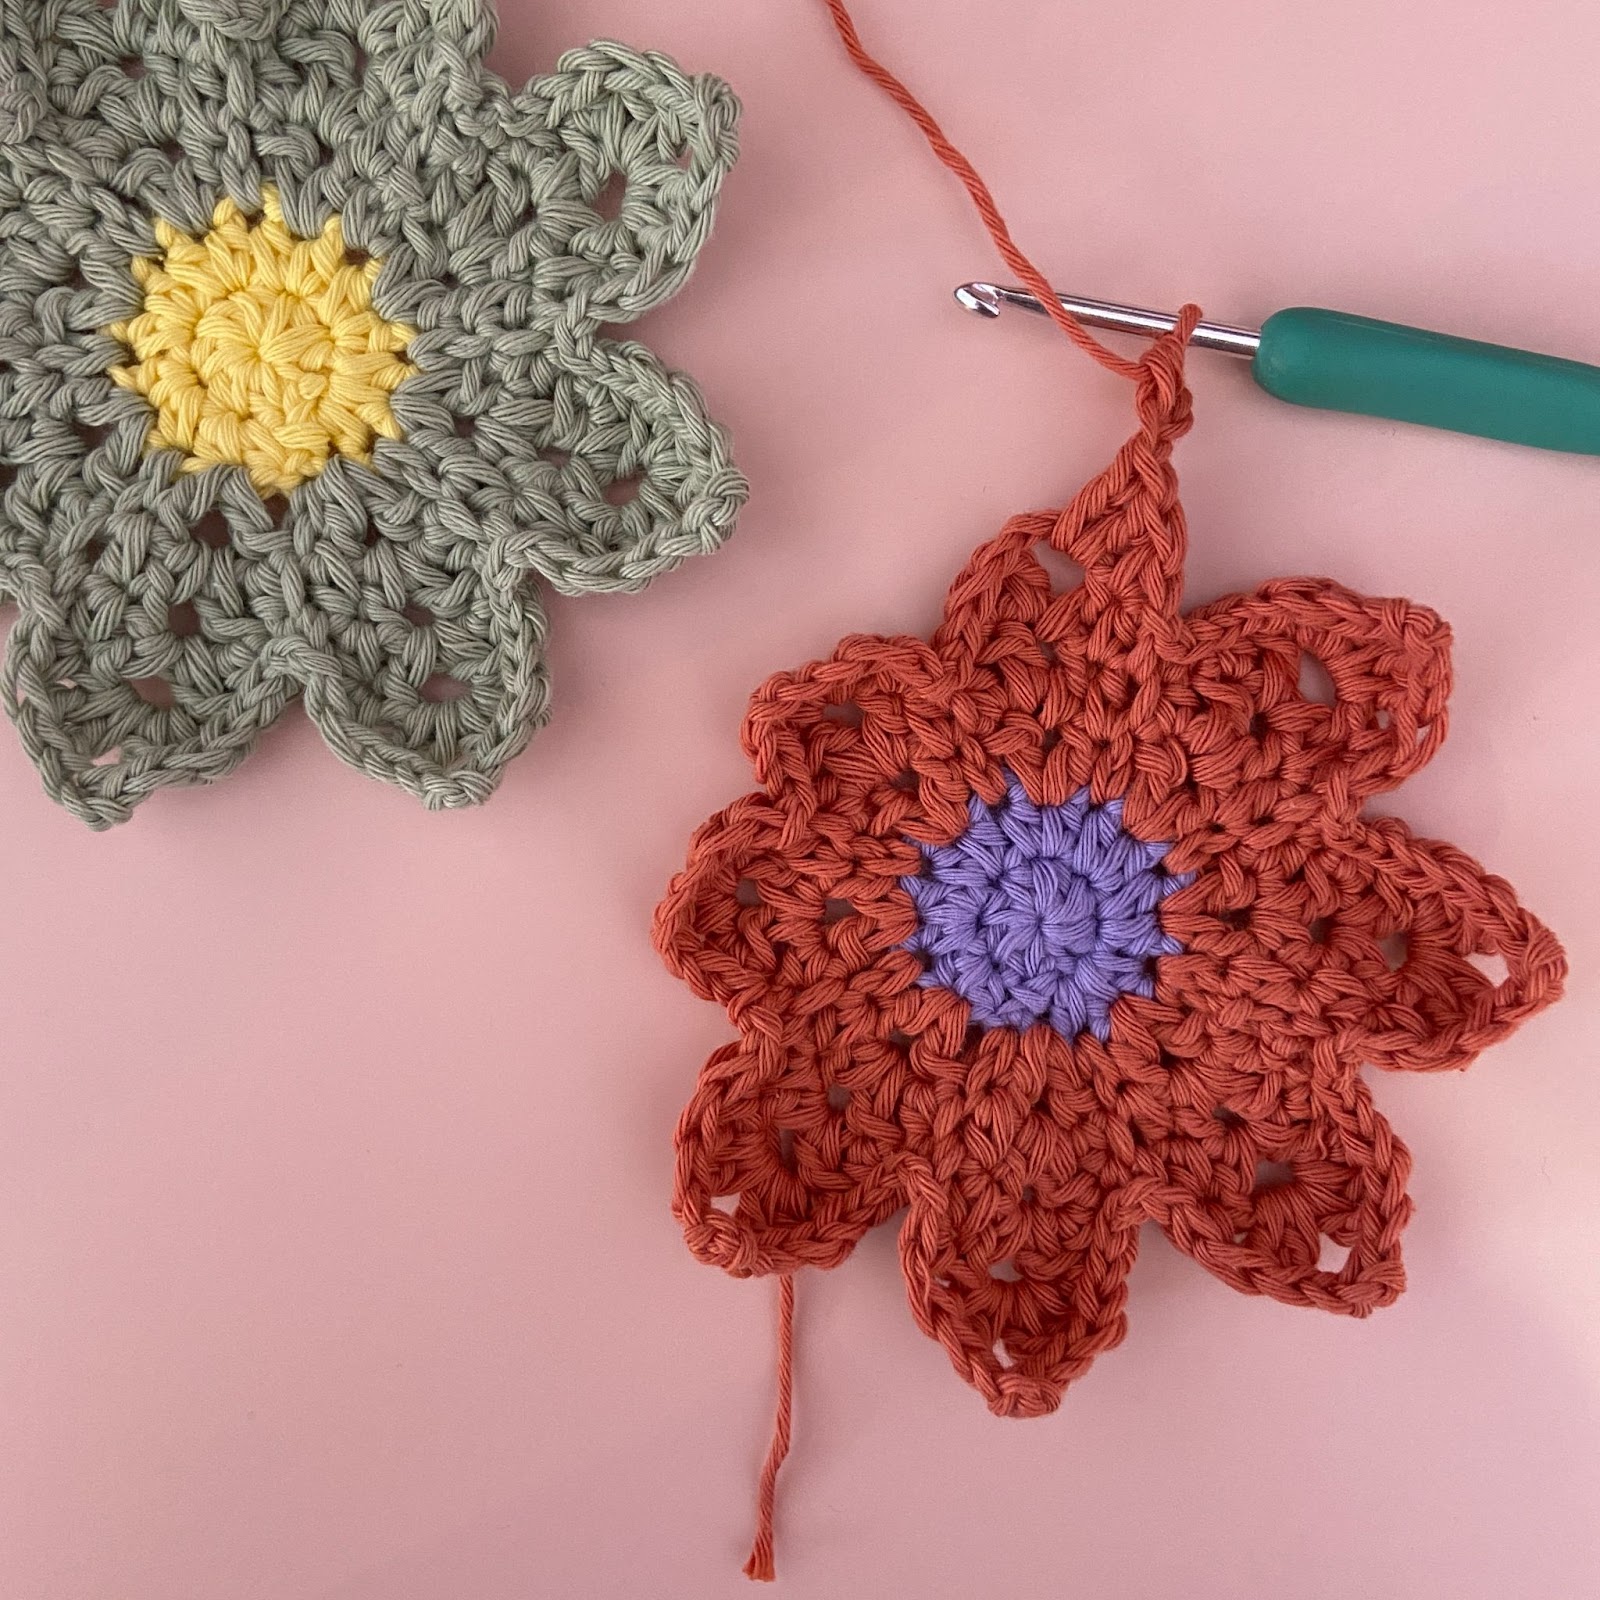
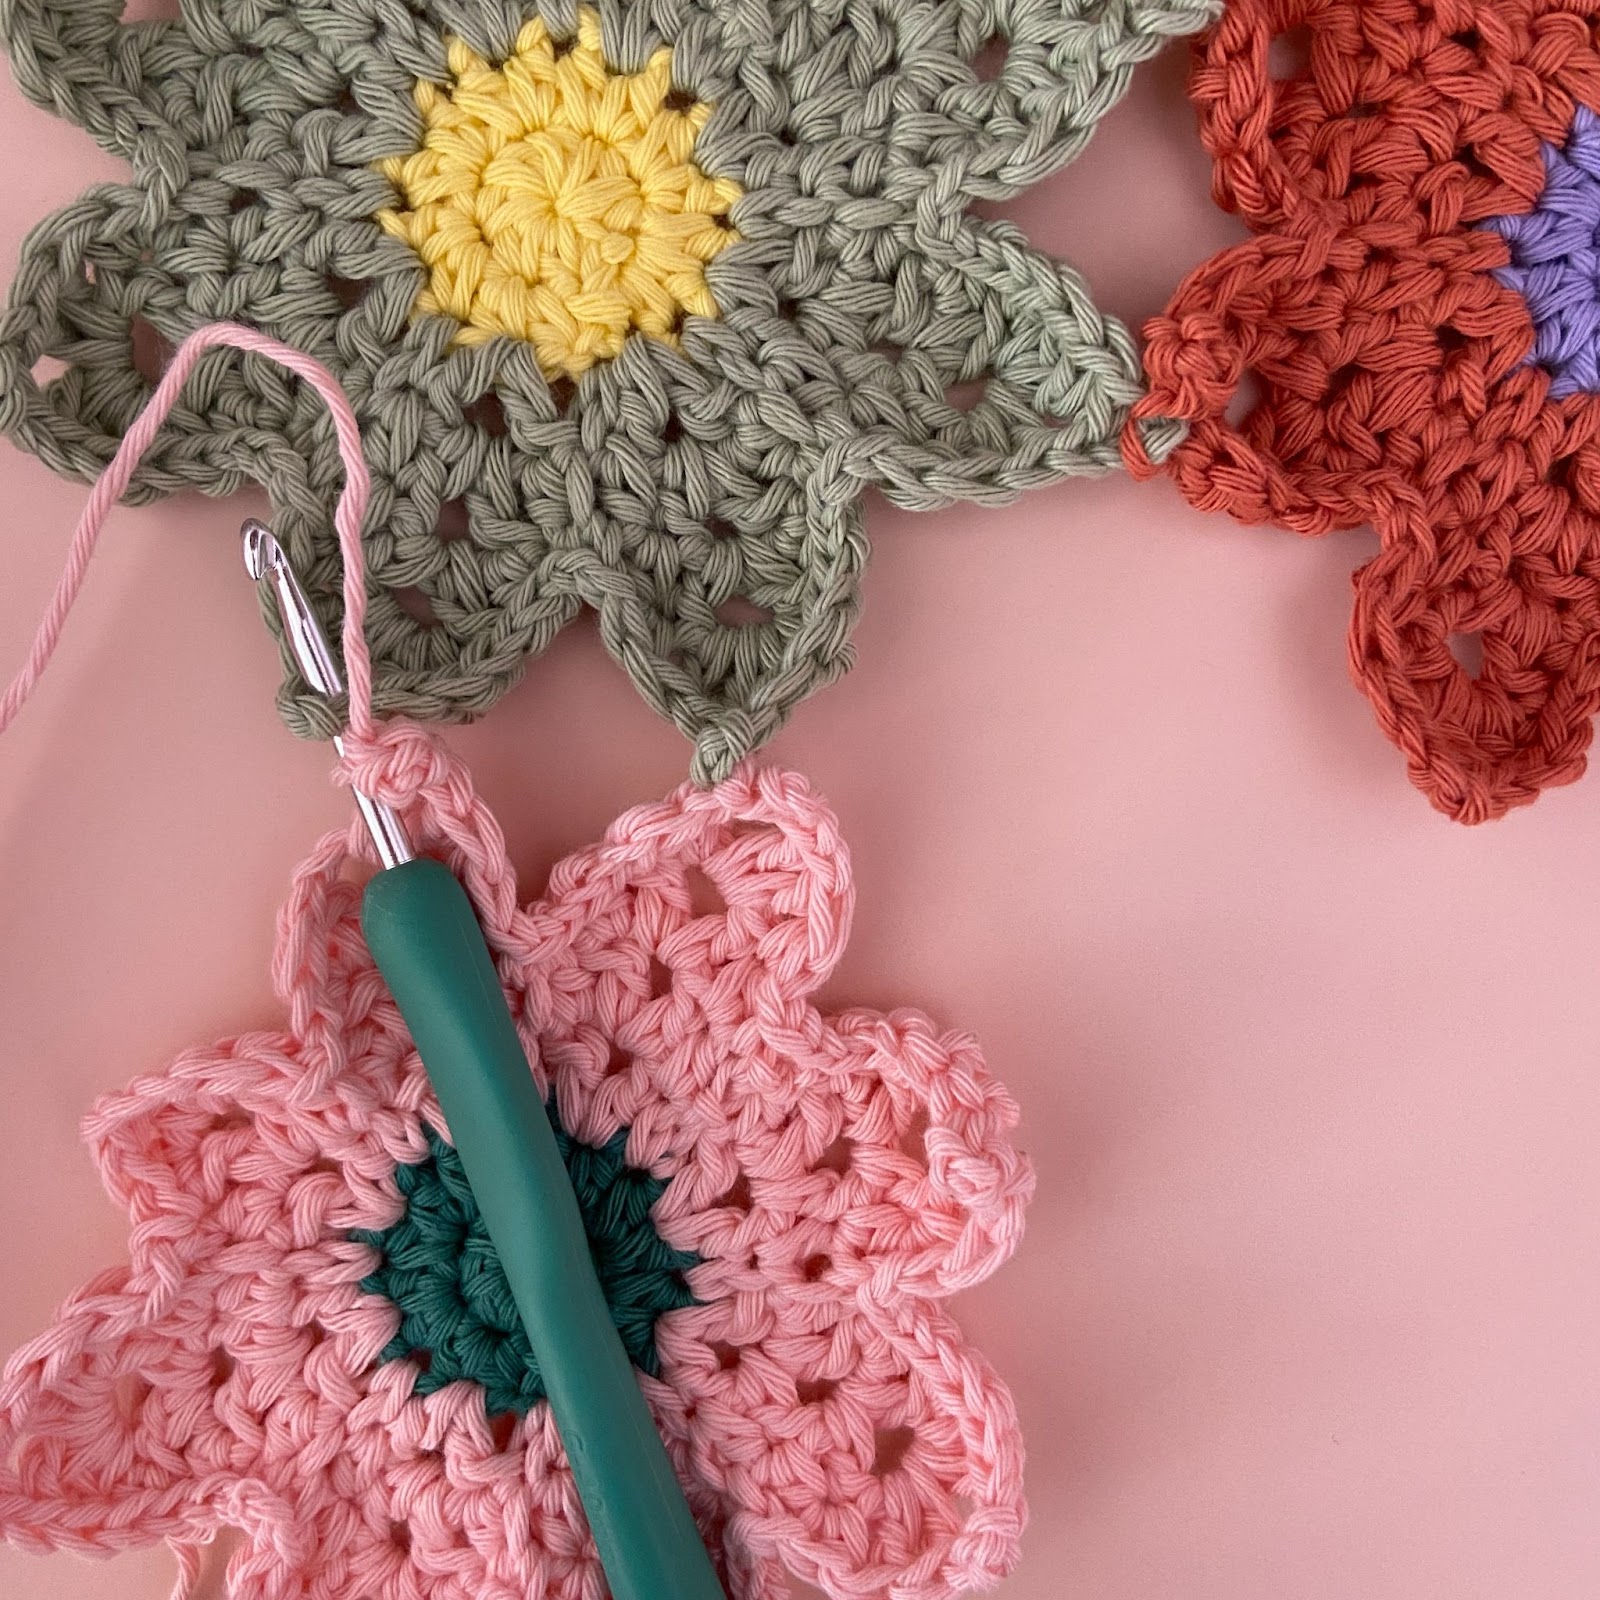
Insert the hook into the picot st of petal 3 of the flower to the left of it (picture 1). Work a ss (pictures 2 and 3).
Then, continue on with round 6, but stop after the picot st of the next petal.
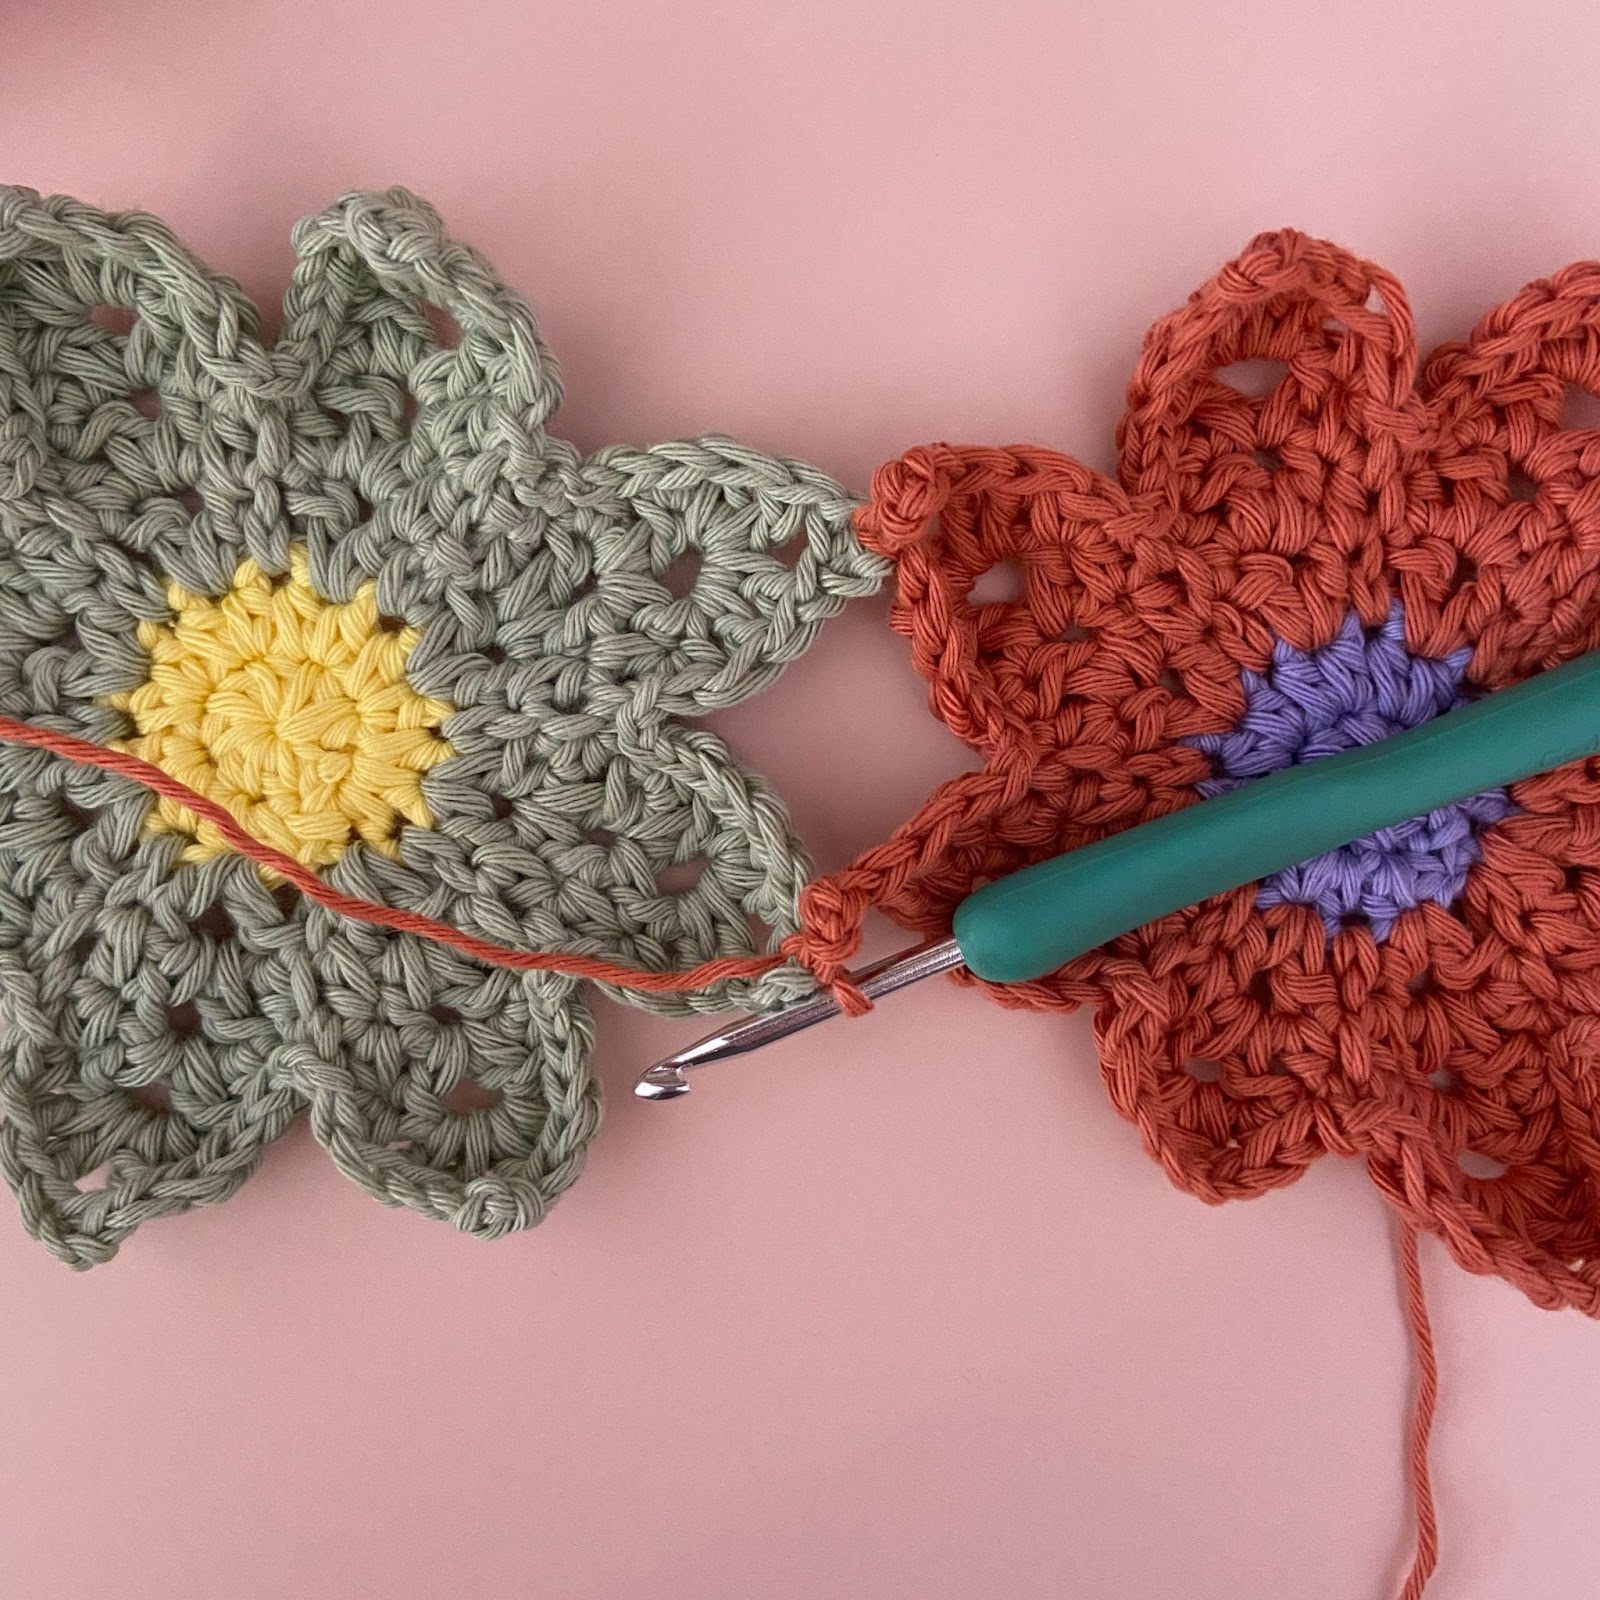
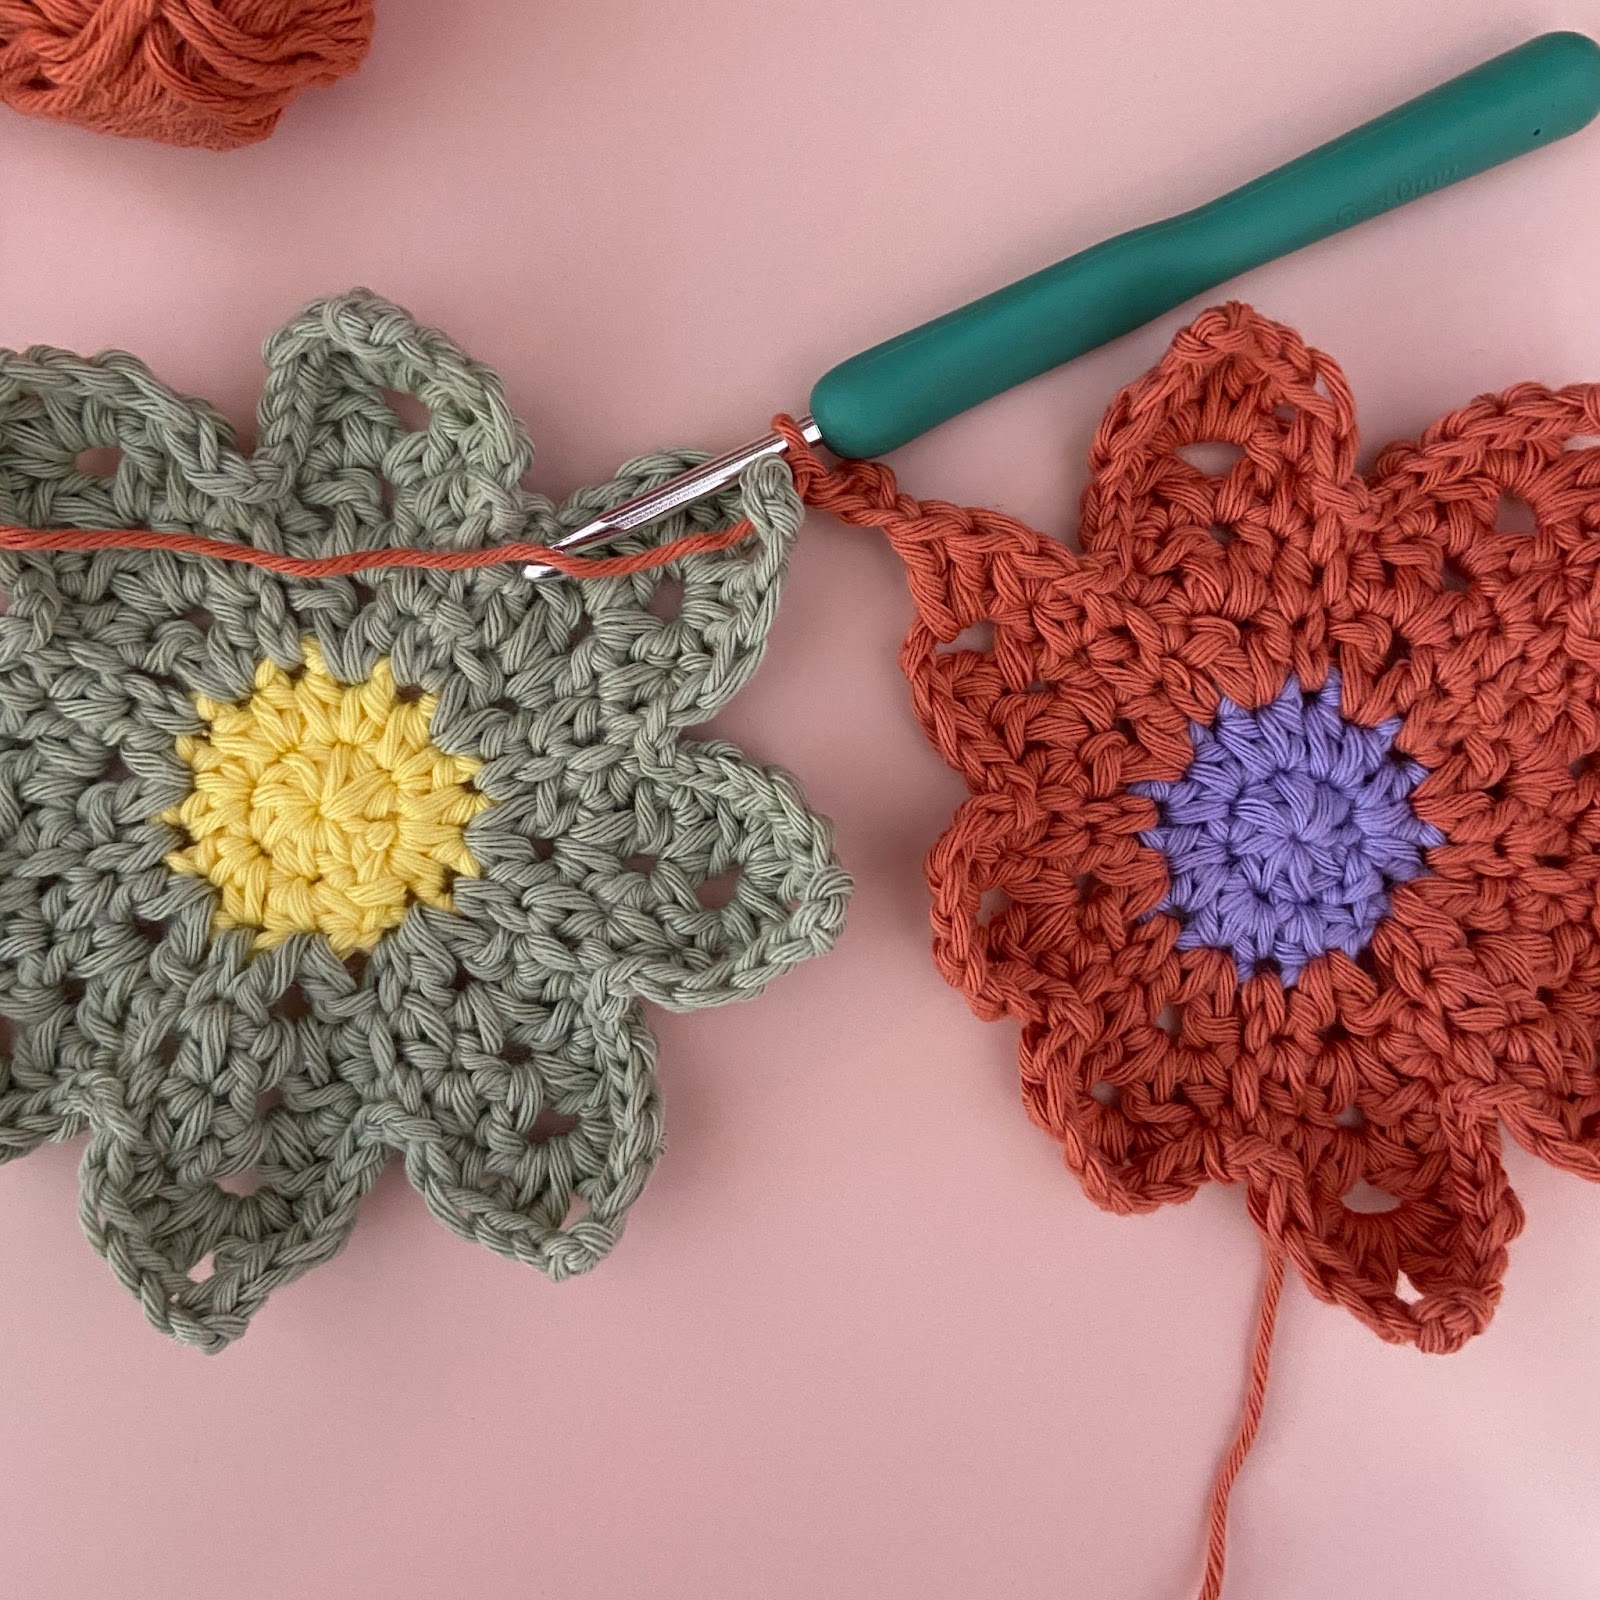
Insert the hook into the picot st of petal 4 of the flower to the left of it (picture 1) and work a ss (picture 2). Then, continue round 6 for the current flower. At the end of round 6, fasten off (picture 3).
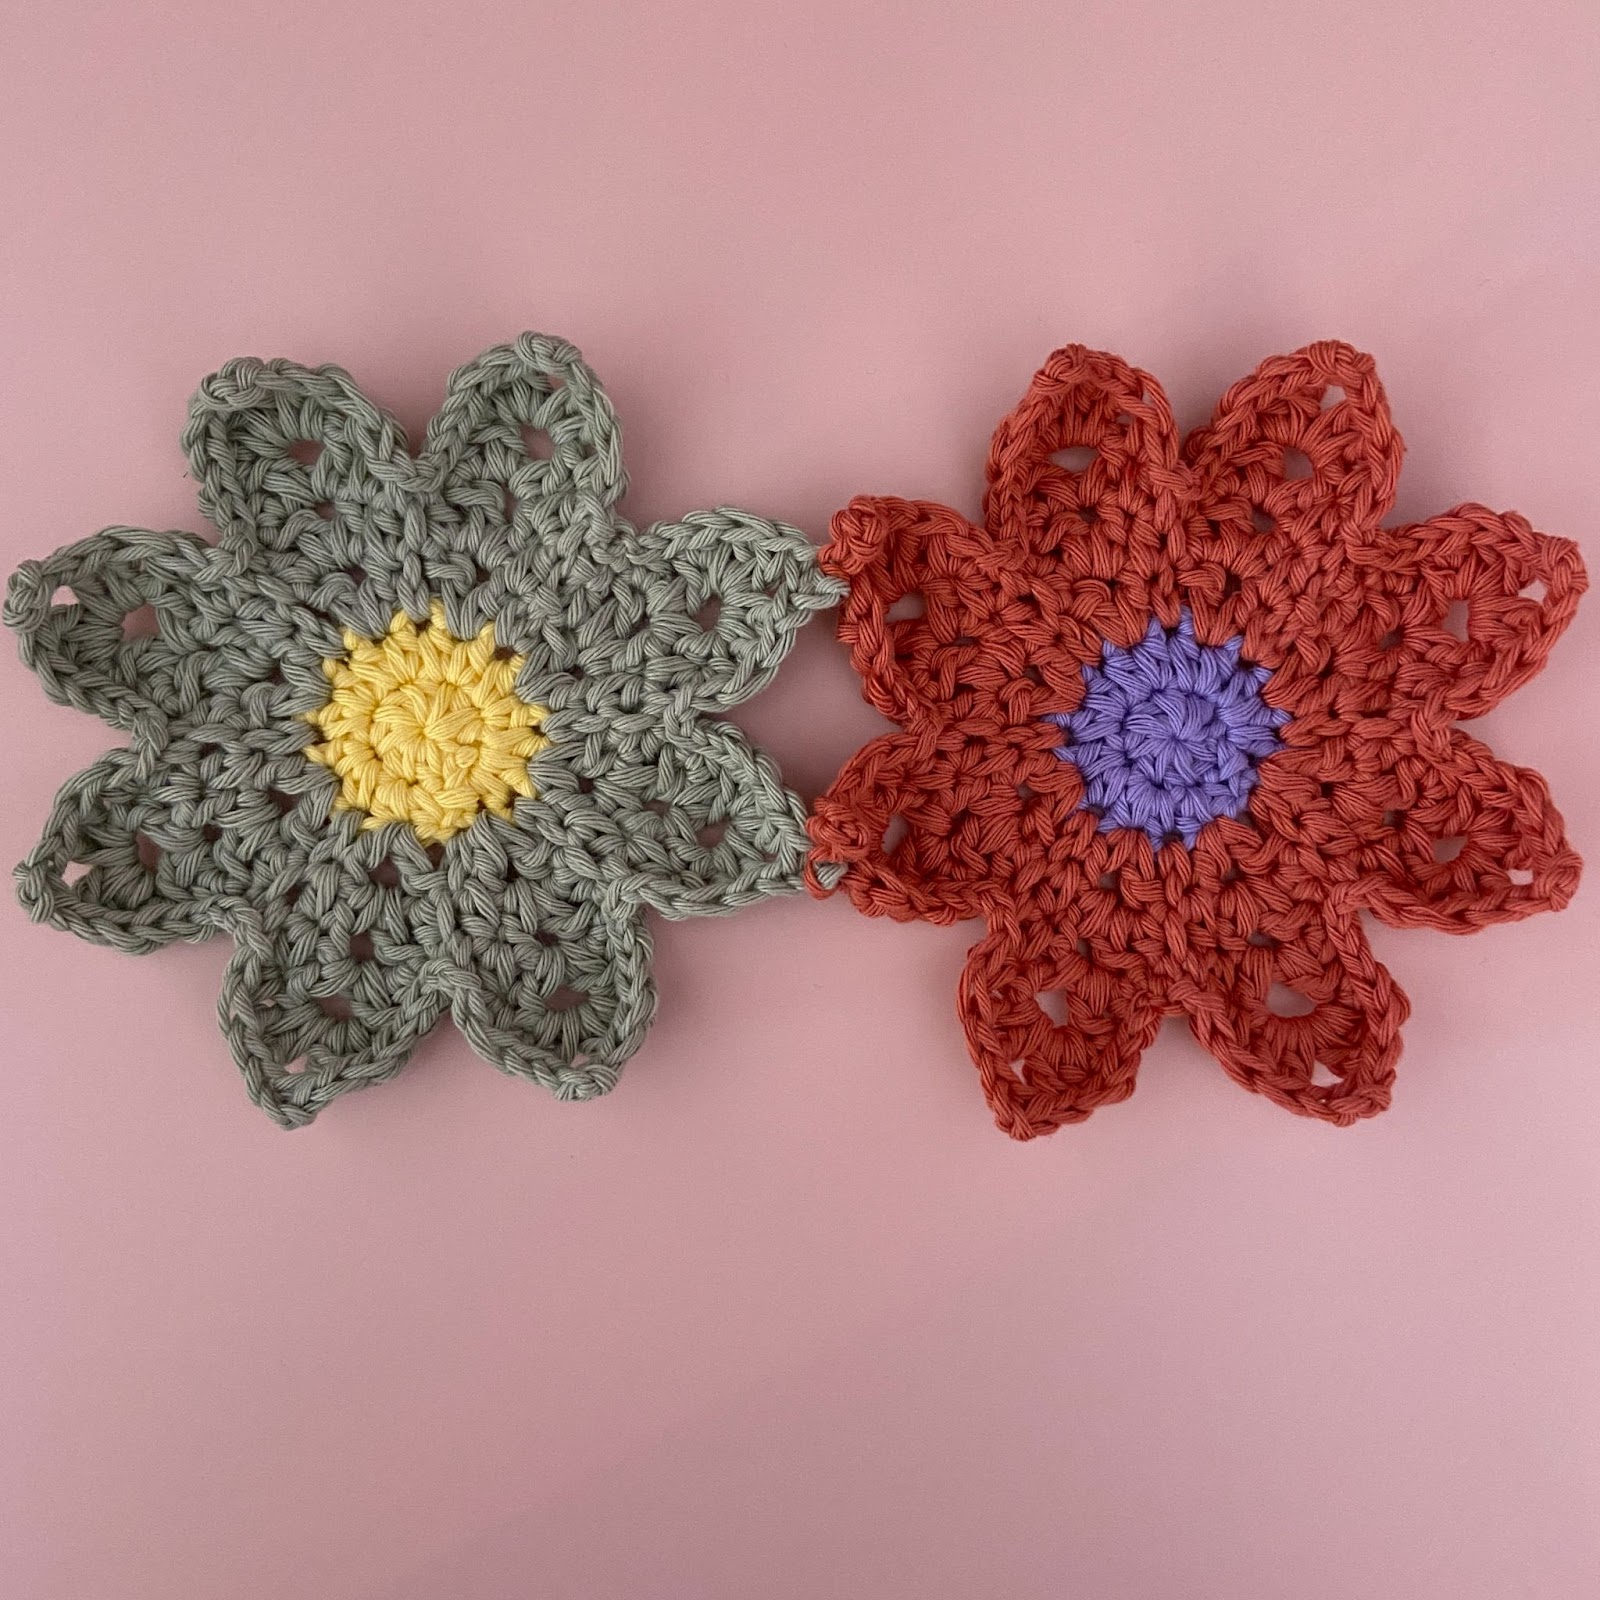
Follow this process to join the rest of the flowers in row 1!
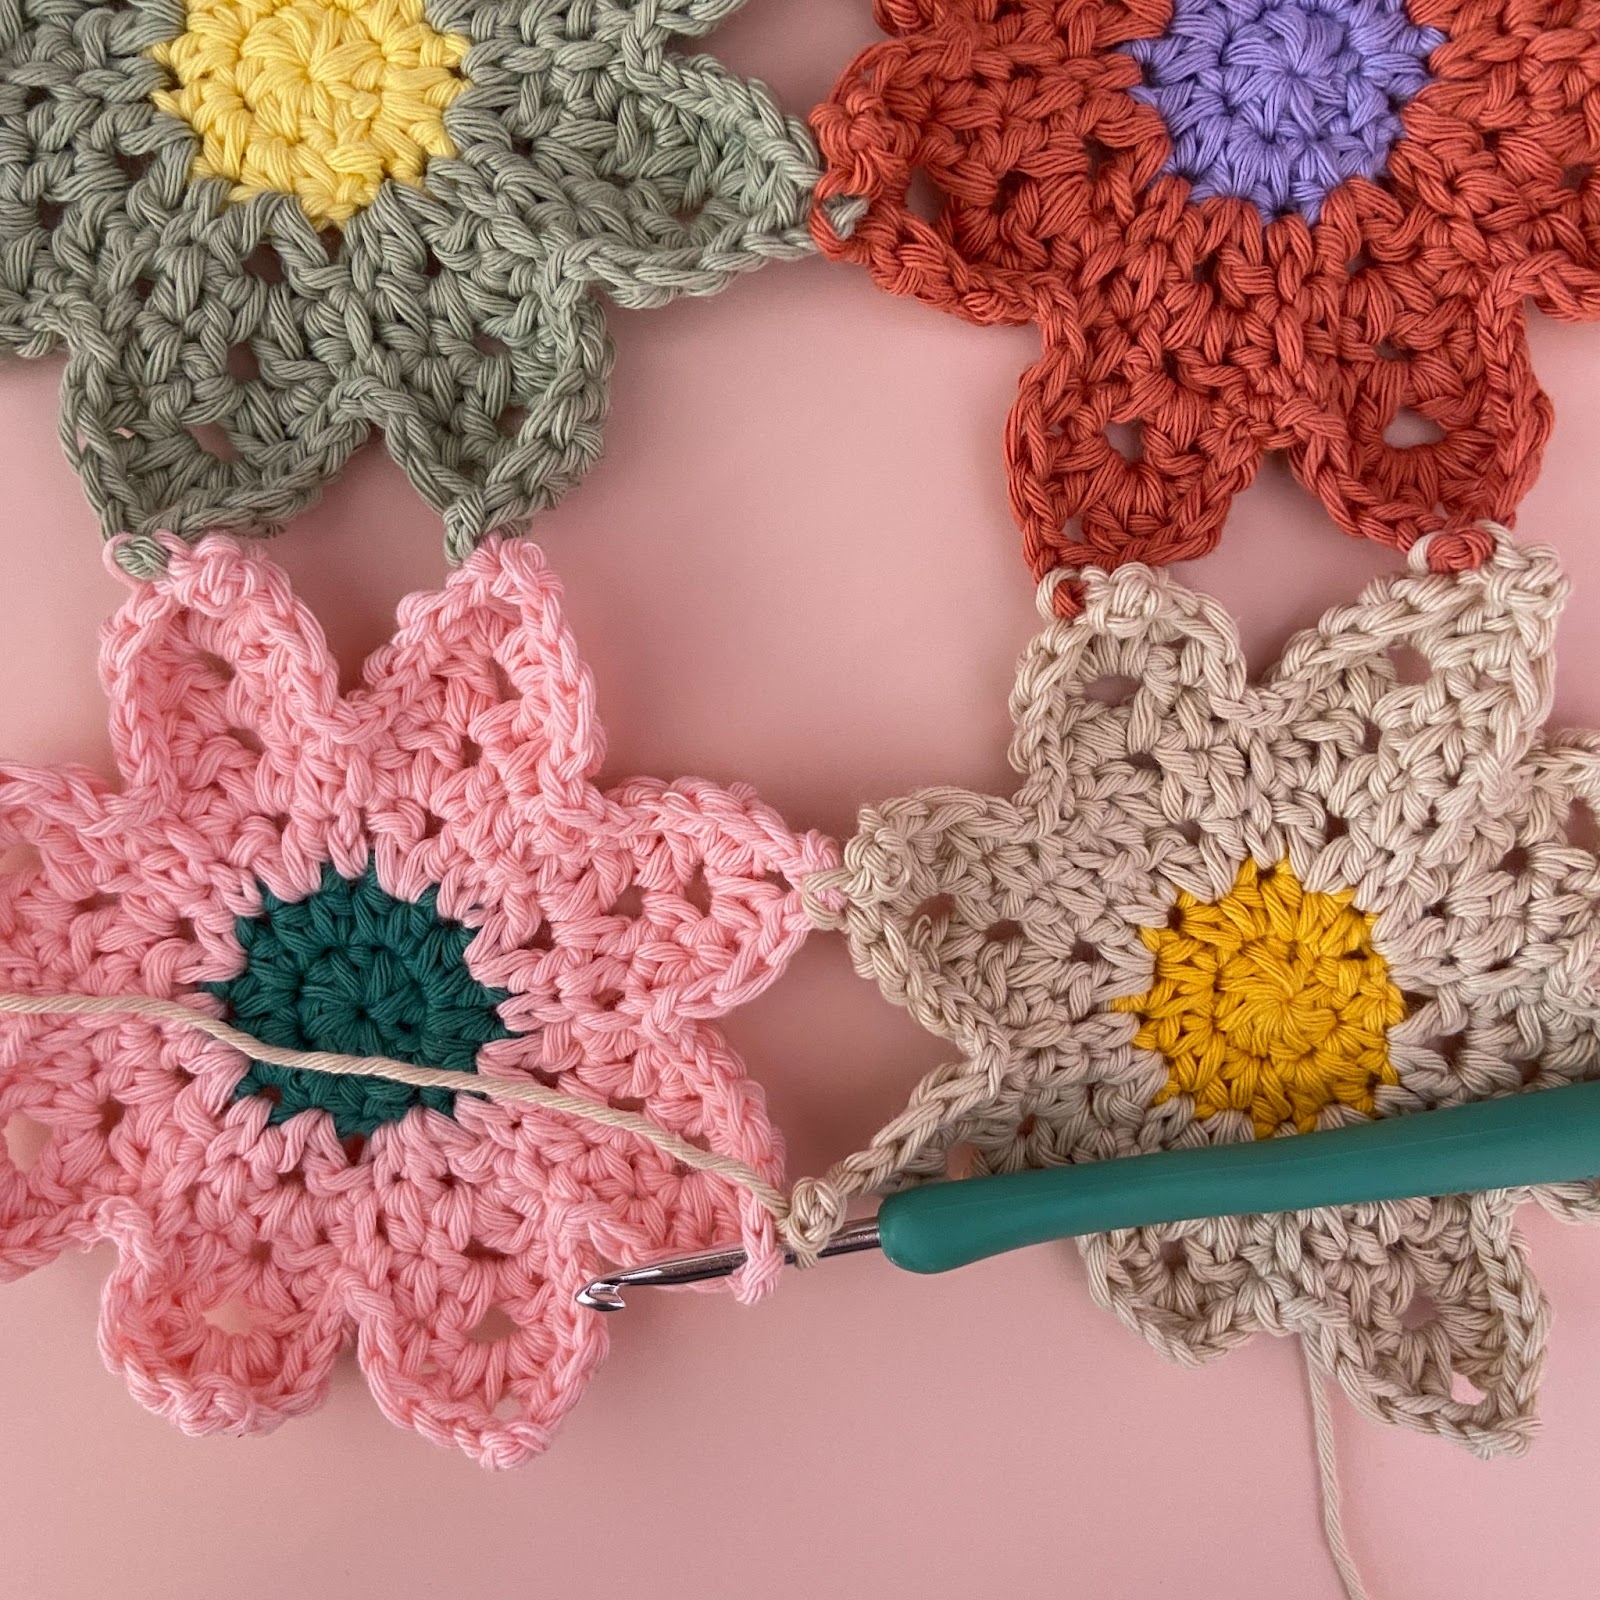
Row 2
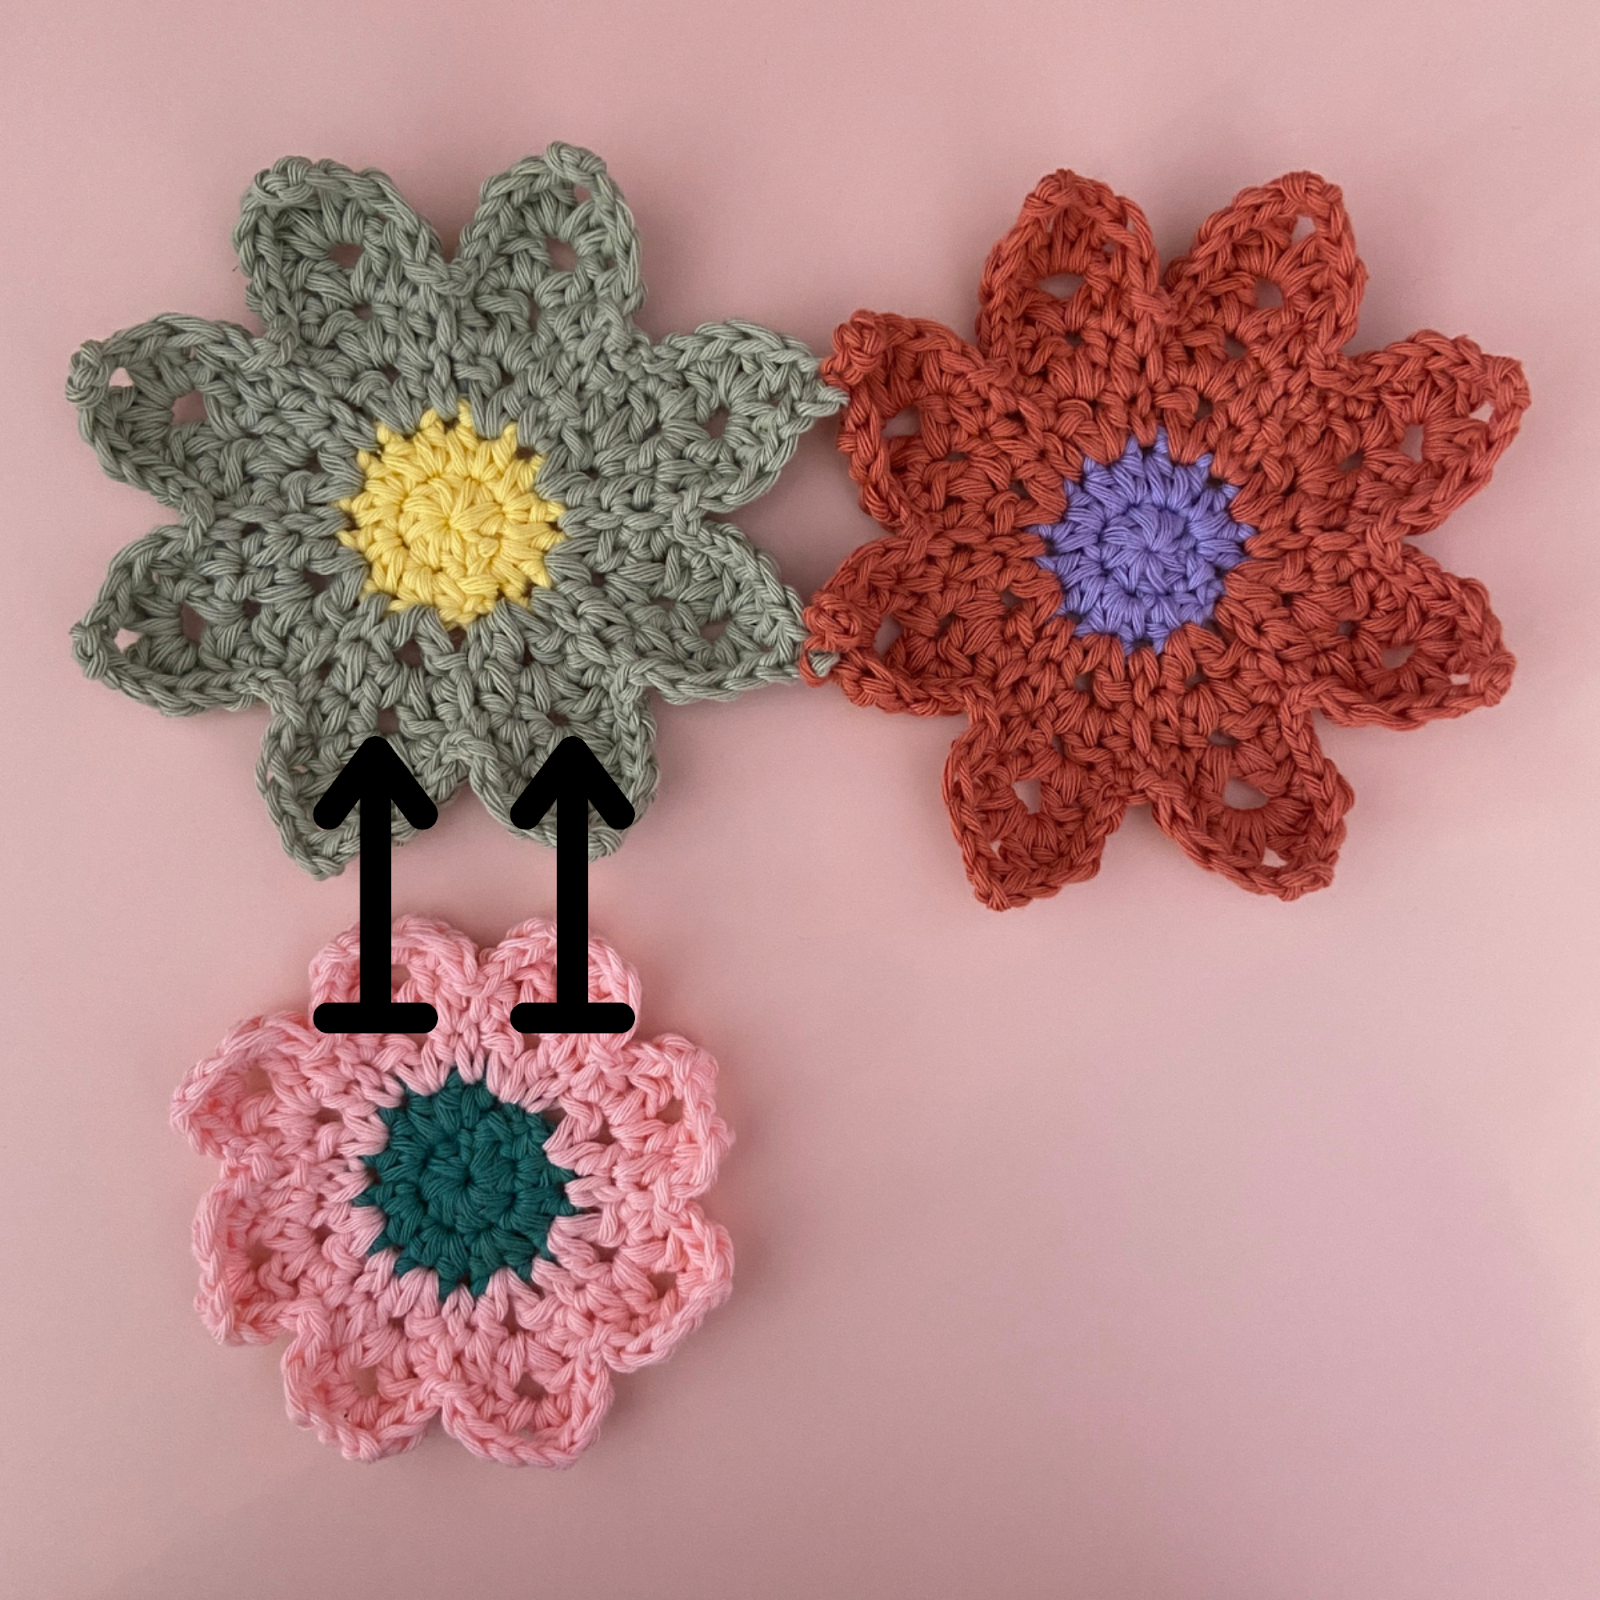
Row 2: Joining the first flower
The first flower is joined to petals 5 and 6 of the flower above it (picture 1). Once again, start crocheting round 6, but stop after the picot stitch of the sixth petal.
Insert the hook into petal 5 of the flower above it and work a ss (picture 2).
Continue crocheting round 6 but stop after the picot st of the next petal.

Insert the hook into petal 6 of the flower above it and work a ss (picture 1). Then, finish round 6 and fasten off (picture 2).
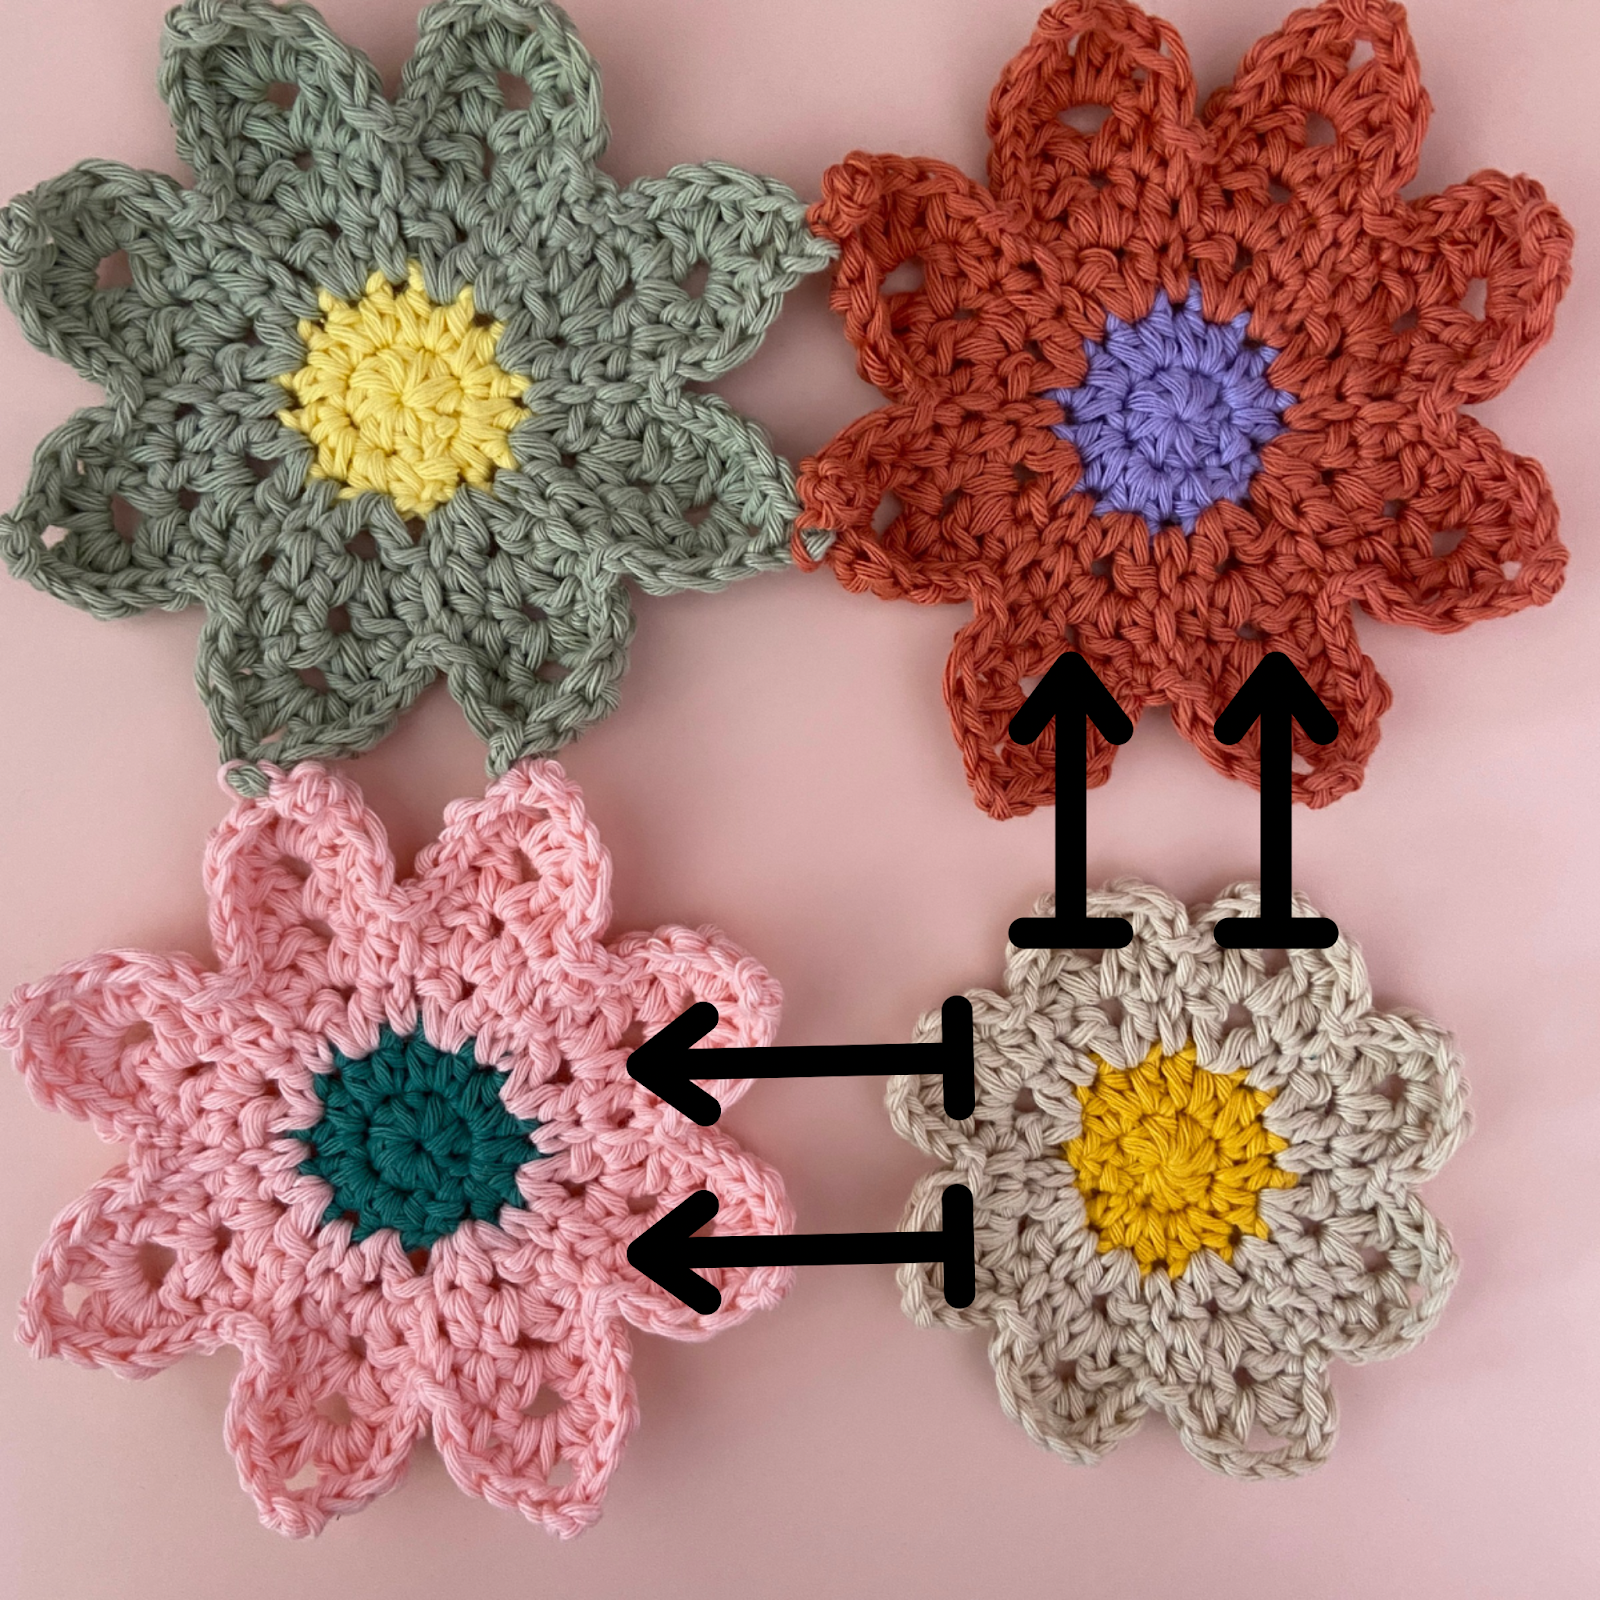
Row 2: Joining the second flower
The next flower is joined to two of the petals of the flower above it and two of the petals of the flower to the left of it. Once again, begin crocheting round 6, but stop after the picot st of fourth petal. Insert the hook into petal 5 of the flower above it and work a ss (picture 2). Continue with round 6, but stop after the picot st of the next petal.
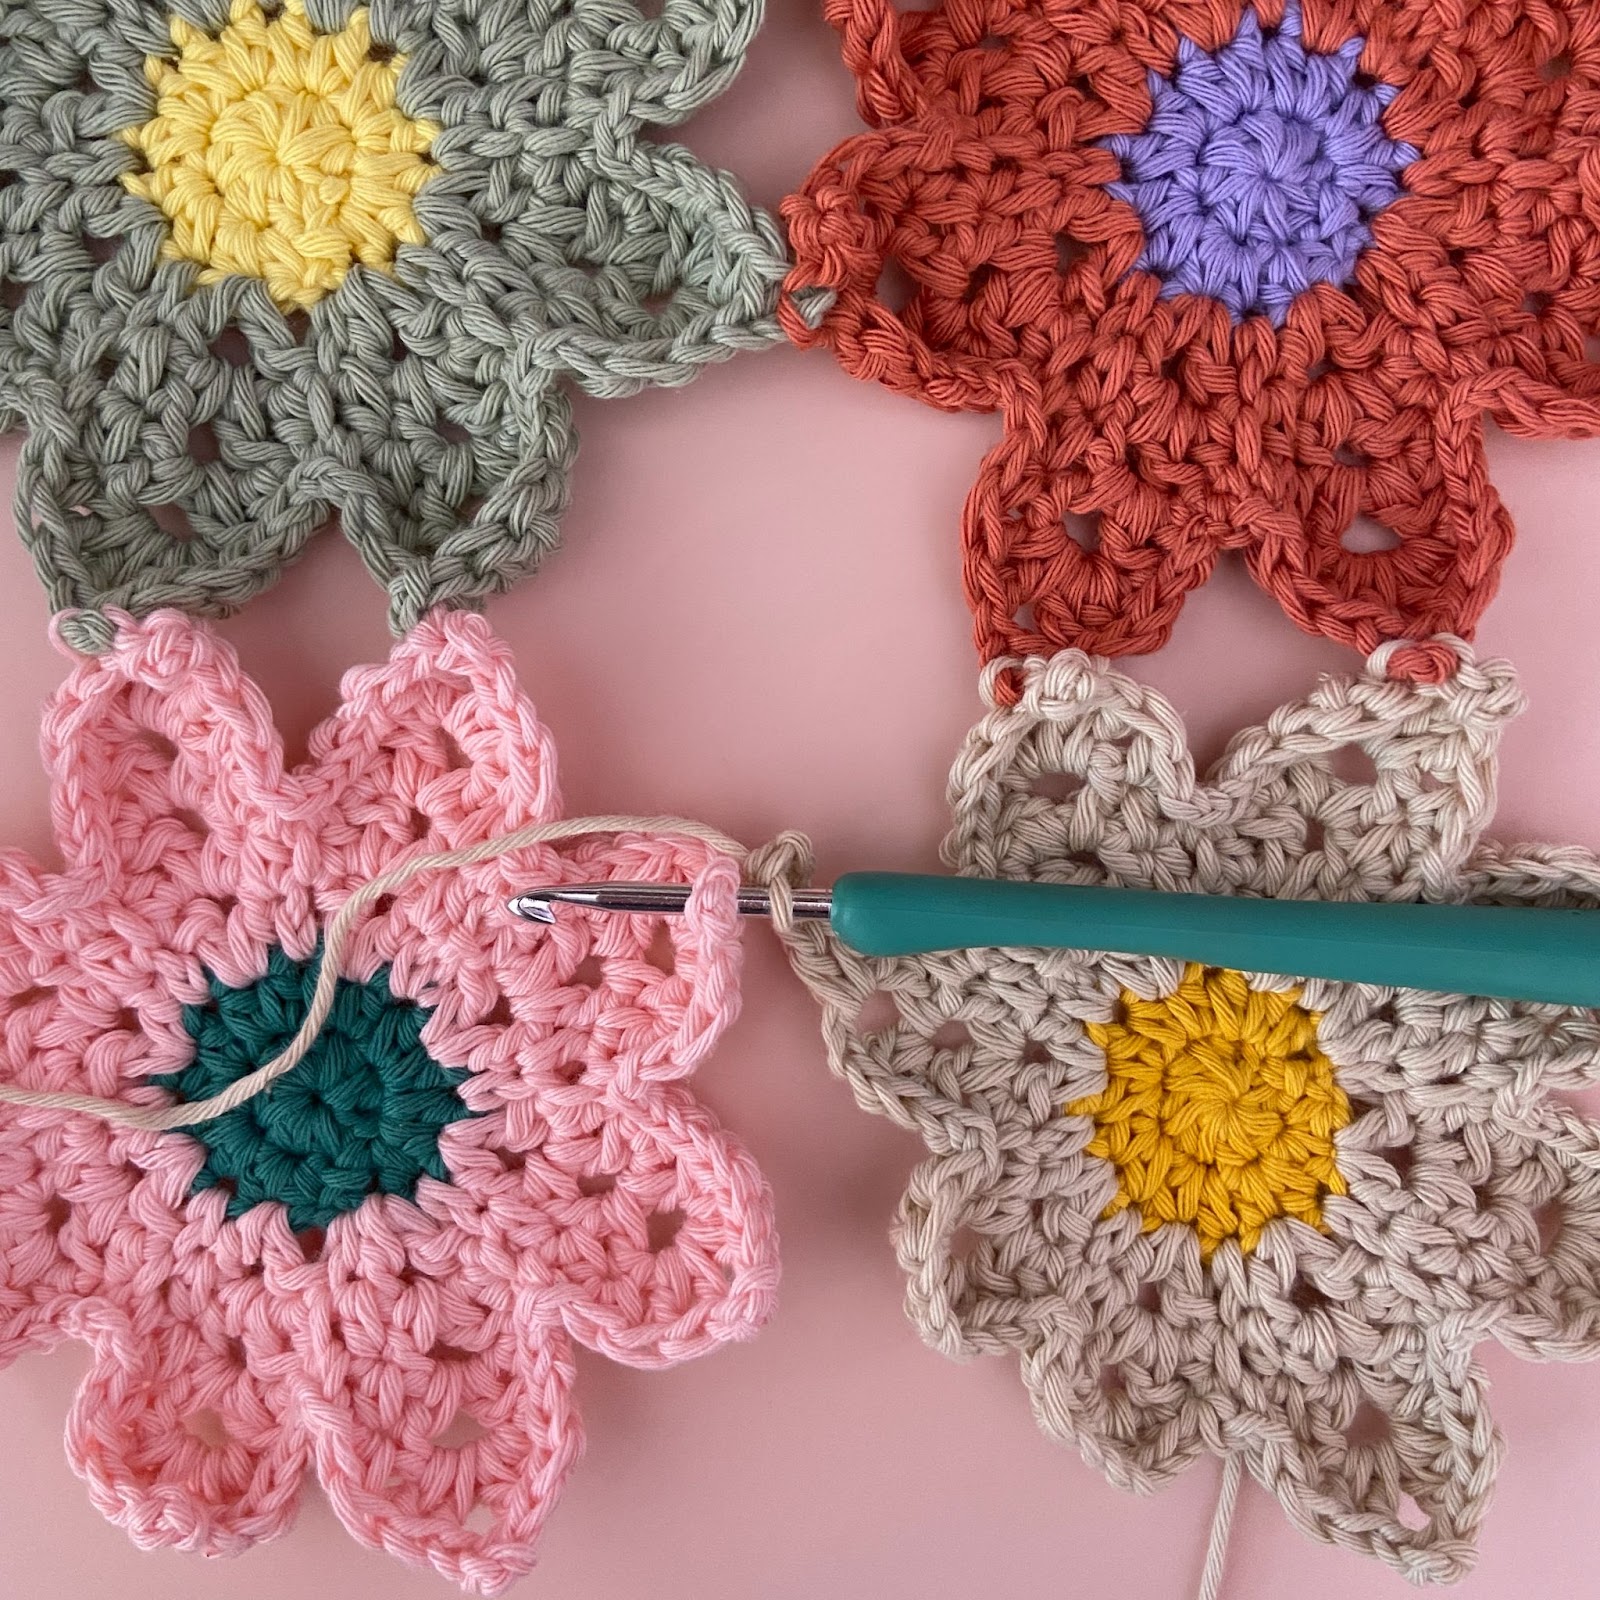
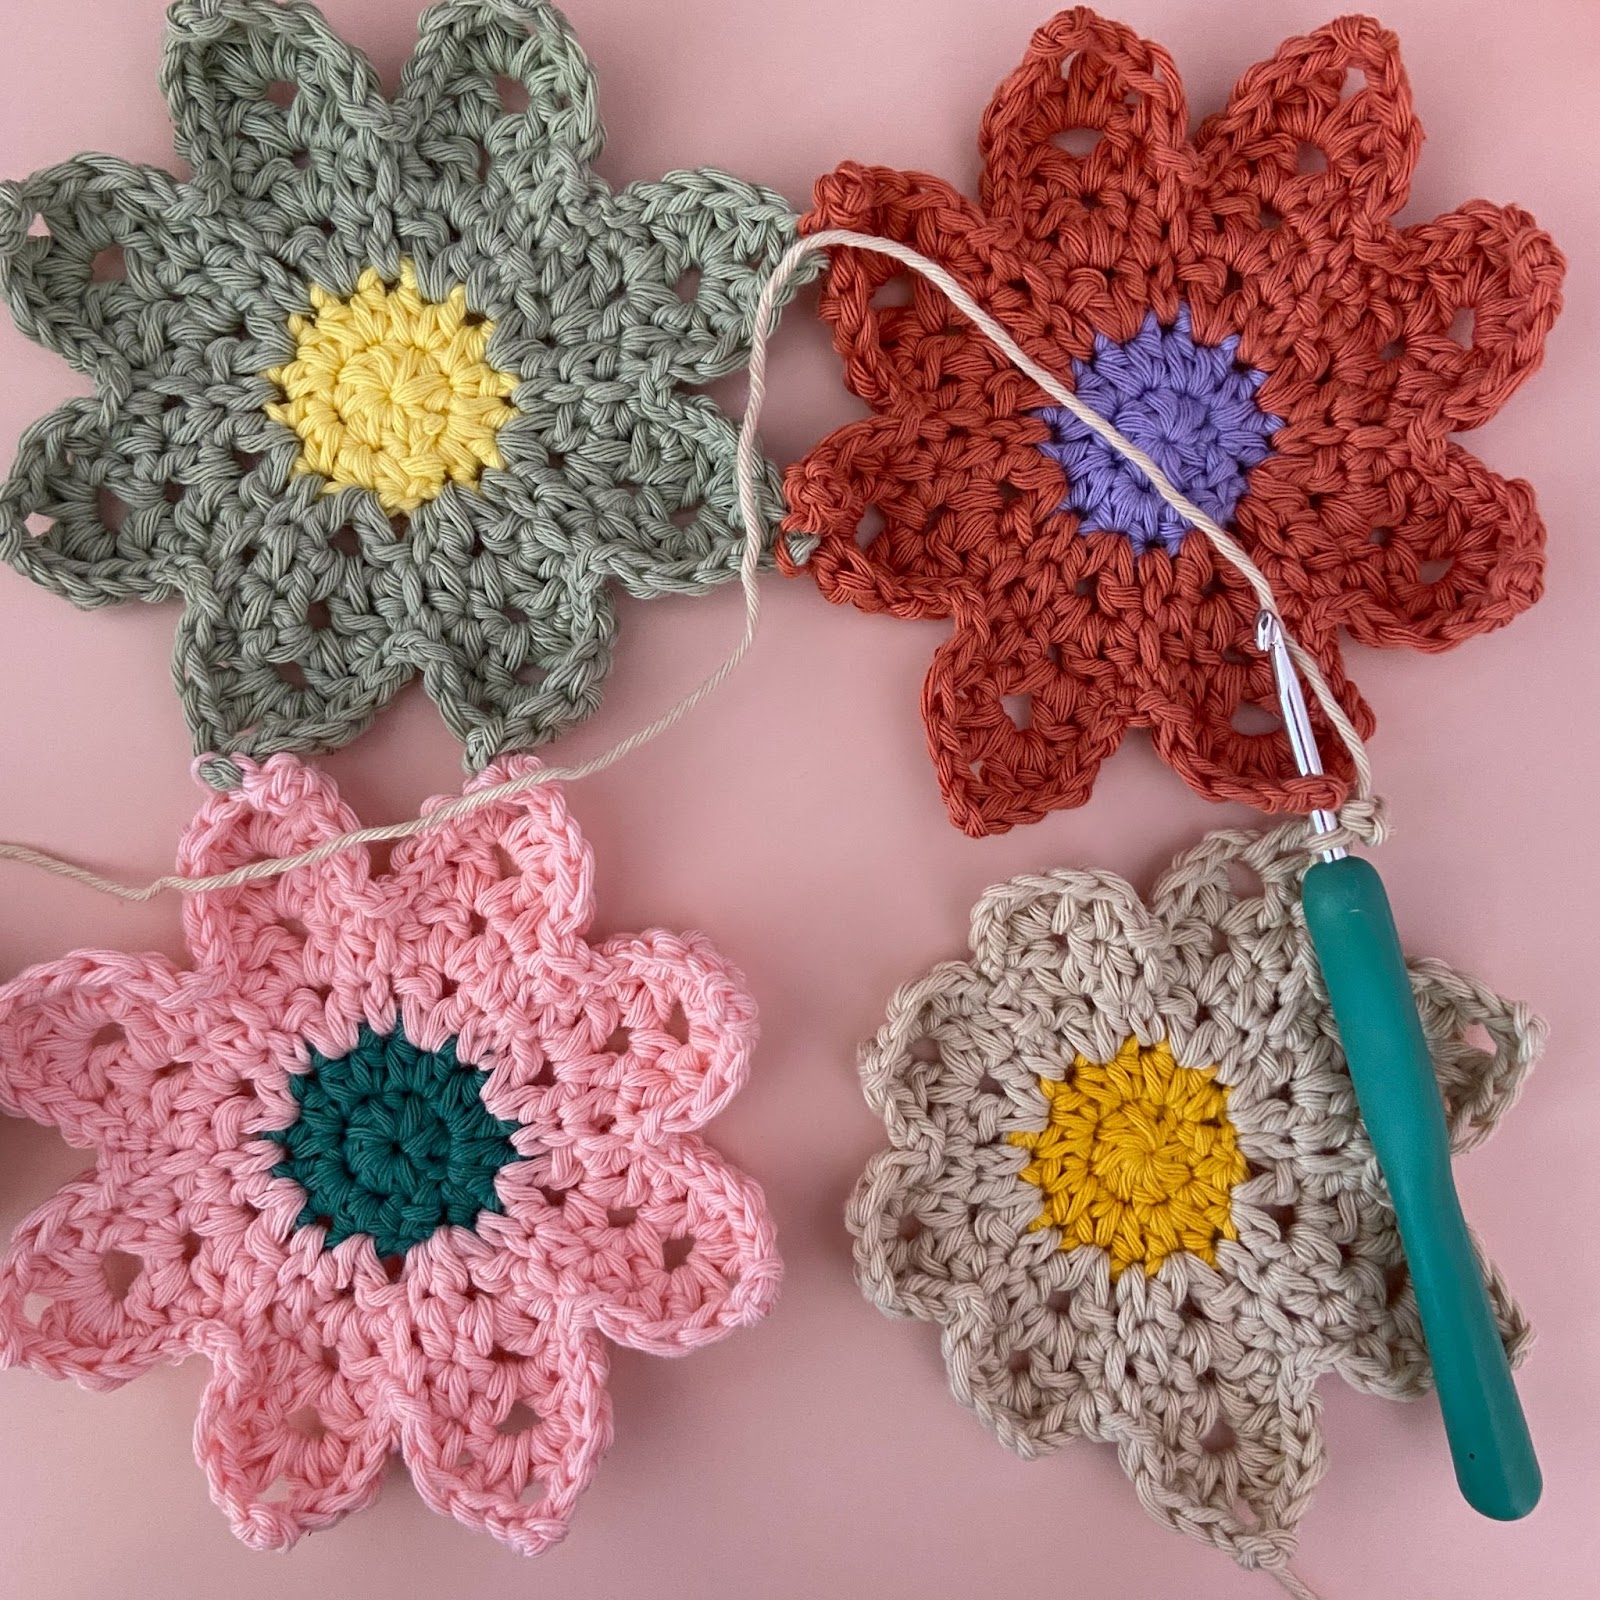
Insert the hook into petal 6 of the flower above it and work a ss (picture 1). Continue with round 6, but stop after the next picot st.
Insert the hook into petal 3 of the flower to the left of it and work a ss (picture 2). Continue with round 6, but stop after the next picot st.
Insert the hook into petal 4 of the flower to the left of it and work a ss (picture 1). Then, finish round 6 and fasten off.
To join the rest of the flowers in this row, follow the same process as joining the second flower.
Rows 3- end
To join the rest of the rows, follow the same process as joining row 2! The first petal is always joined with two petals, and the rest of the flowers are joined with four petals!
I hope you enjoyed this pattern! If you make it and post it on Instagram, make sure you tag me, so I can see it! You can also email me a picture at maggietrunkhill@daisygirlcrochet.com
*If you would like to make the blanket and sell the blanket, please give me (Maggie Trunkhill) credit as the pattern designer. Do not reproduce this pattern in any form without my permission.