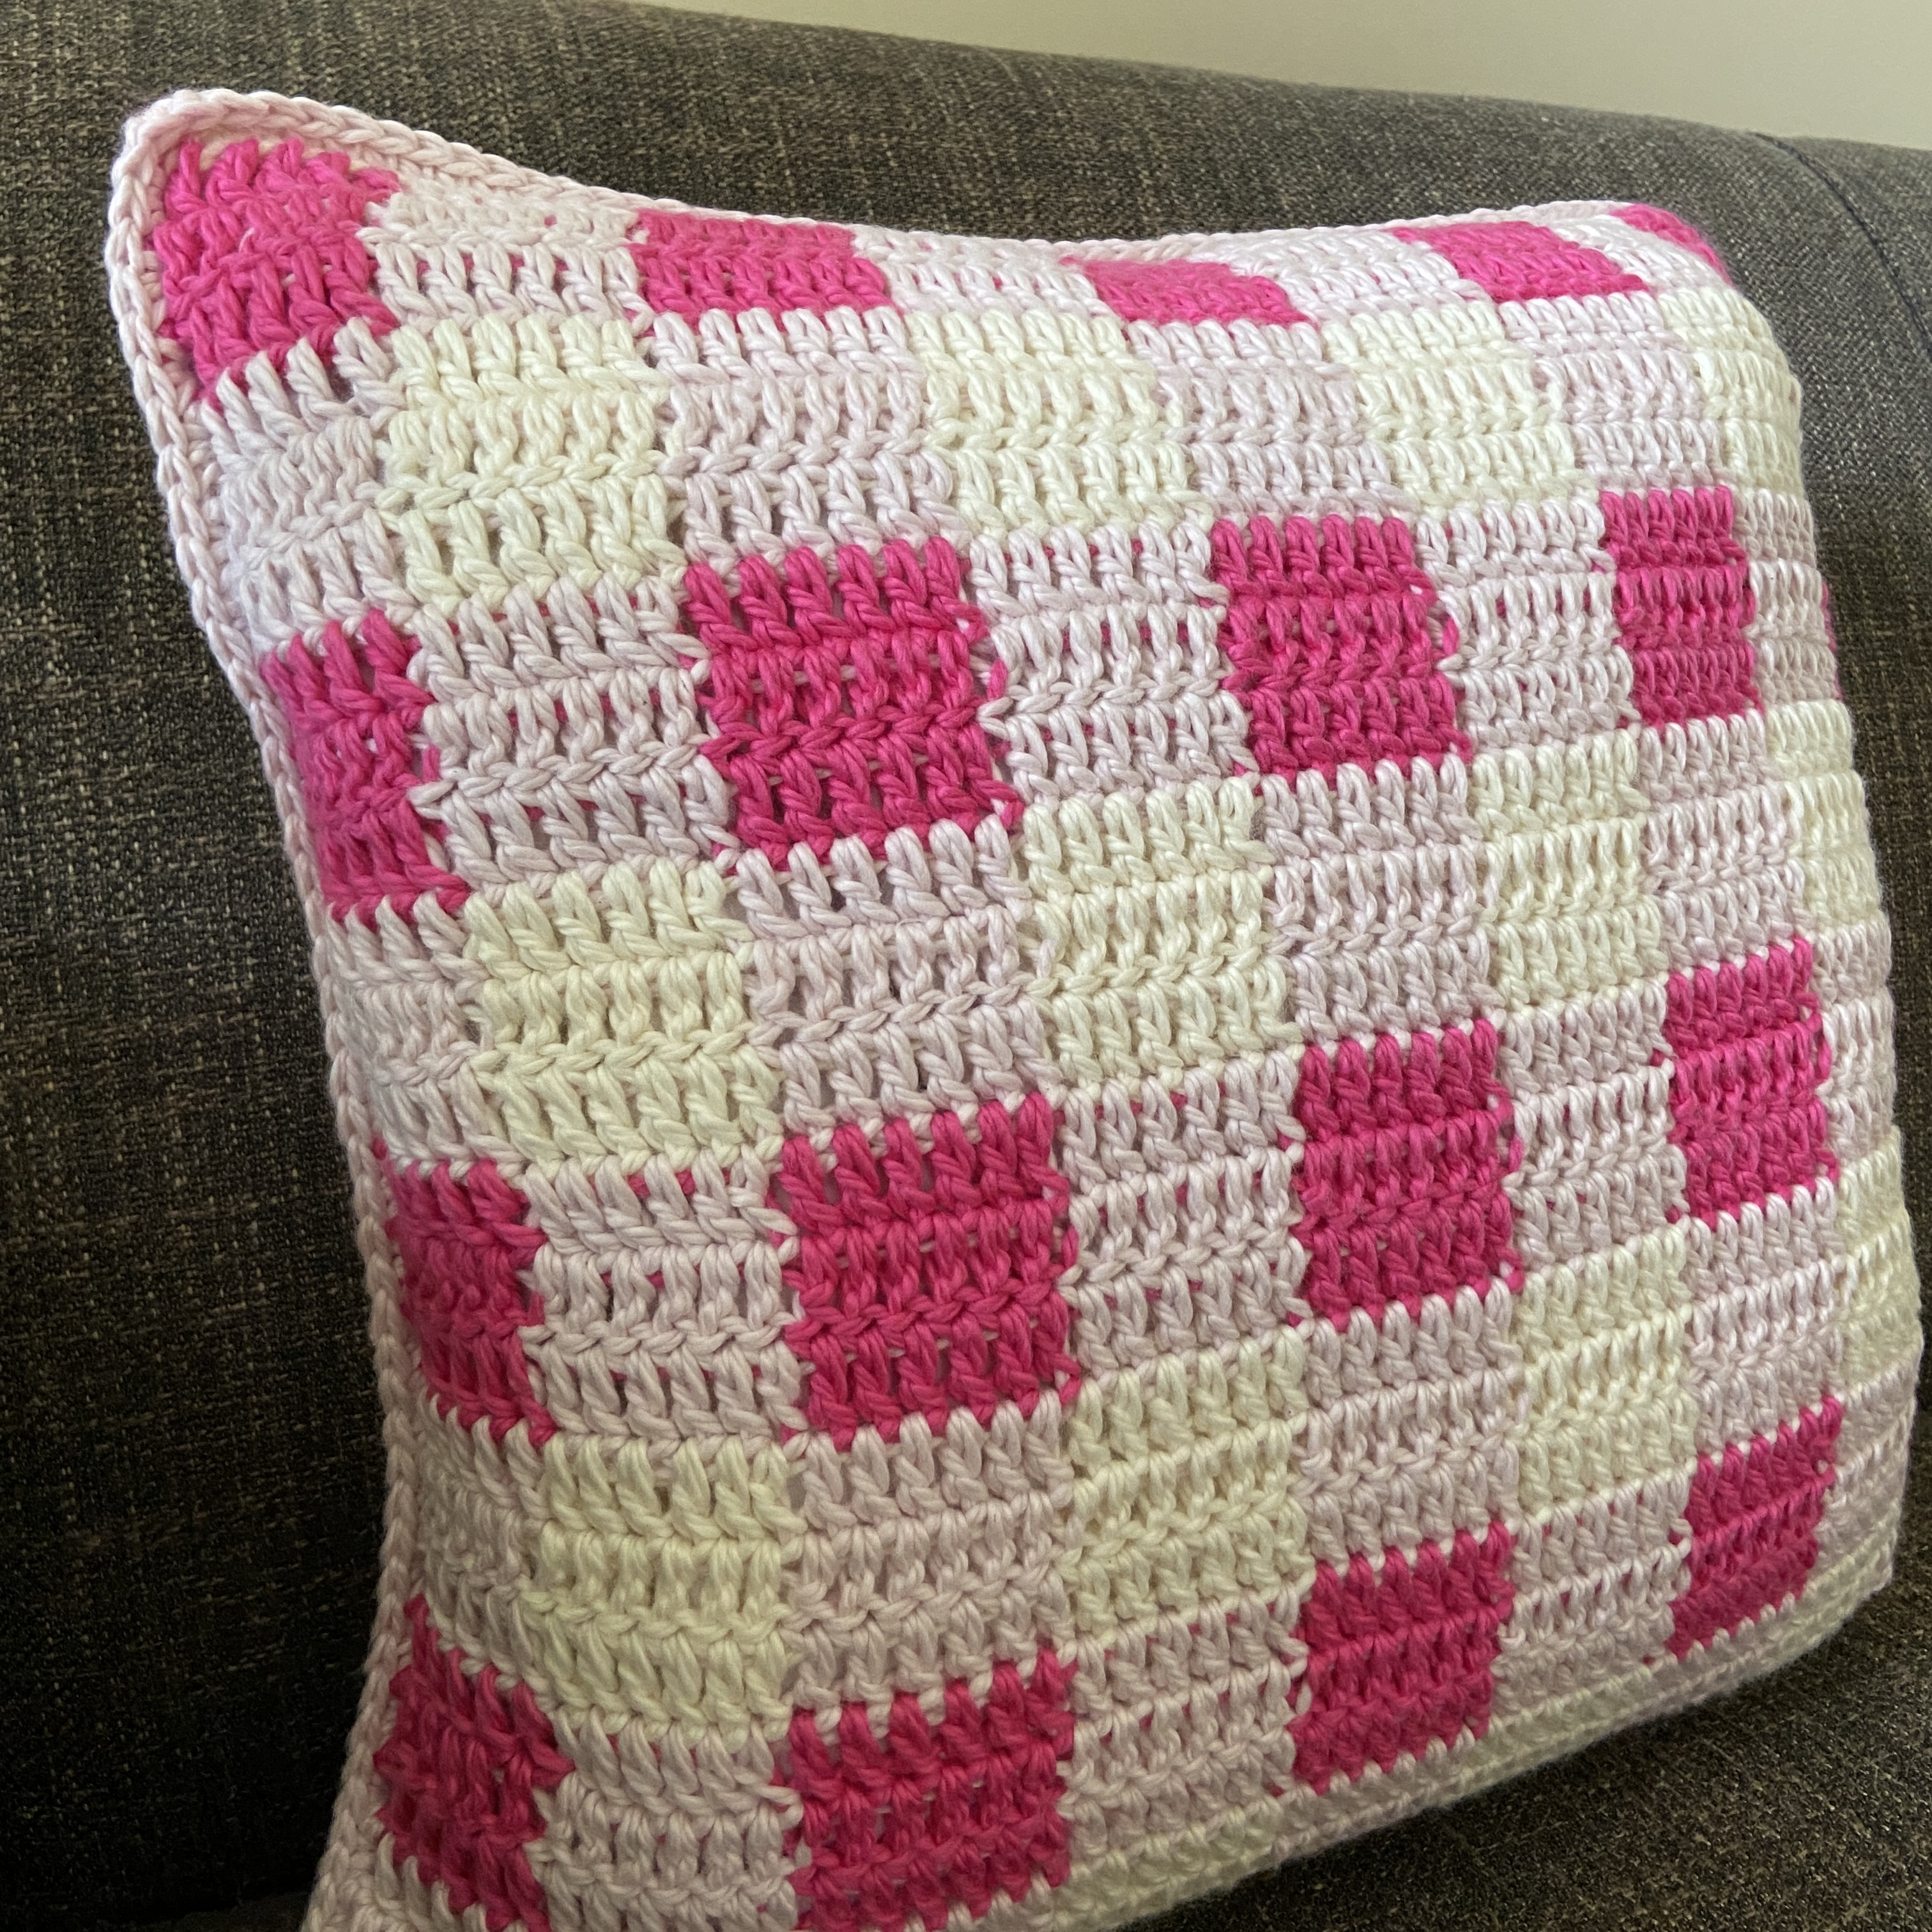
My sister asked me a while ago if I could make her a pink plaid pillow, and I finally had some time to make it! I needed to have it ready for last weekend, and I ended up having to finish it in the morning right before she arrived! This pillow uses tapestry crochet to change color, and there is a photo tutorial to explain this process. There is also a video that demonstrates how to make the front side. If you have never tried tapestry crochet before, don’t worry, I will walk you through the process in the video! This pattern could easily be adjusted to make a blanket by adding more rows. I might make a blanket with it sometime! Enjoy the pattern and let me know if you have any questions (you can email me at maggietrunkhill@daisygirlcrochet.com). I would love to see the pillow that you make, so if you share it on Instagram, please use the hashtag #crochetbydaisygirlcrochet and tag me!
Getting Started
Materials
- 5.5 mm crochet hook
- Scissors and a tapestry needle- for weaving in ends
- 18 by 18 in (46 by 46 cm) square pillow insert
- 5 buttons (2 cm in diameter)
- Worsted weight yarn
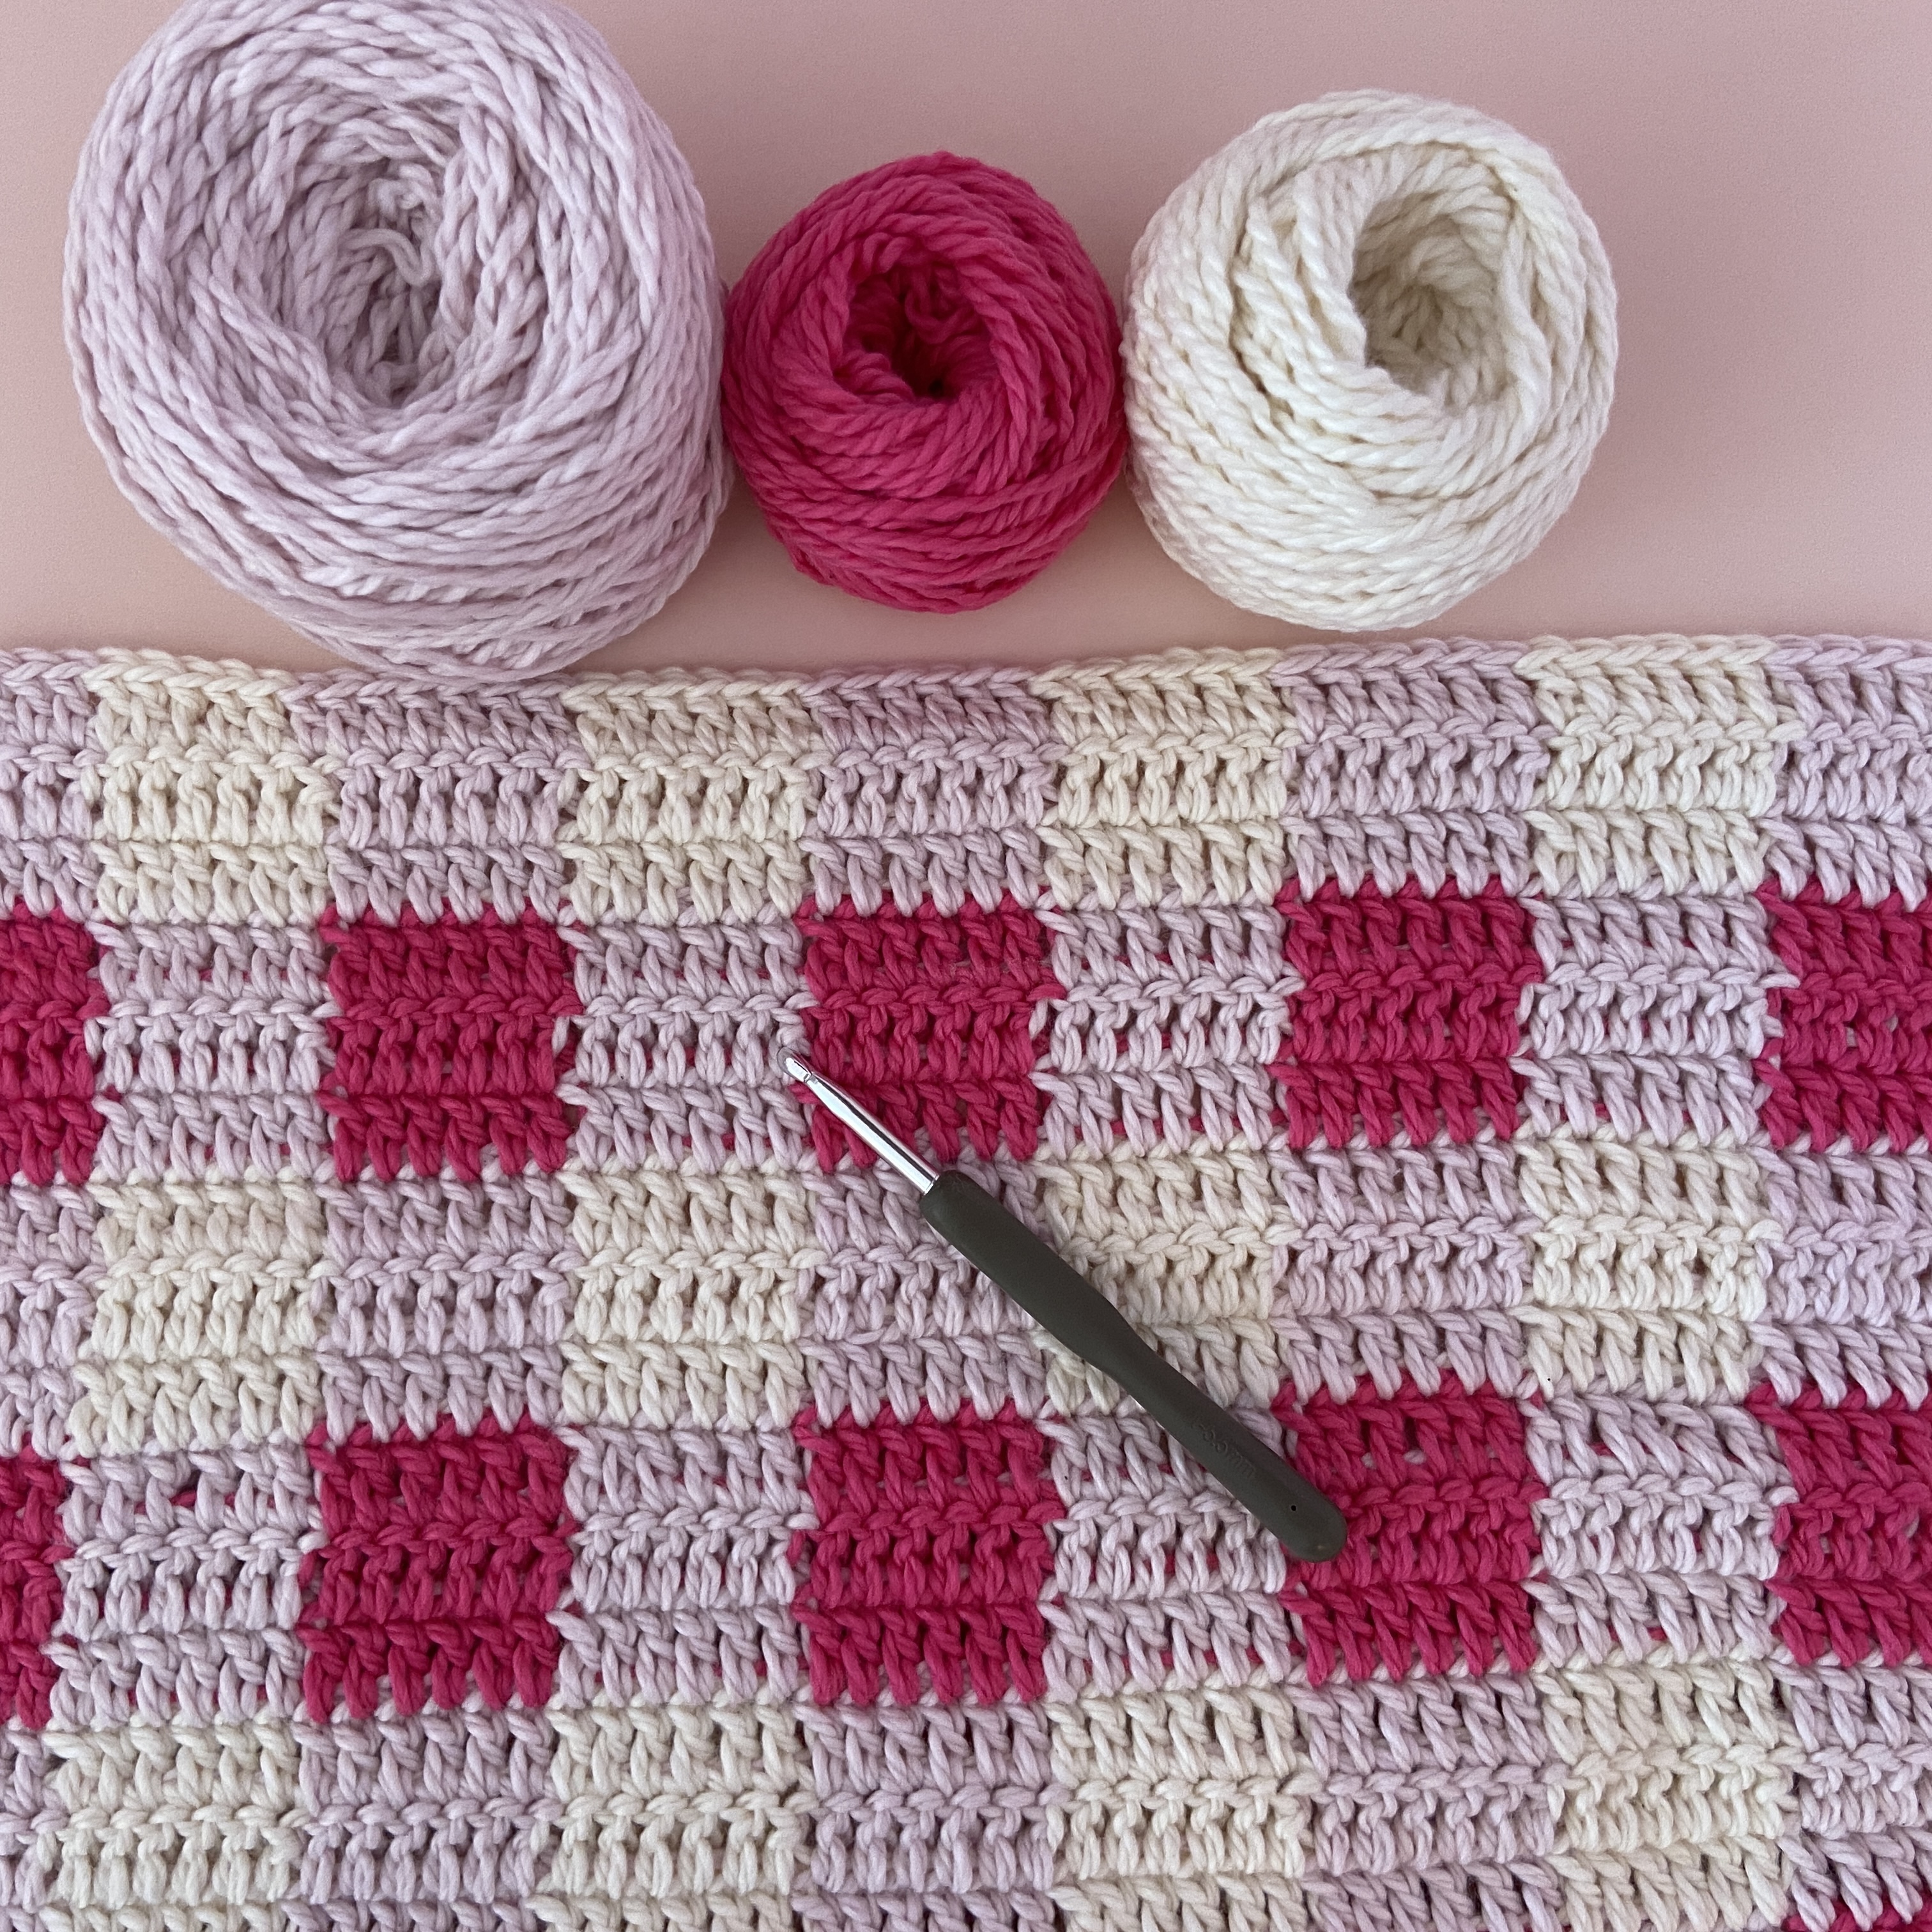
Yarn I Used
Blue Sky Fibers Organic Cotton (100% organic cotton; 100 g/ 150 yd skeins)
- 2 shell (light pink)
- 1 lotus (hot pink)
- 1 bone (cream)
Yarn Substitution
Any medium/worsted weight yarn will work well for this pillow! If you are using a different yarn, after you make the front side, measure it. Then, it will fit a pillow insert that is 1-2 inches larger than it!
Gauge and Size
12 sts and 6 rows = 4 inches (10 cm)
The gauge provided is measured with double crochet sts worked in rows.
Pillows should always be 1-2 inches smaller than the insert, so they are stretched over the insert. Hence, the front and the back of the pillow should both be about 16.25 by 16.25 inches (41.3 by 41.3 cm).
Abbreviations: In U.S. Terms (Translated to UK in parentheses)
st= stitch
sp= space
ch= chain (chain)
ss= slip stitch (slip stitch)
sc= single crochet (double crochet)
s-dc= starting double crochet (starting treble crochet)
dc= double crochet (treble)
blo = back loop only
cc = change color
[ ] indicate that the sts are worked into the same space
{ } indicate that the the sts are repeated later in the pattern
* also indicates that stitches are repeated later in the pattern
Starting Stitches
Most of the rows of this pillow are composed of double crochet stitches. You can ch 3 to count as the first double crochet stitch of a row, but I like to use standing double crochet stitches as they blend in with the other stitches nicer. I demonstrate these stitches in the video if you have never tried them before! If you are a beginner, you might prefer to ch 3.
How to Change Color and the Video
Each section of checkers consists of three rows. The pillow has 9 checkers horizontally and eight vertically. I alternated between sections of hot pink and light pink and sections of light pink and cream.
Video
The video for this pattern demonstrates how to make the front side:
I have also written out the instructions for changing color here with some pictures; however, if this is your first time trying tapestry crochet, the video might be more helpful!
Things to remember
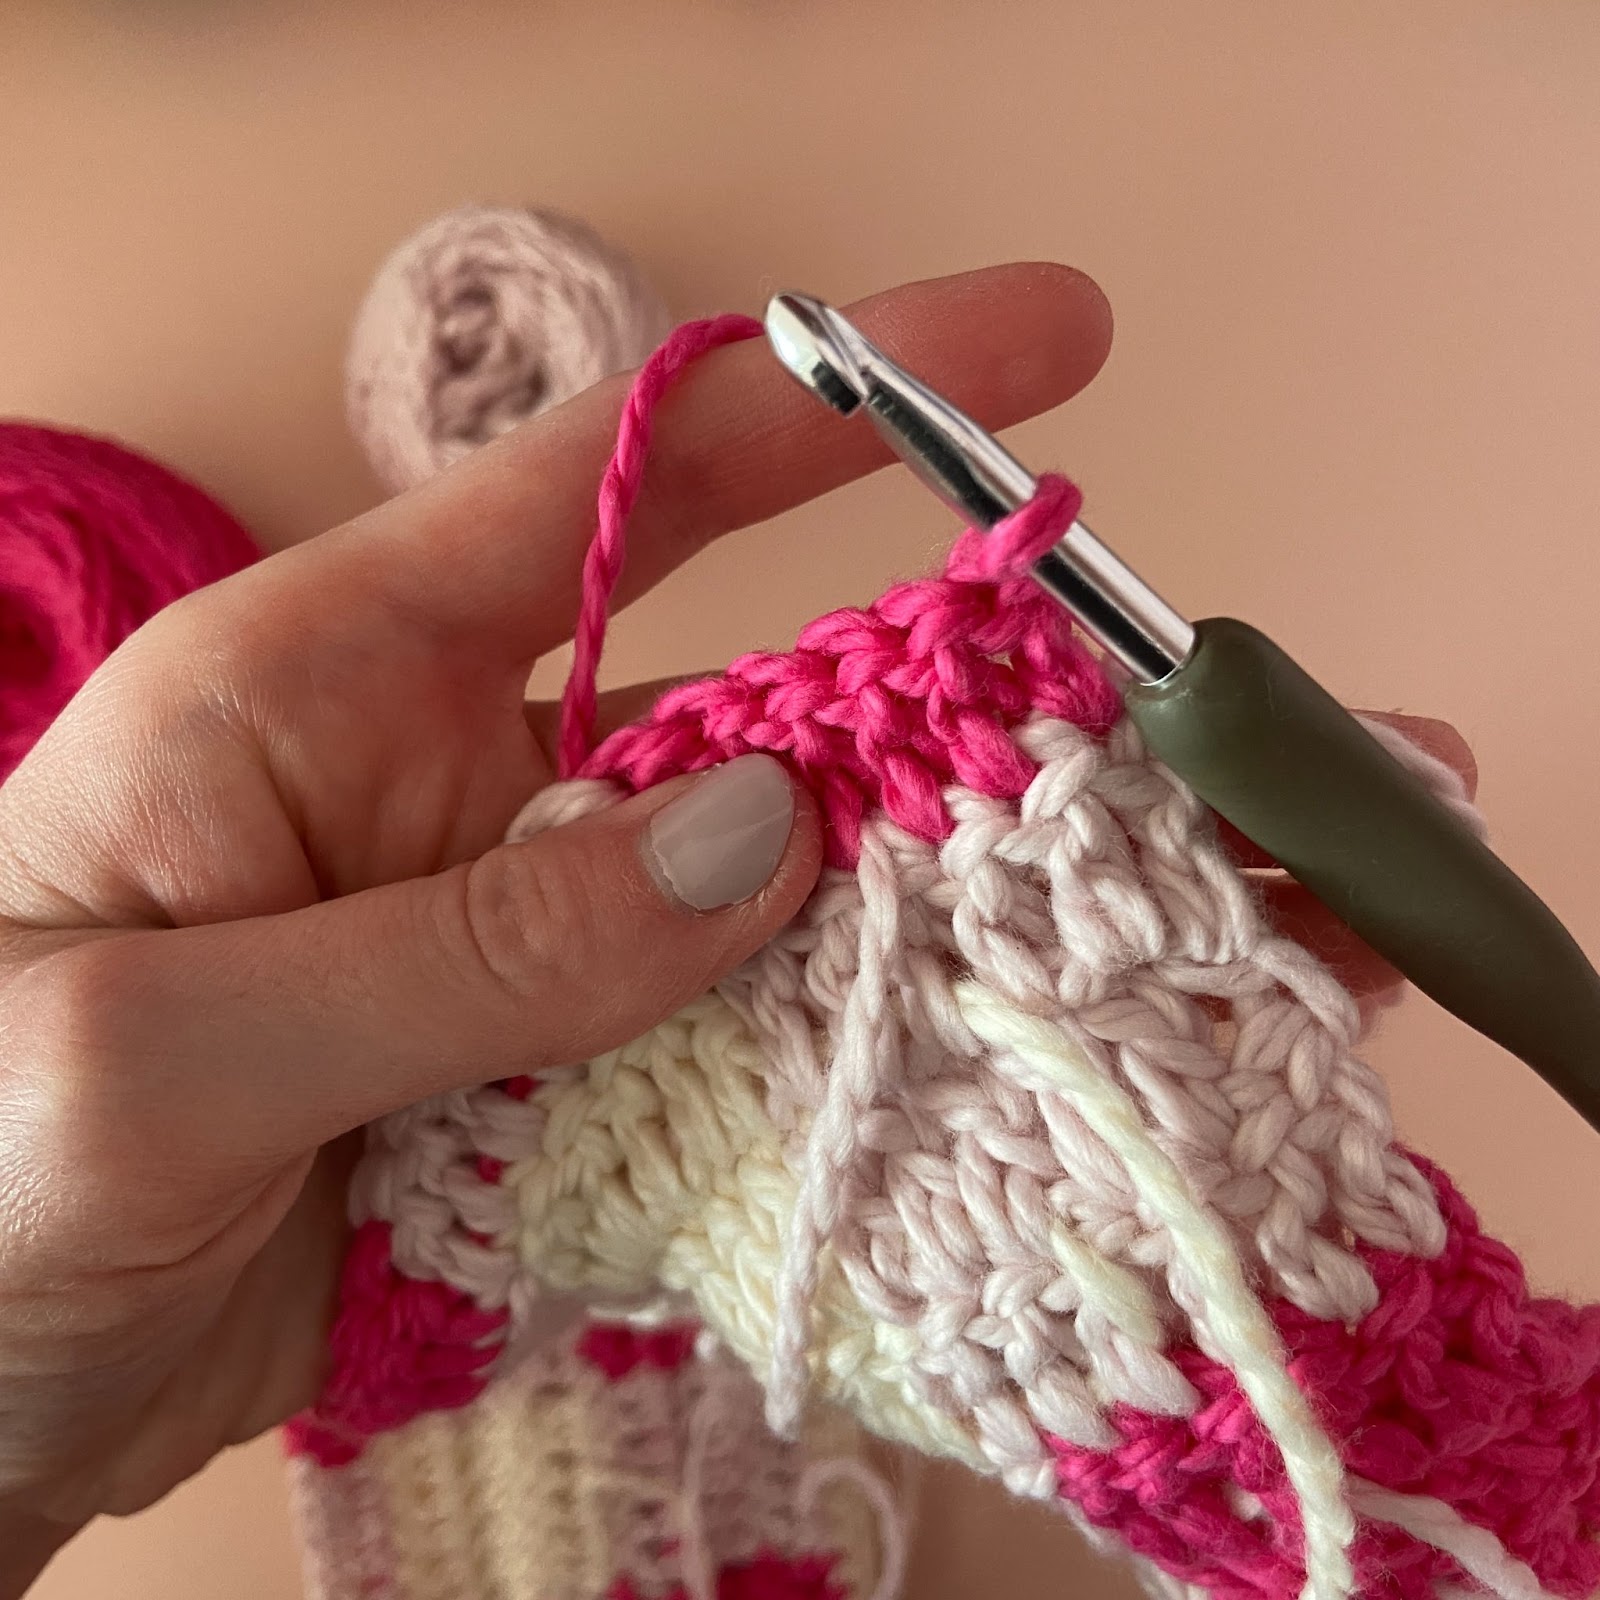
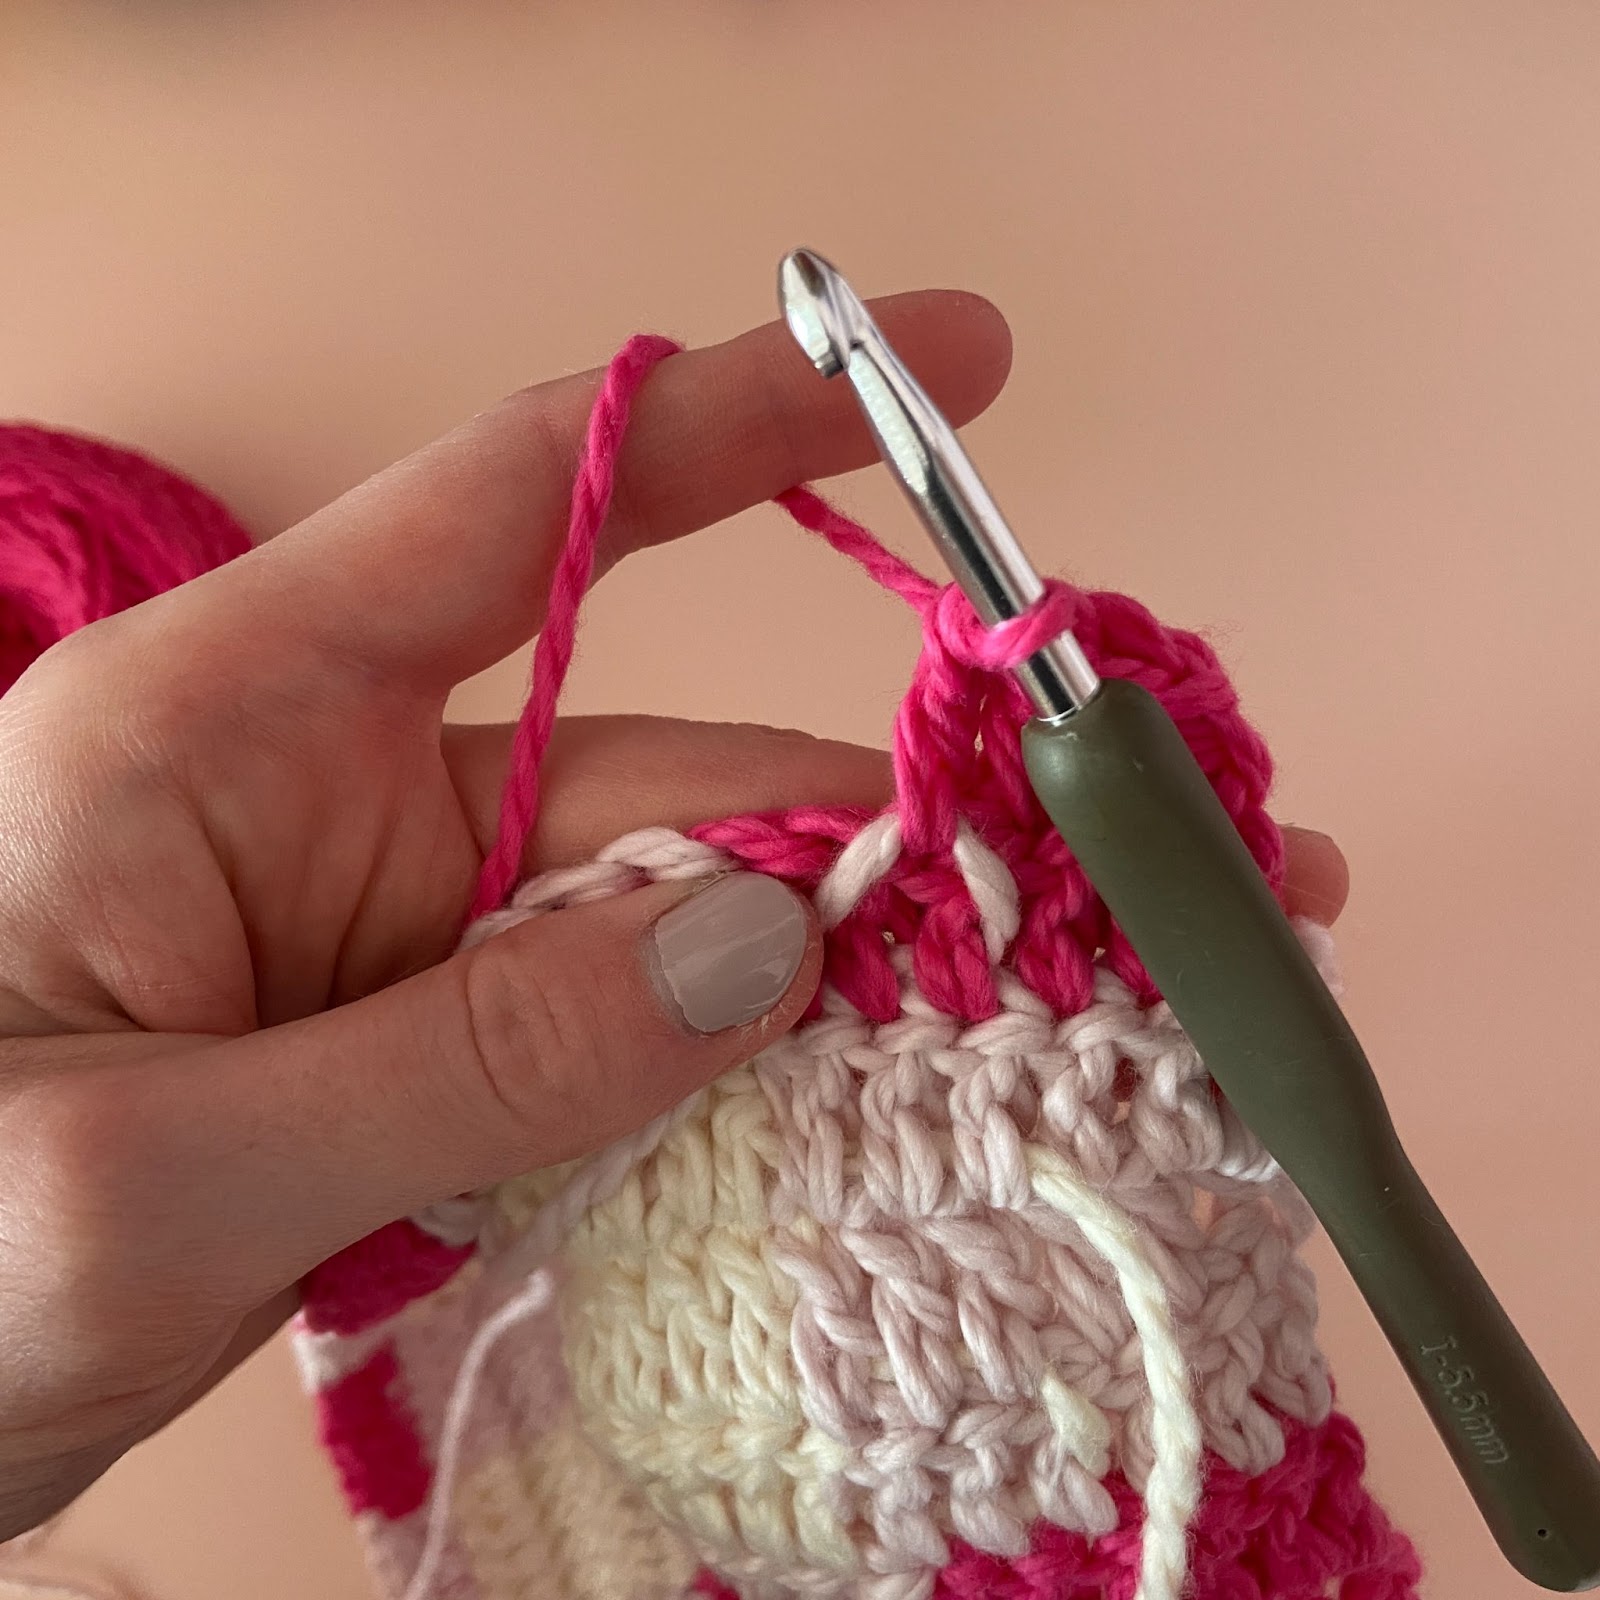
- During the last dc st before the pattern reads “cc to” use the new color to complete the final yarn over, pull through
- During rows 1 and 3, hold the carried yarn against the back of the work. During row 2, hold the yarn against the front of the work.
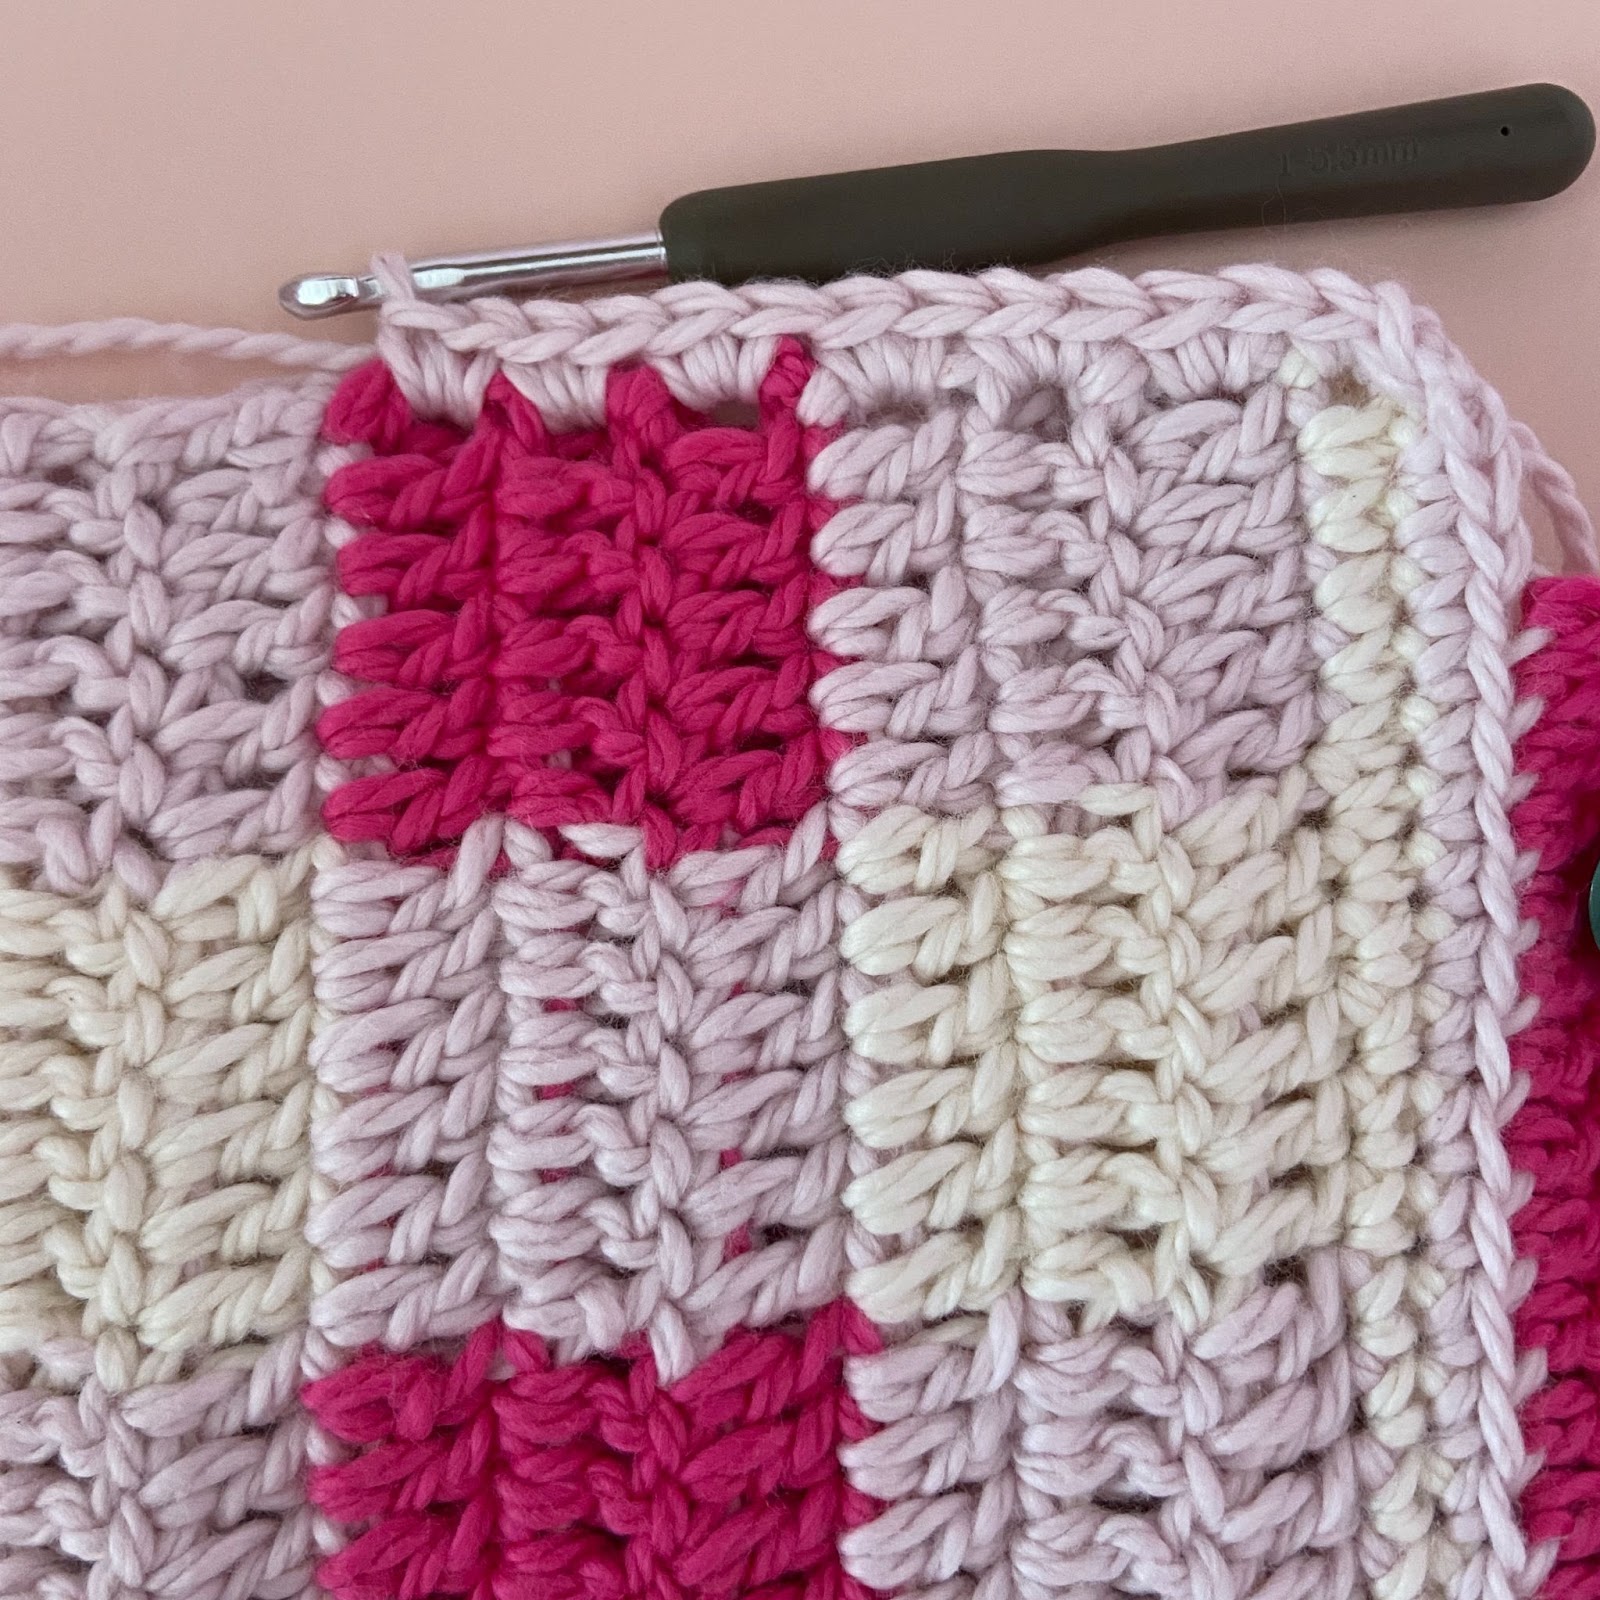
- The right side of the work is the side of the work that is facing you when you are crocheting rows 1 and 3. On the other side, you might be able to see the color changes.
- Drop the carried yarn before the last three sts of the row and then pick it back up after the first 3 sts of the next row.
- Make sure when you change color, do not pull on the yarn. It may look loose, but that is ok. If you pull on it, the rows will slowly become tighter and the edges of the work will not be straight.
Here is the detailed version with pictures:
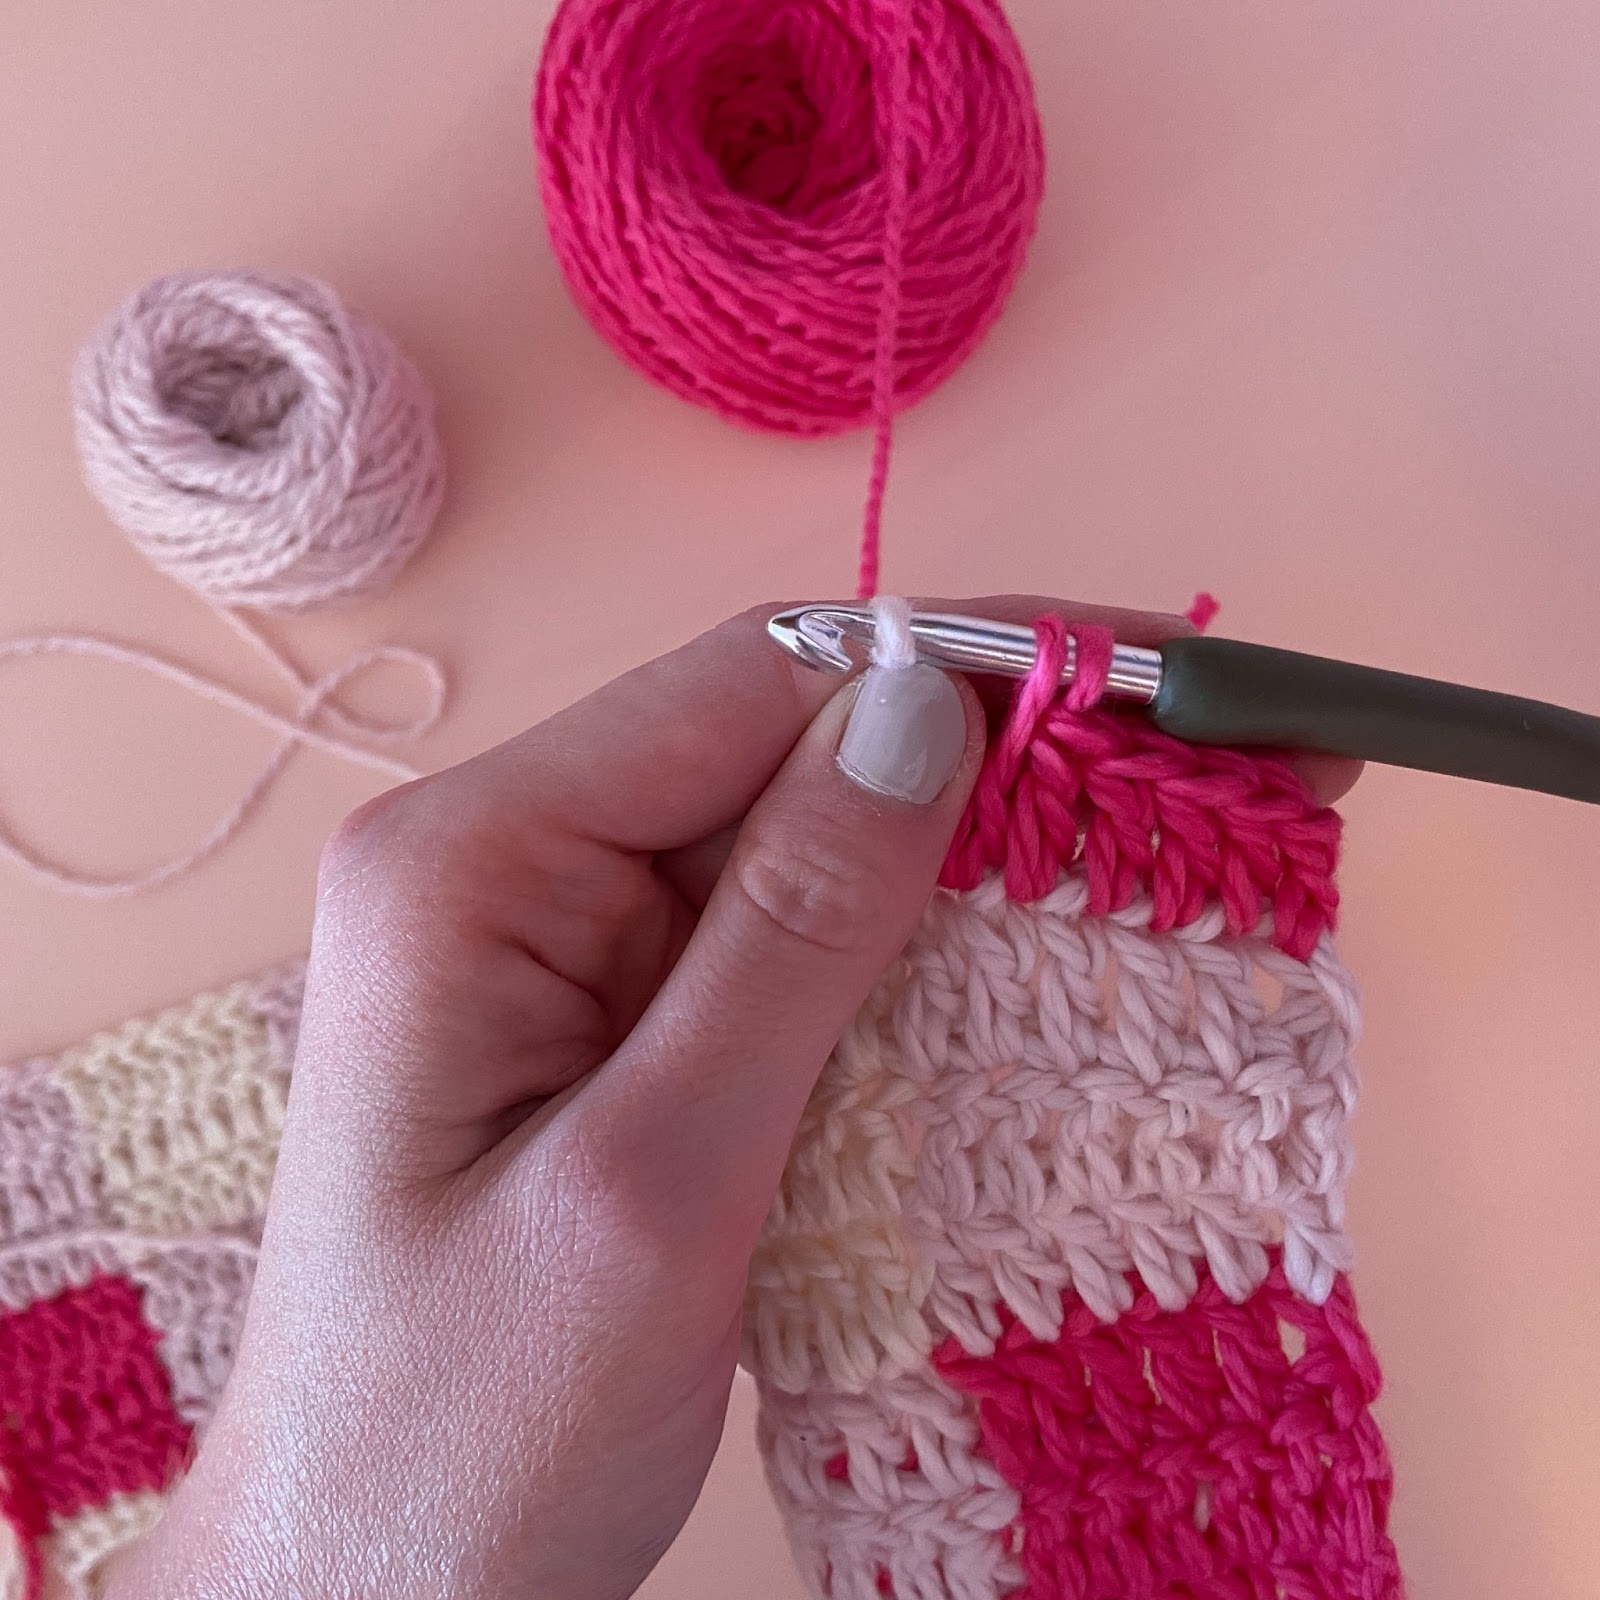
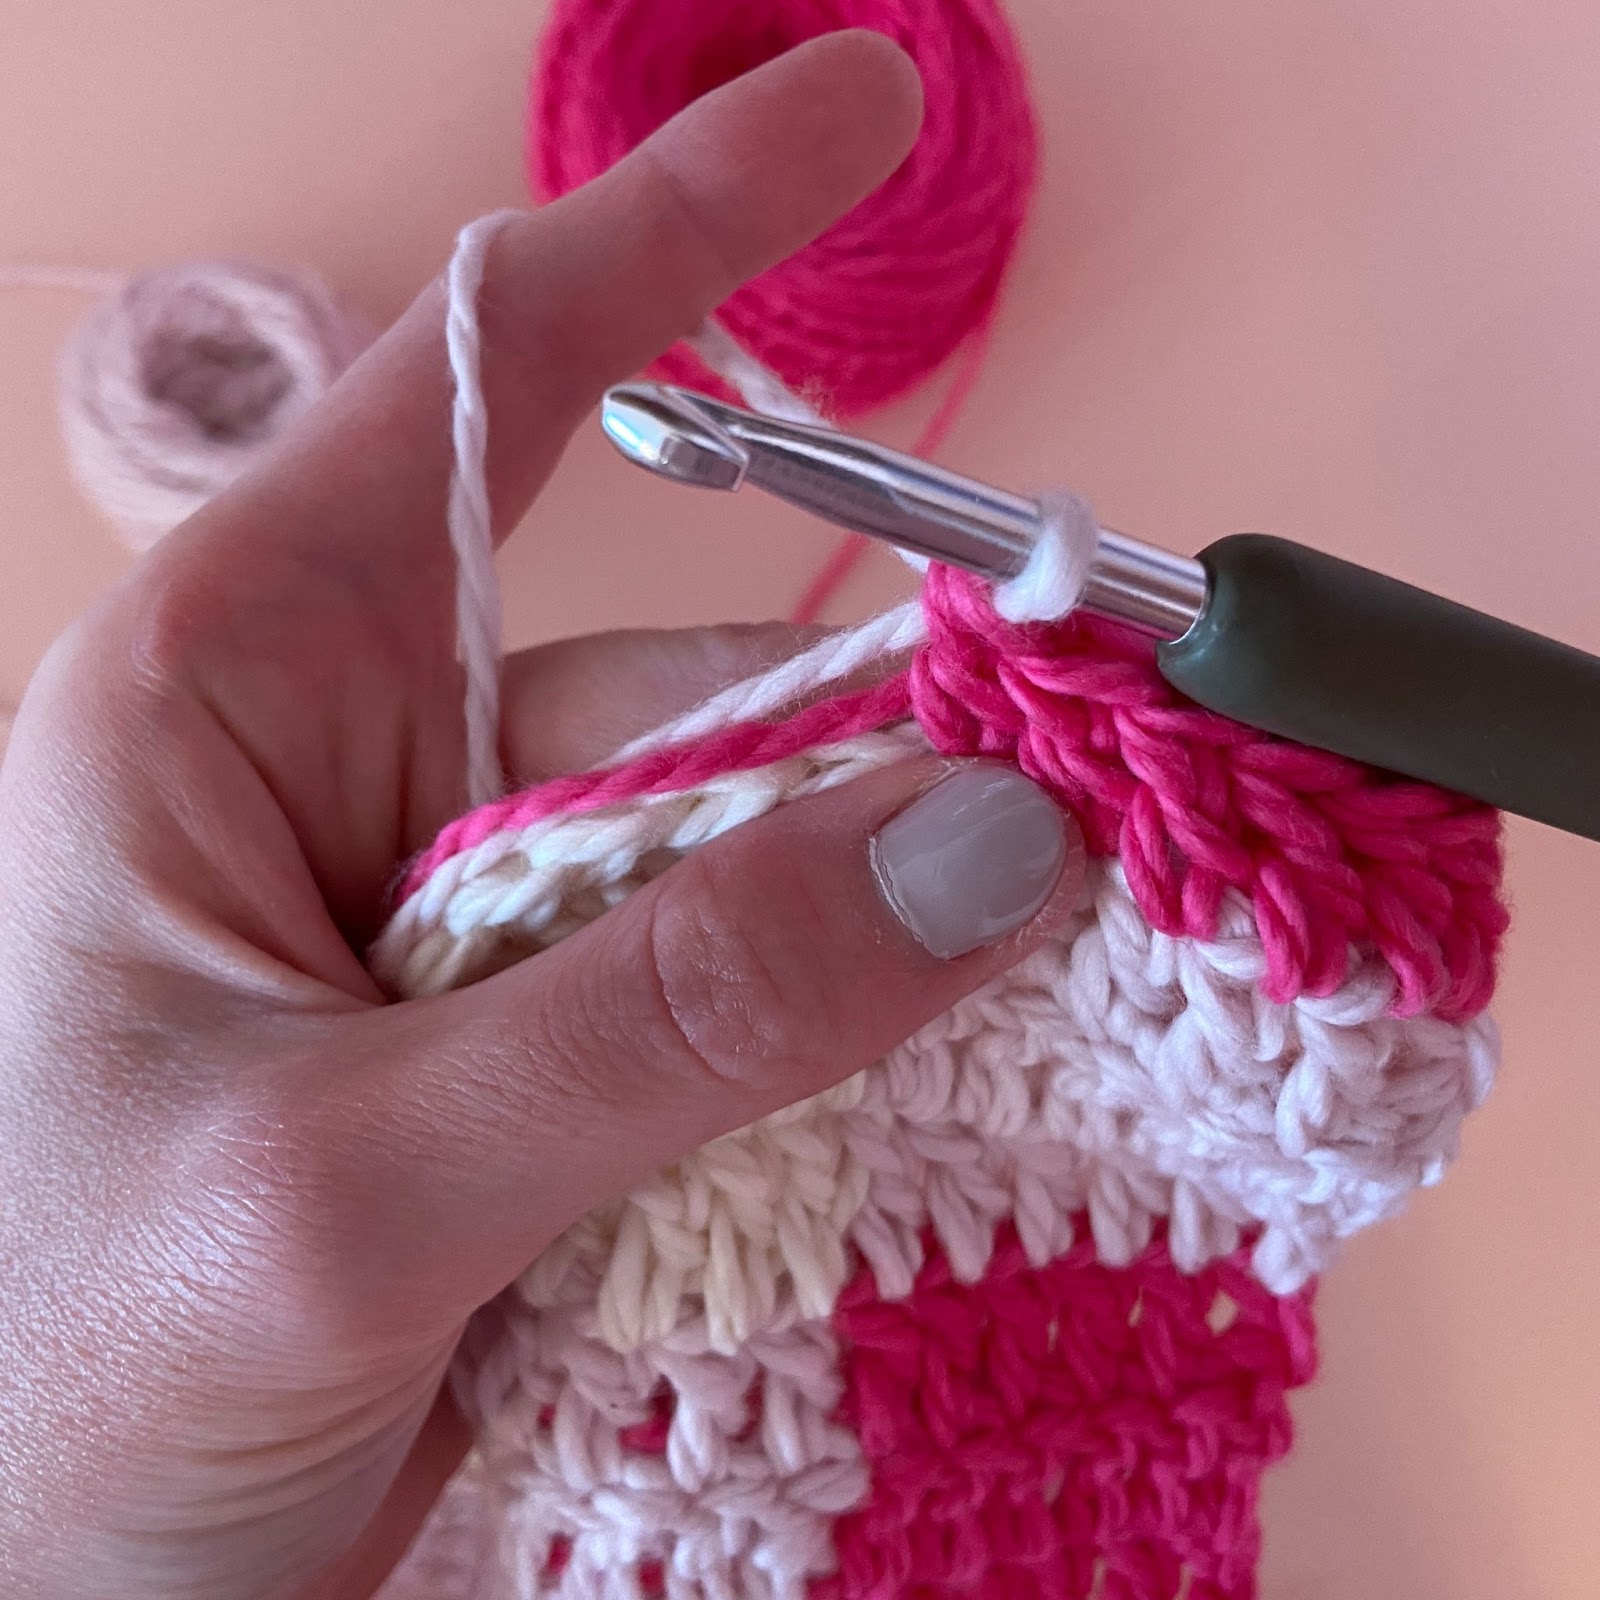
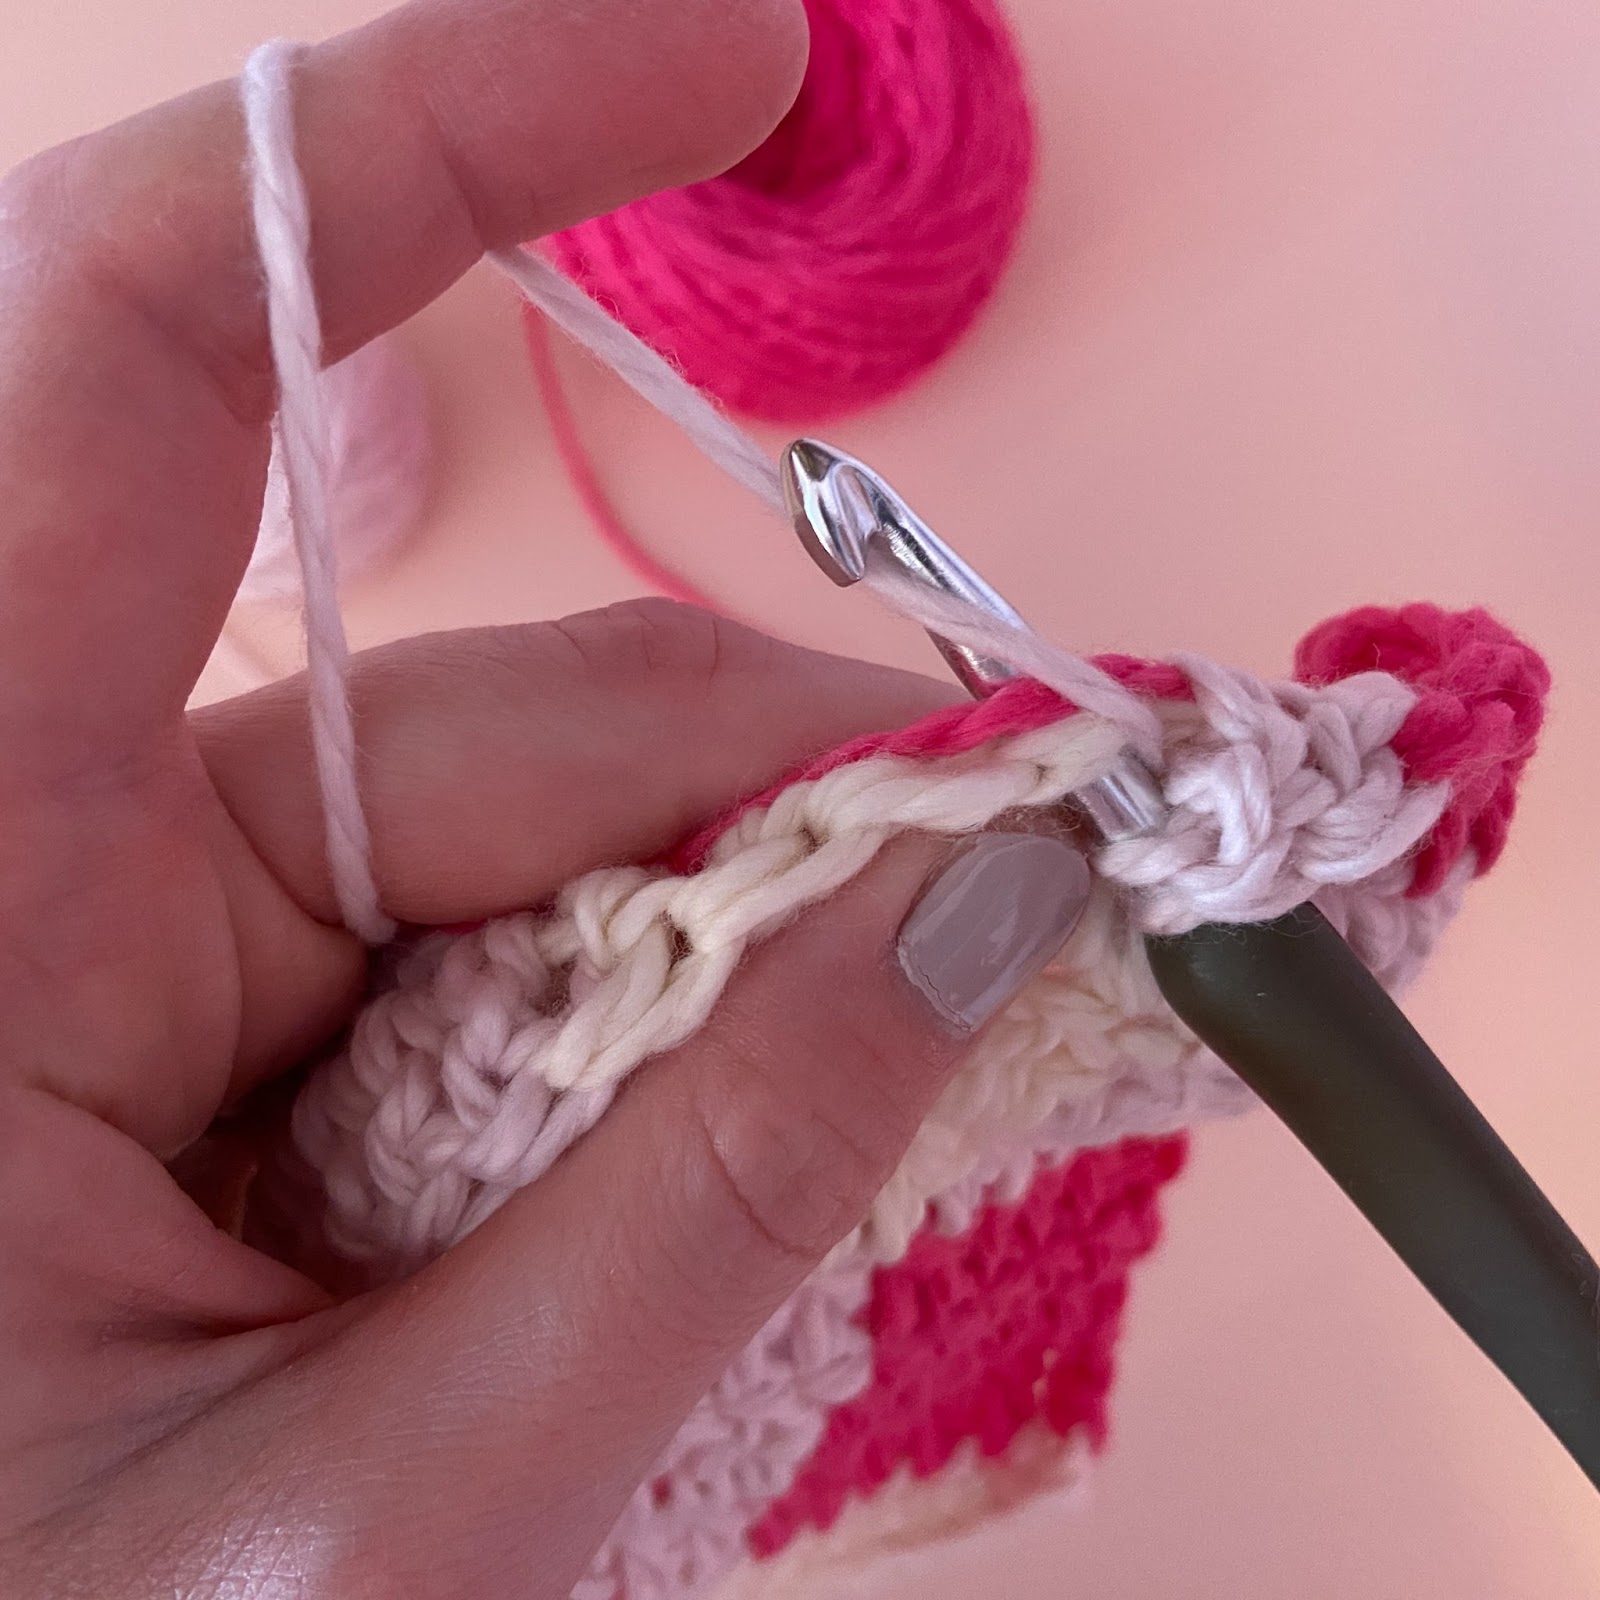
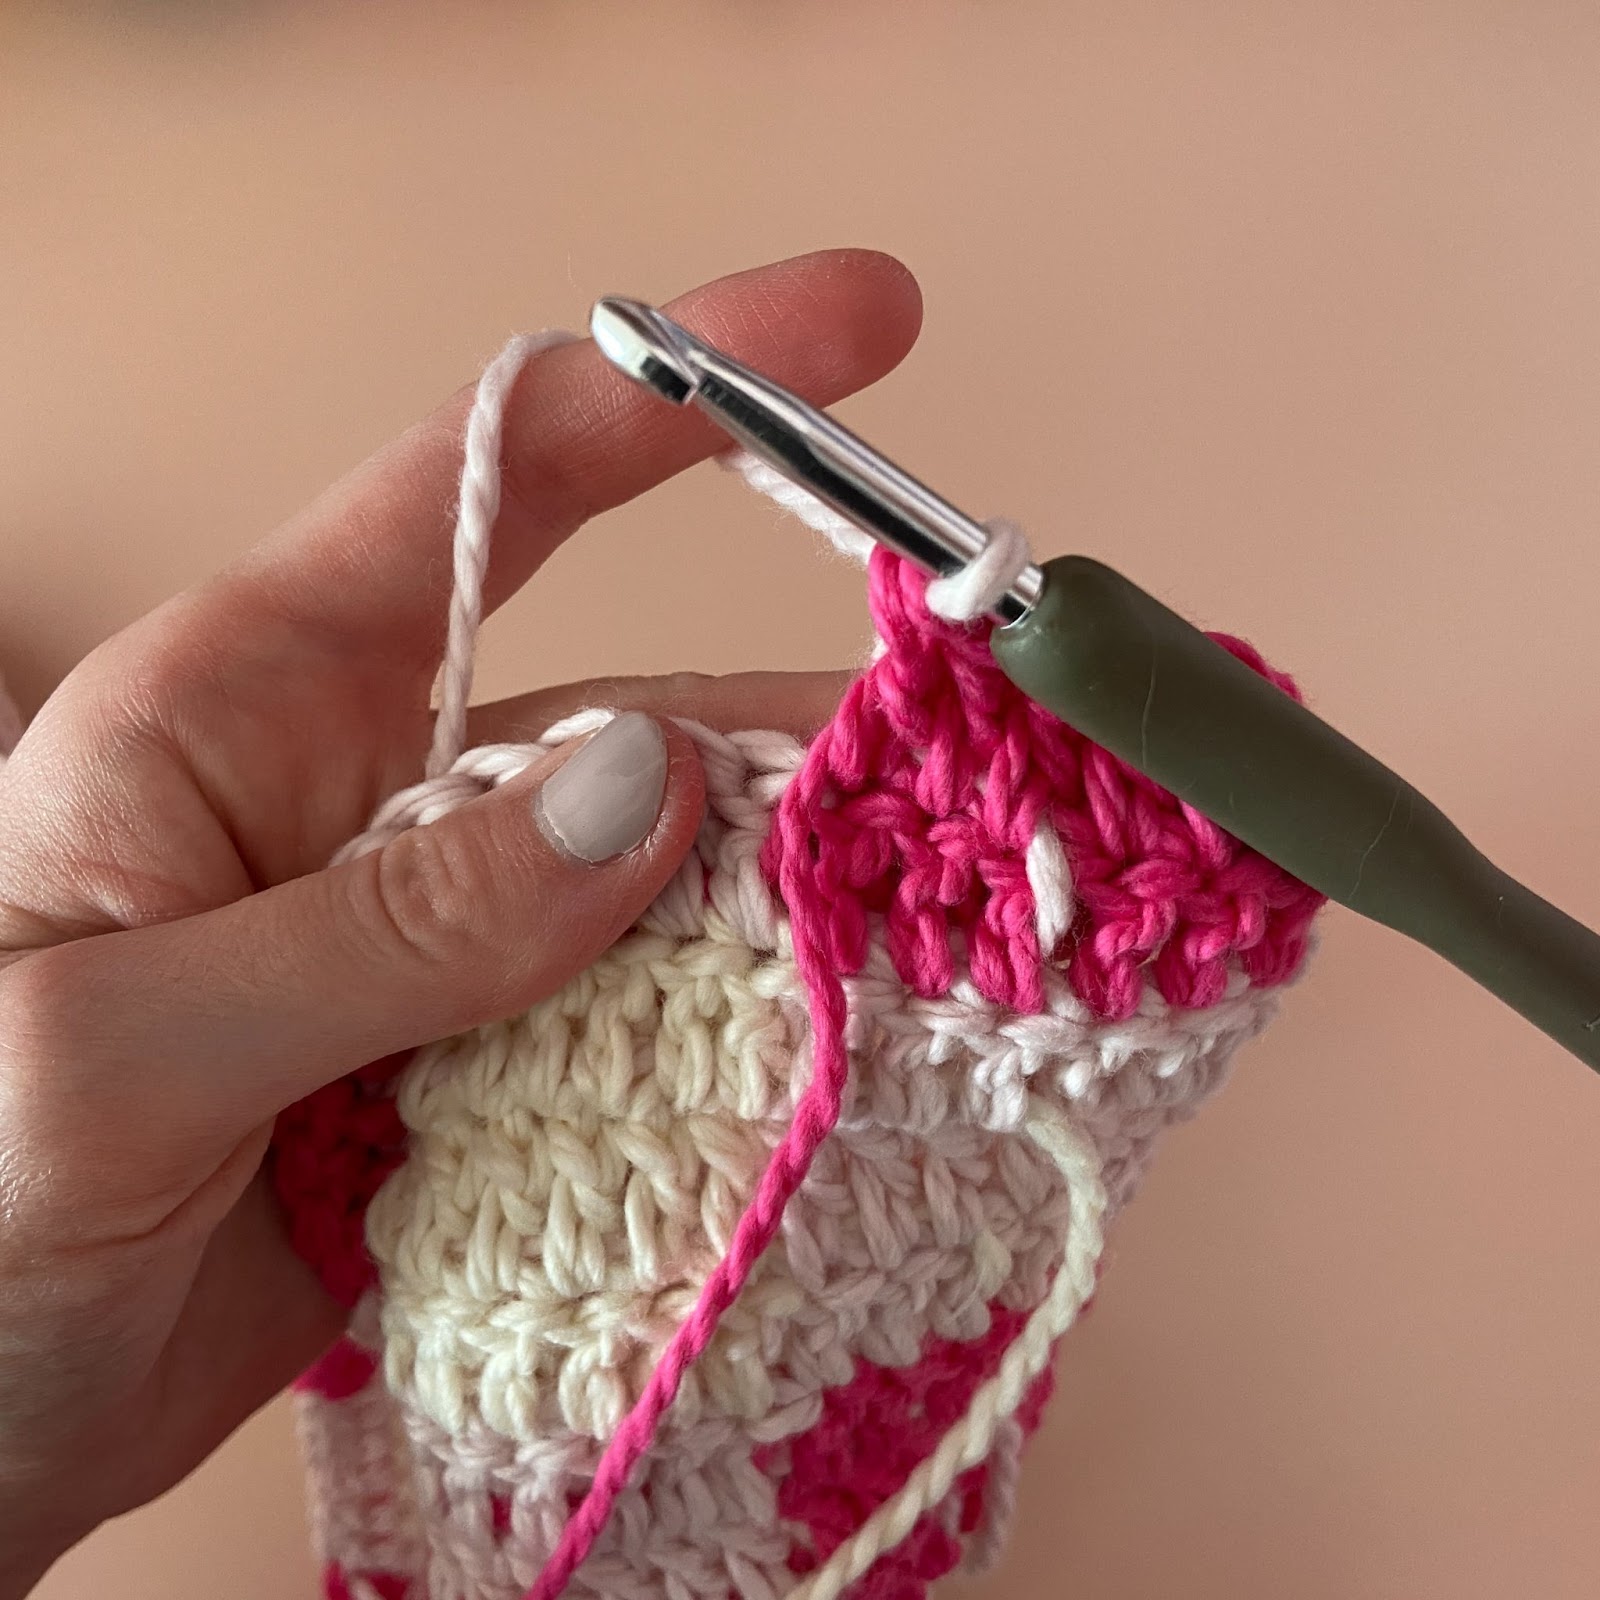
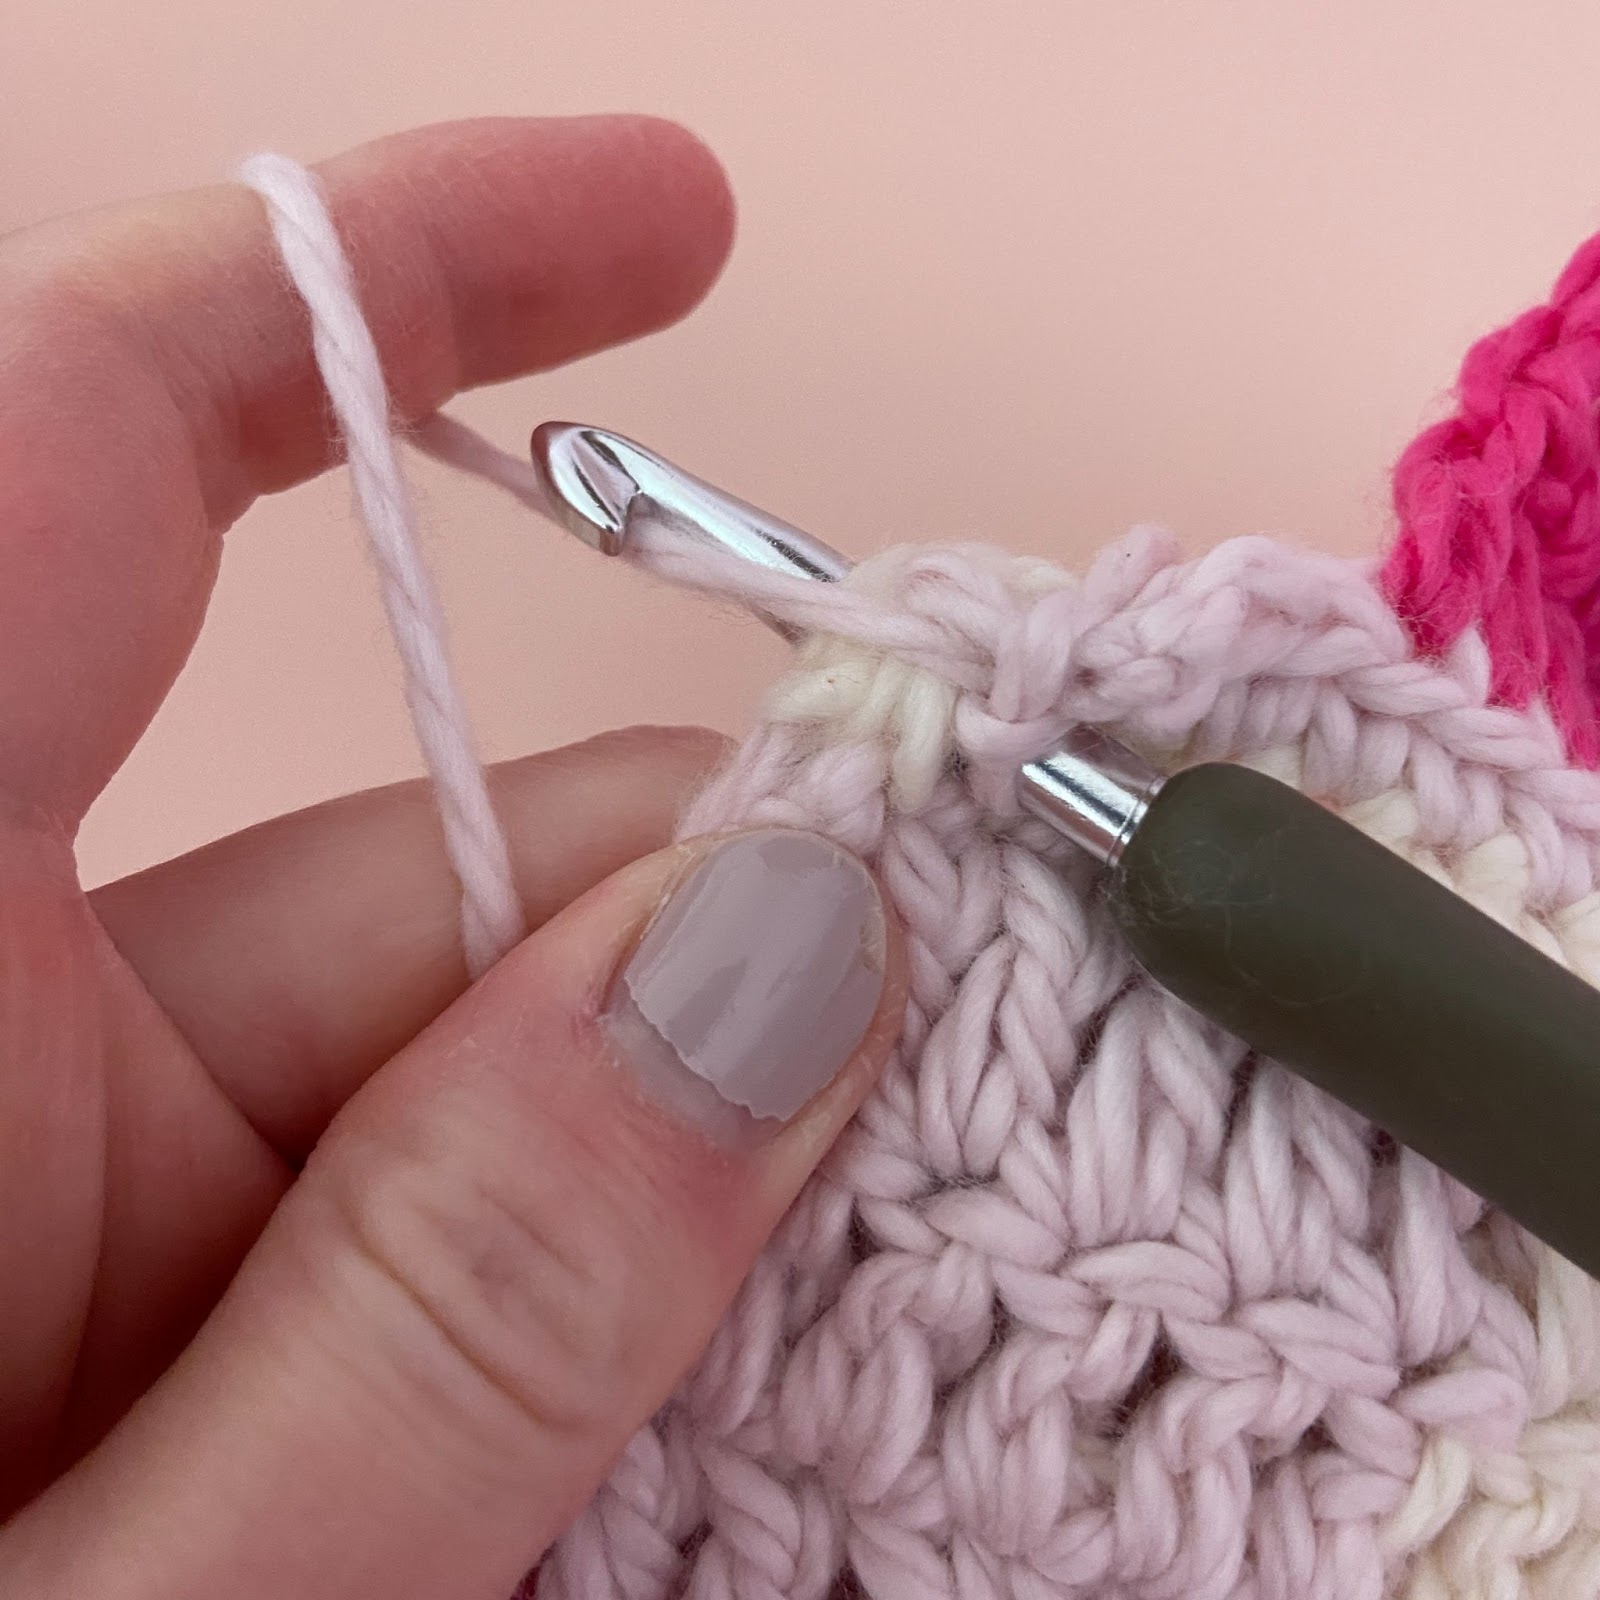
Begin by crocheting with the hot pink. During the last dc st before the pattern reads “cc to light pink”, use the light pink to finish the final yarn over, pull through (pictures 1 and 2).
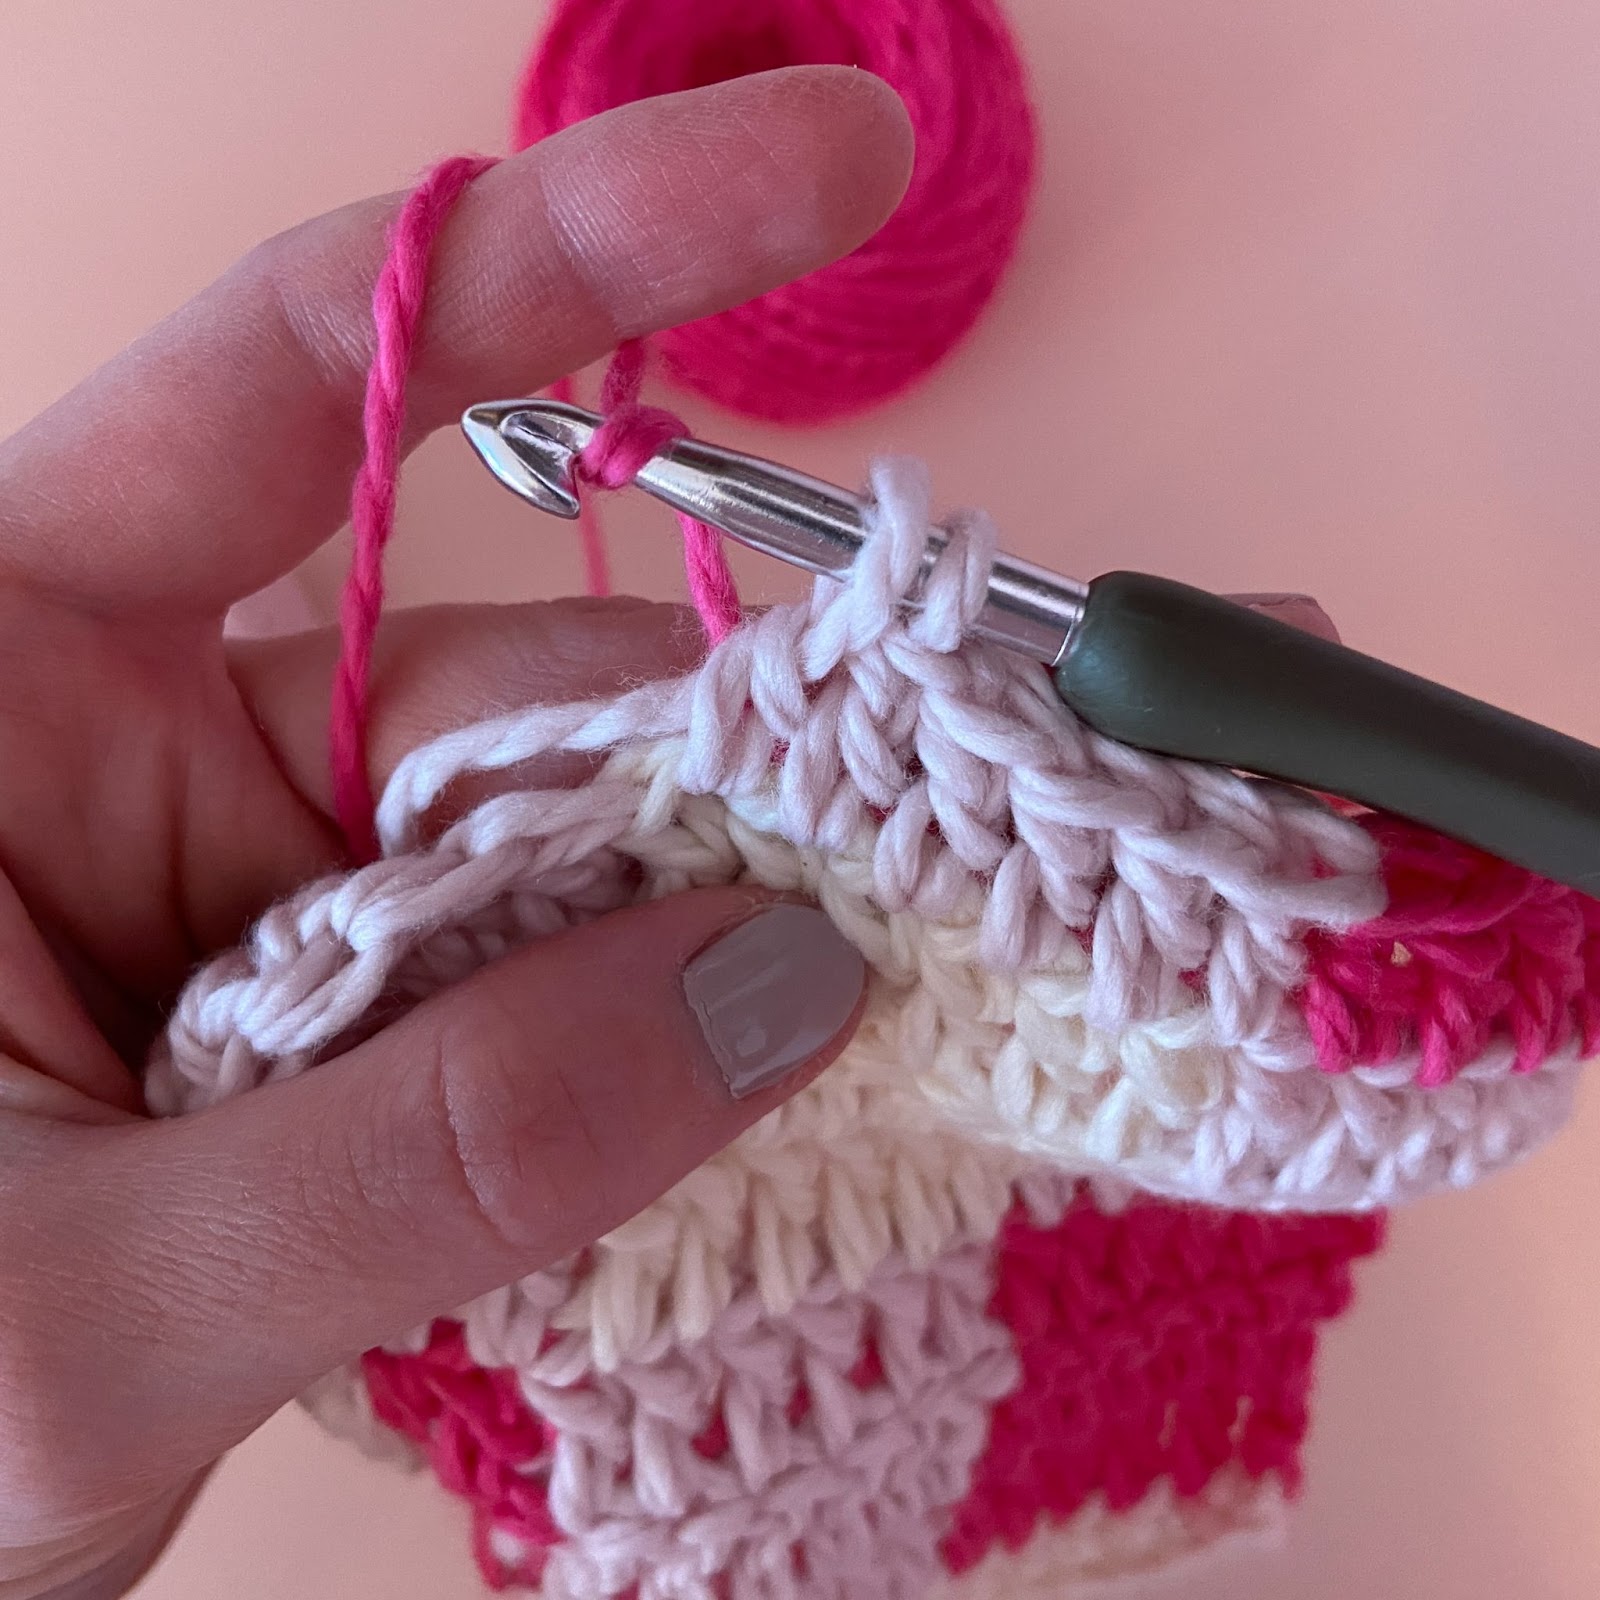
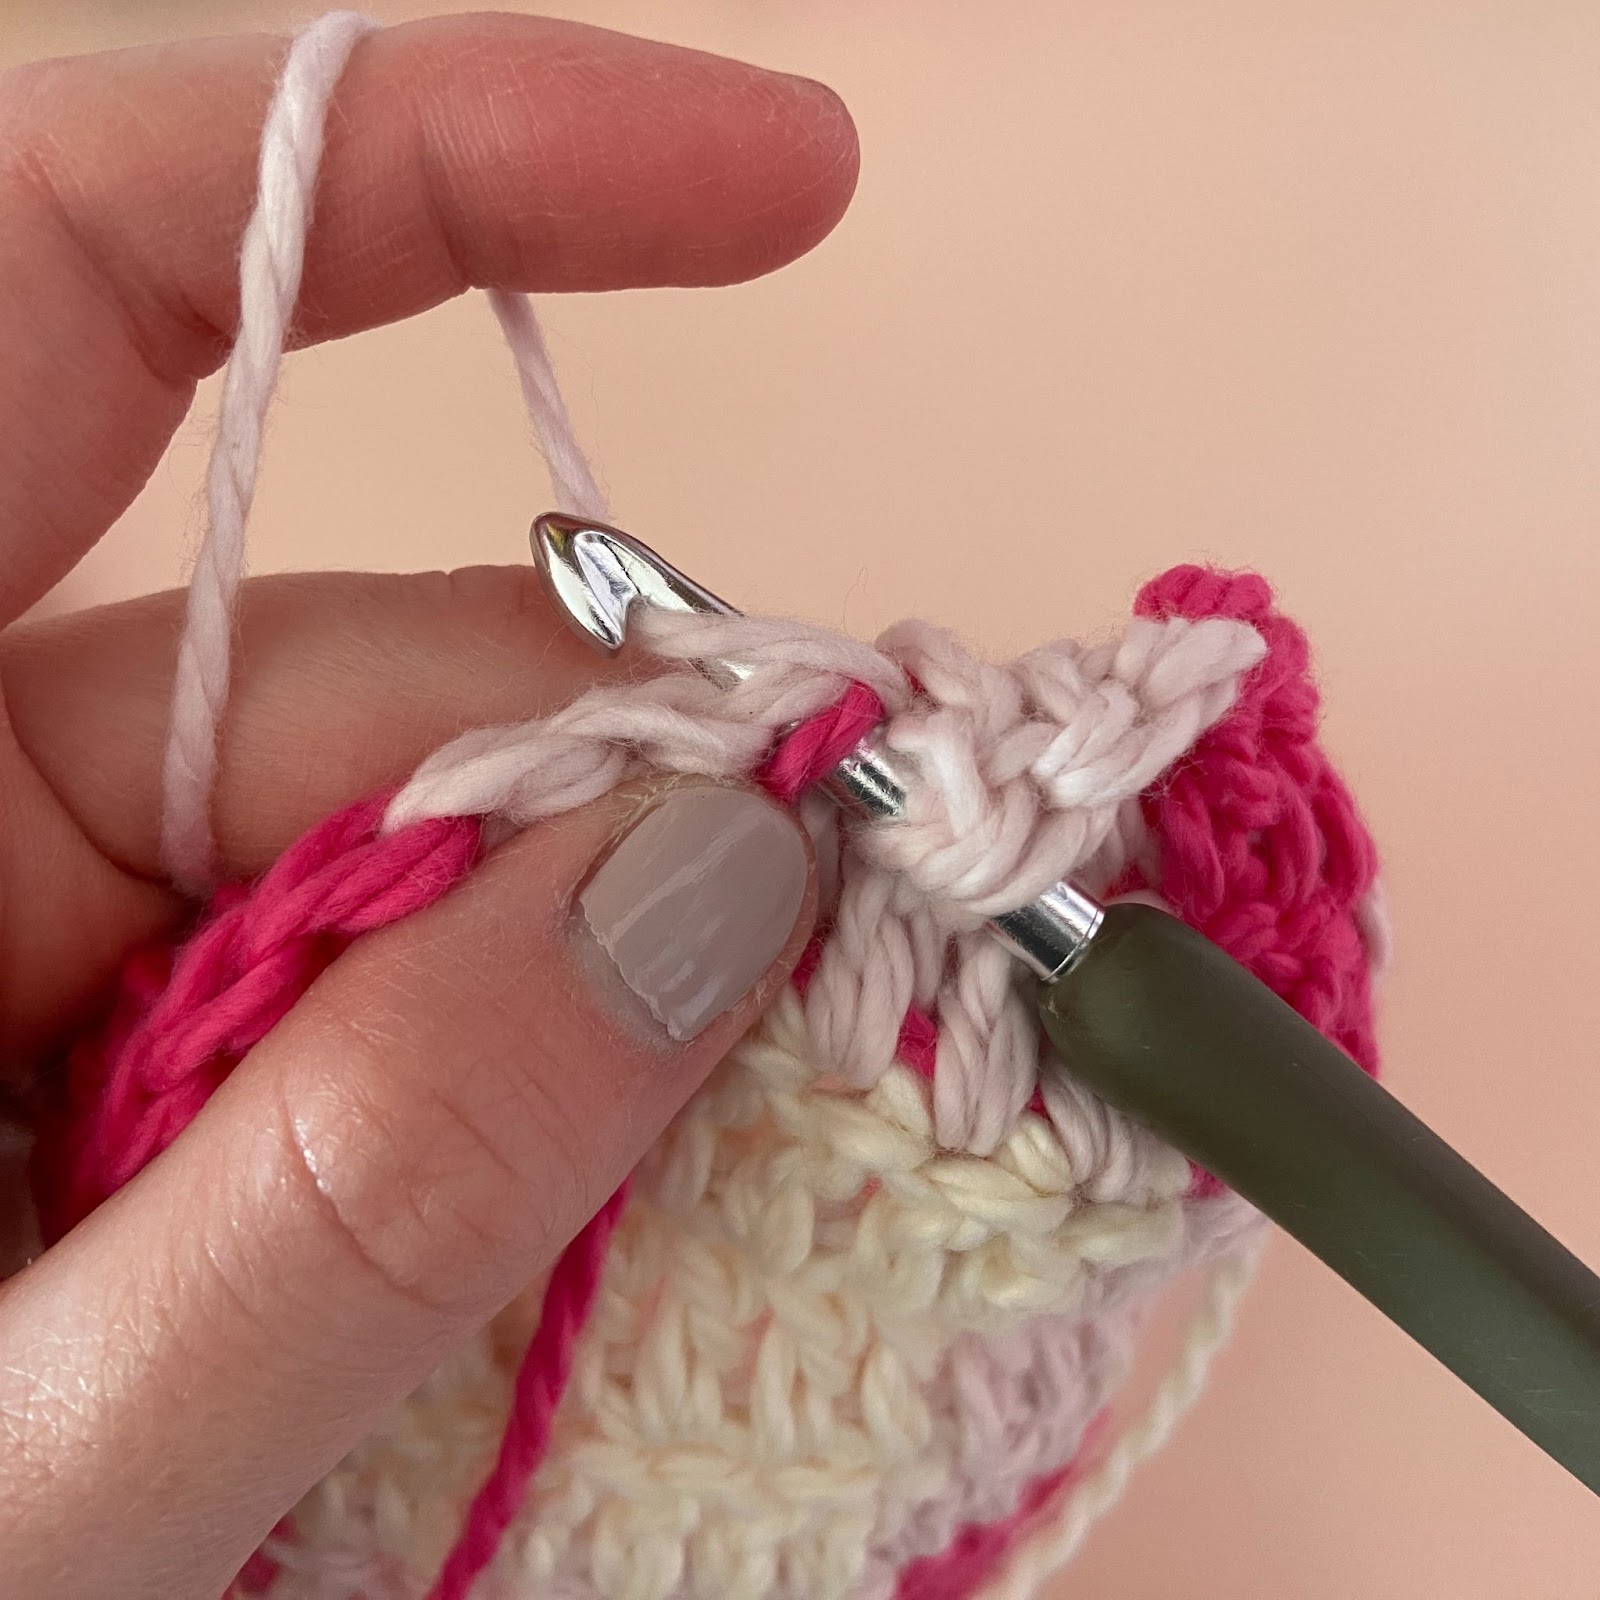
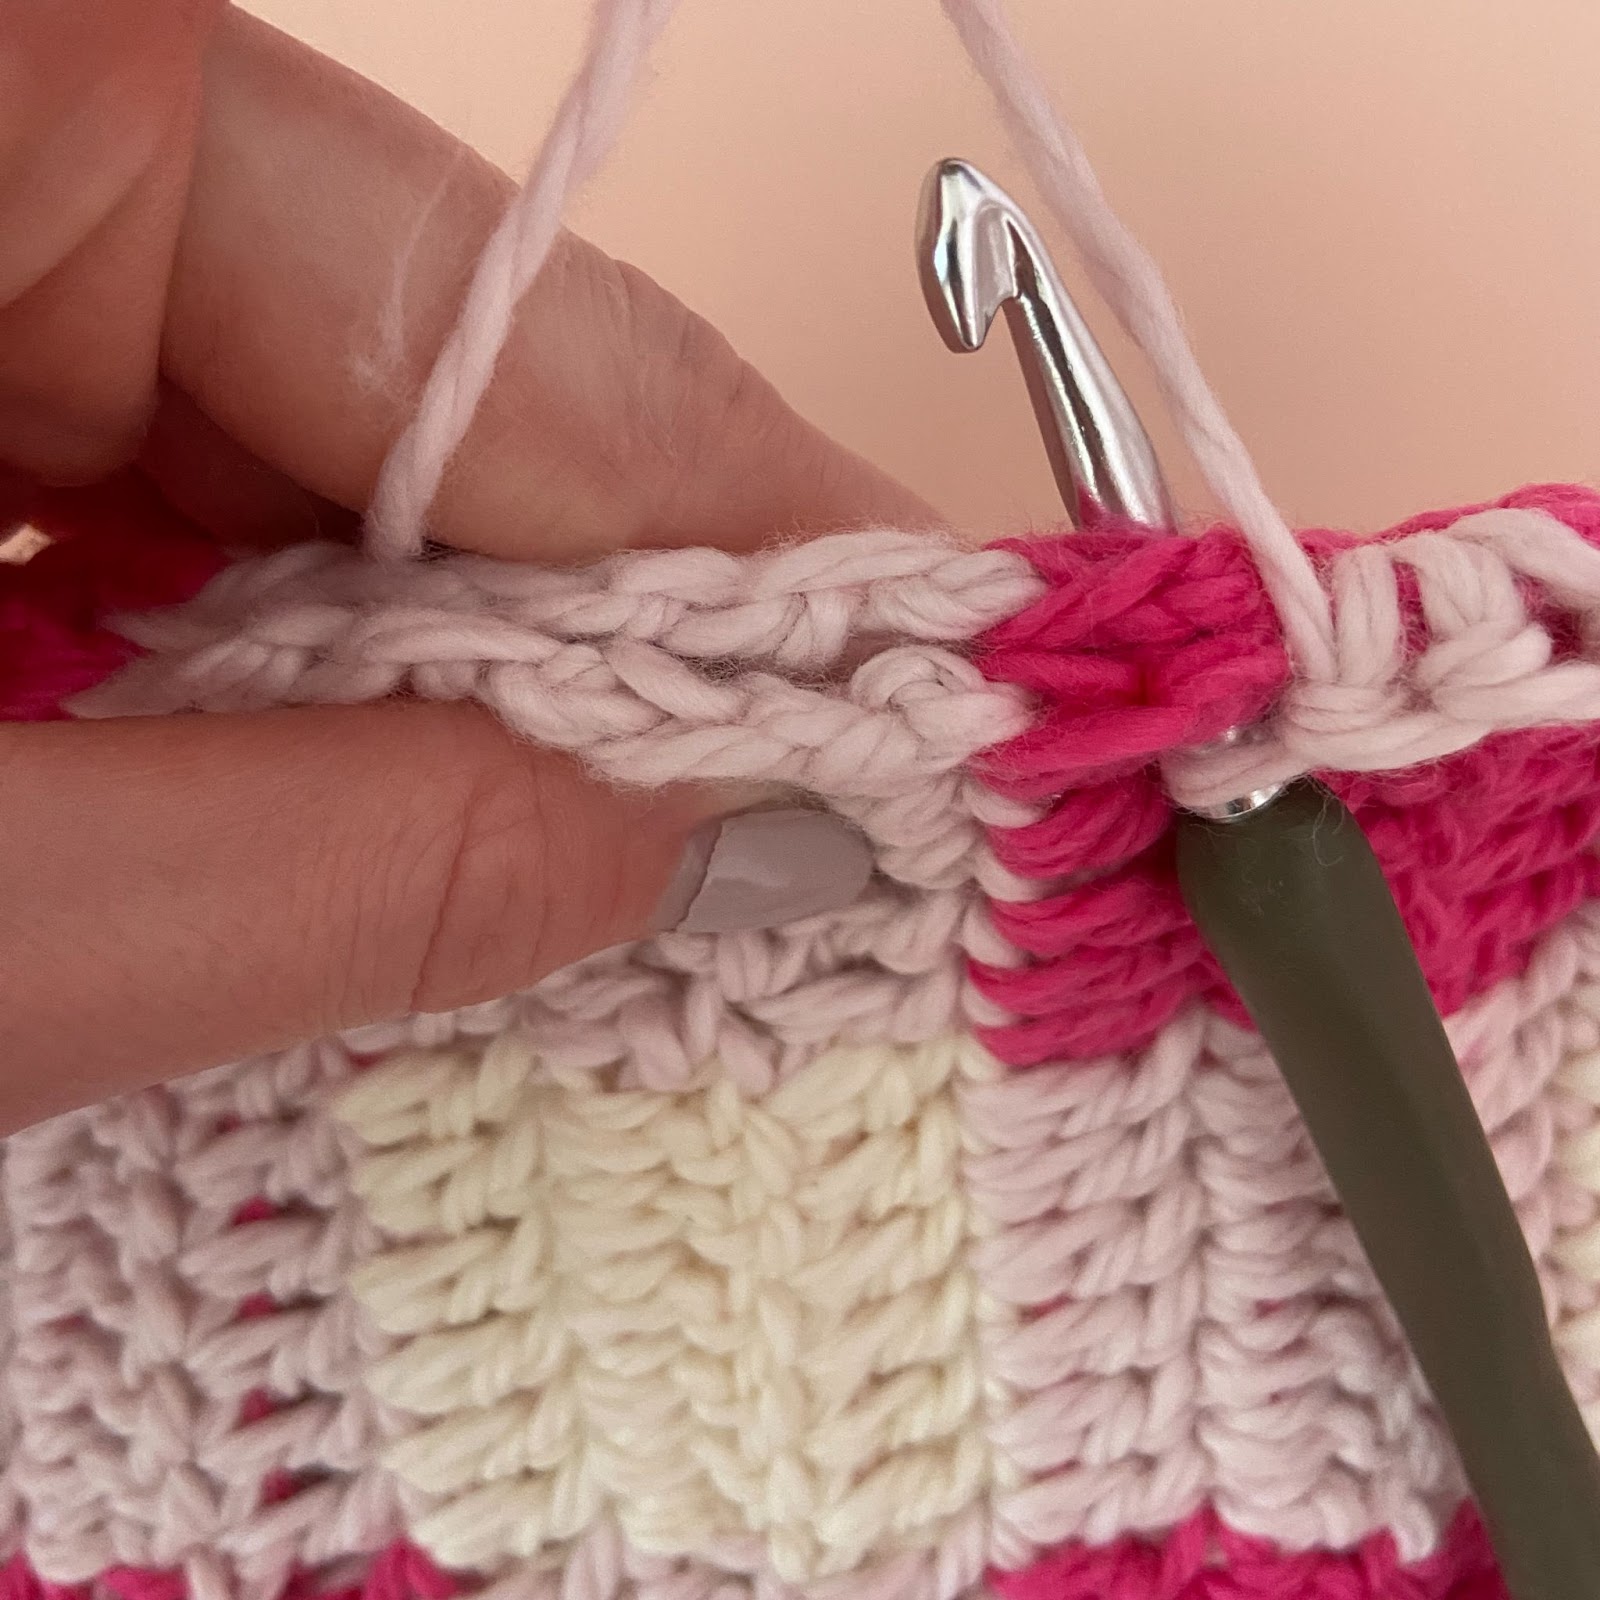
Hold the hot pink against the back of the work while crocheting with the light pink (picture 3).

When it is time to change color to the hot pink, follow the same process (pictures 1 and 2).
Then, hold the light pink against the back of the work while crocheting with the hot pink (picture 3).
Continue with this process until the end of the first row.
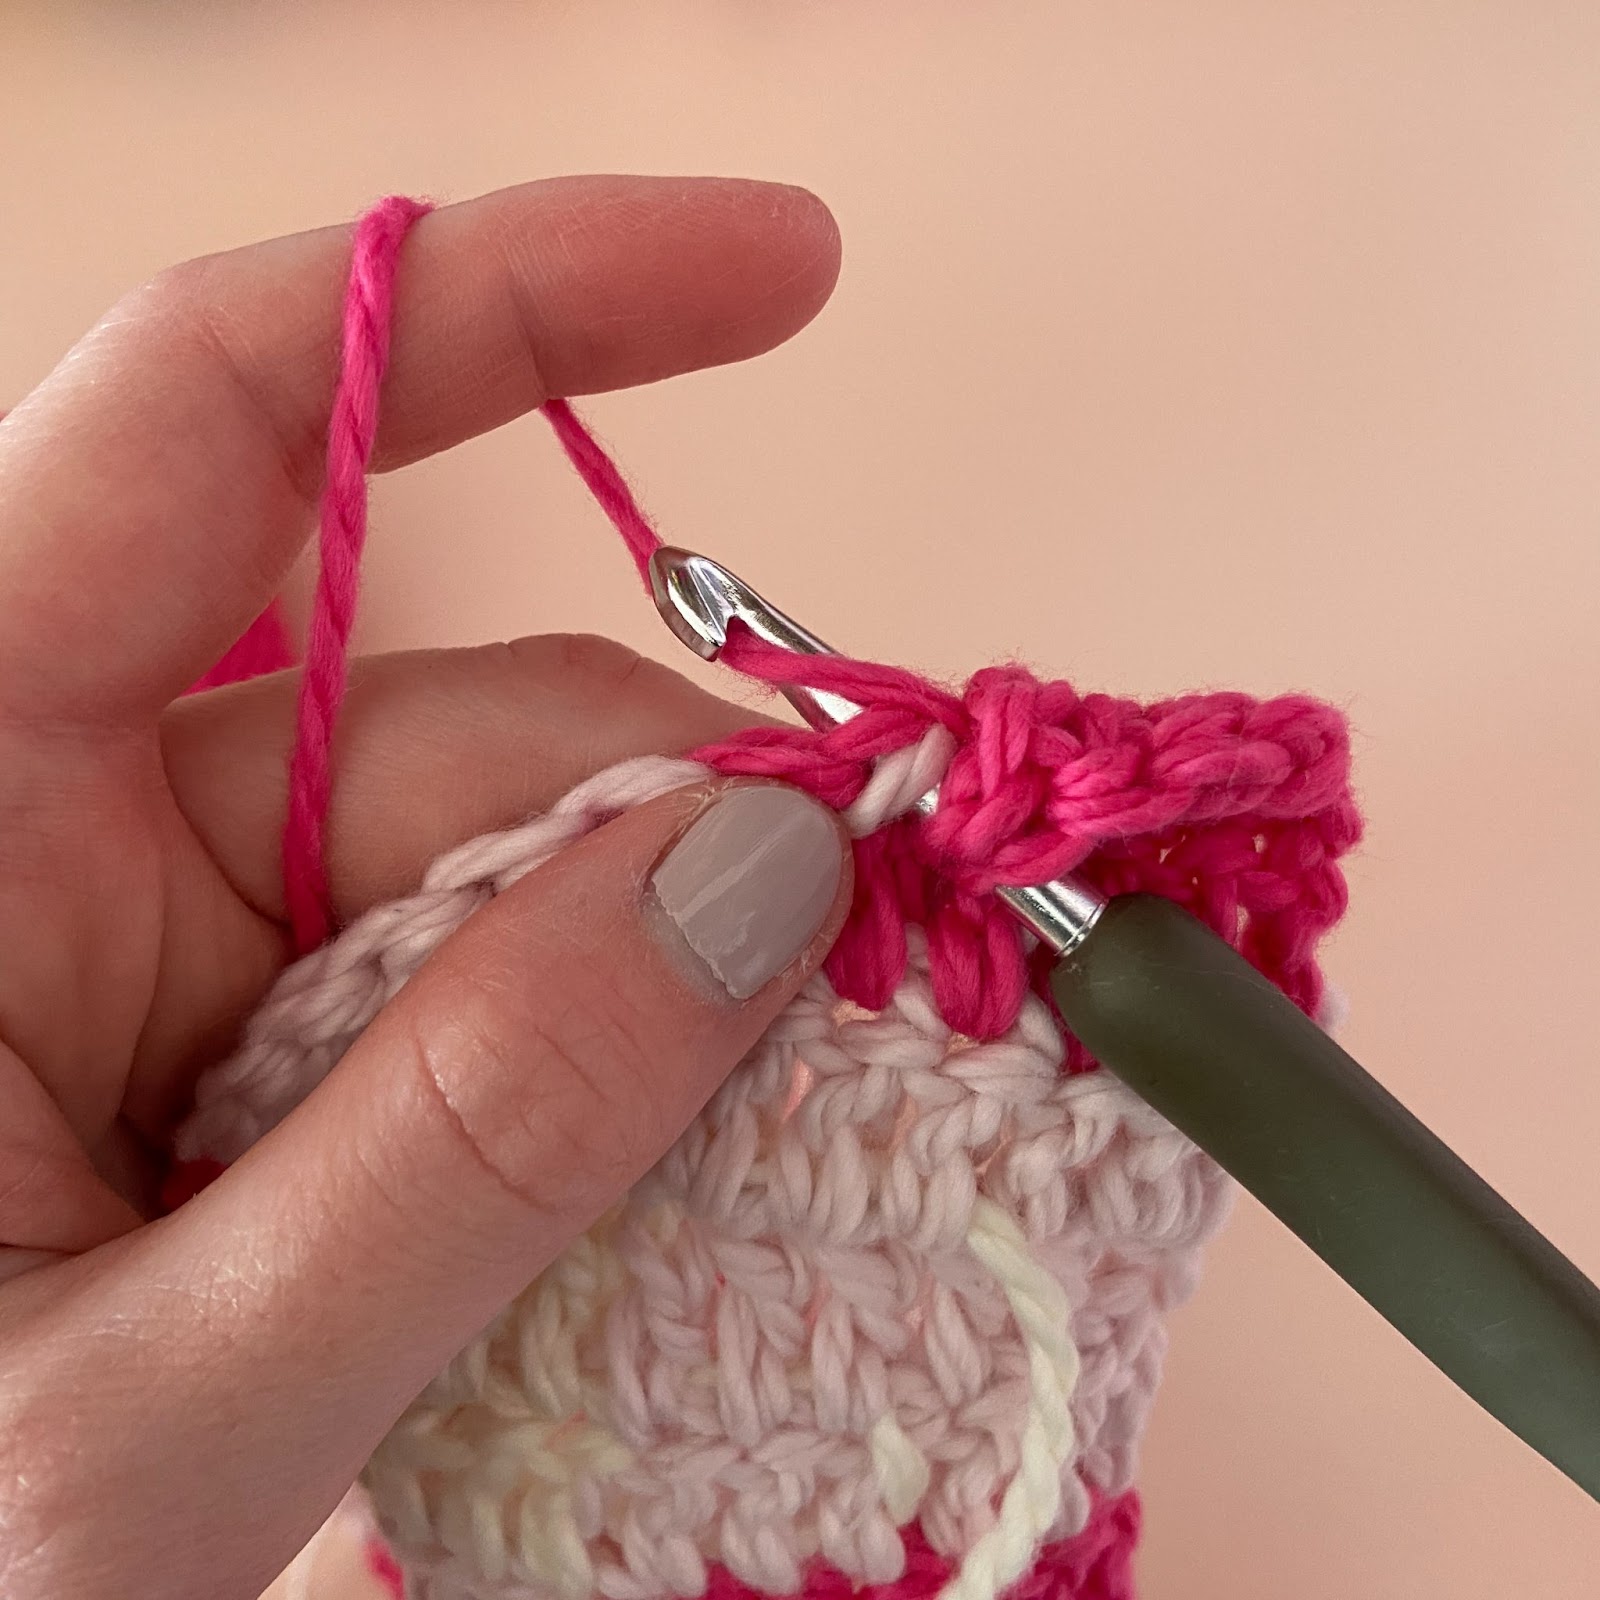
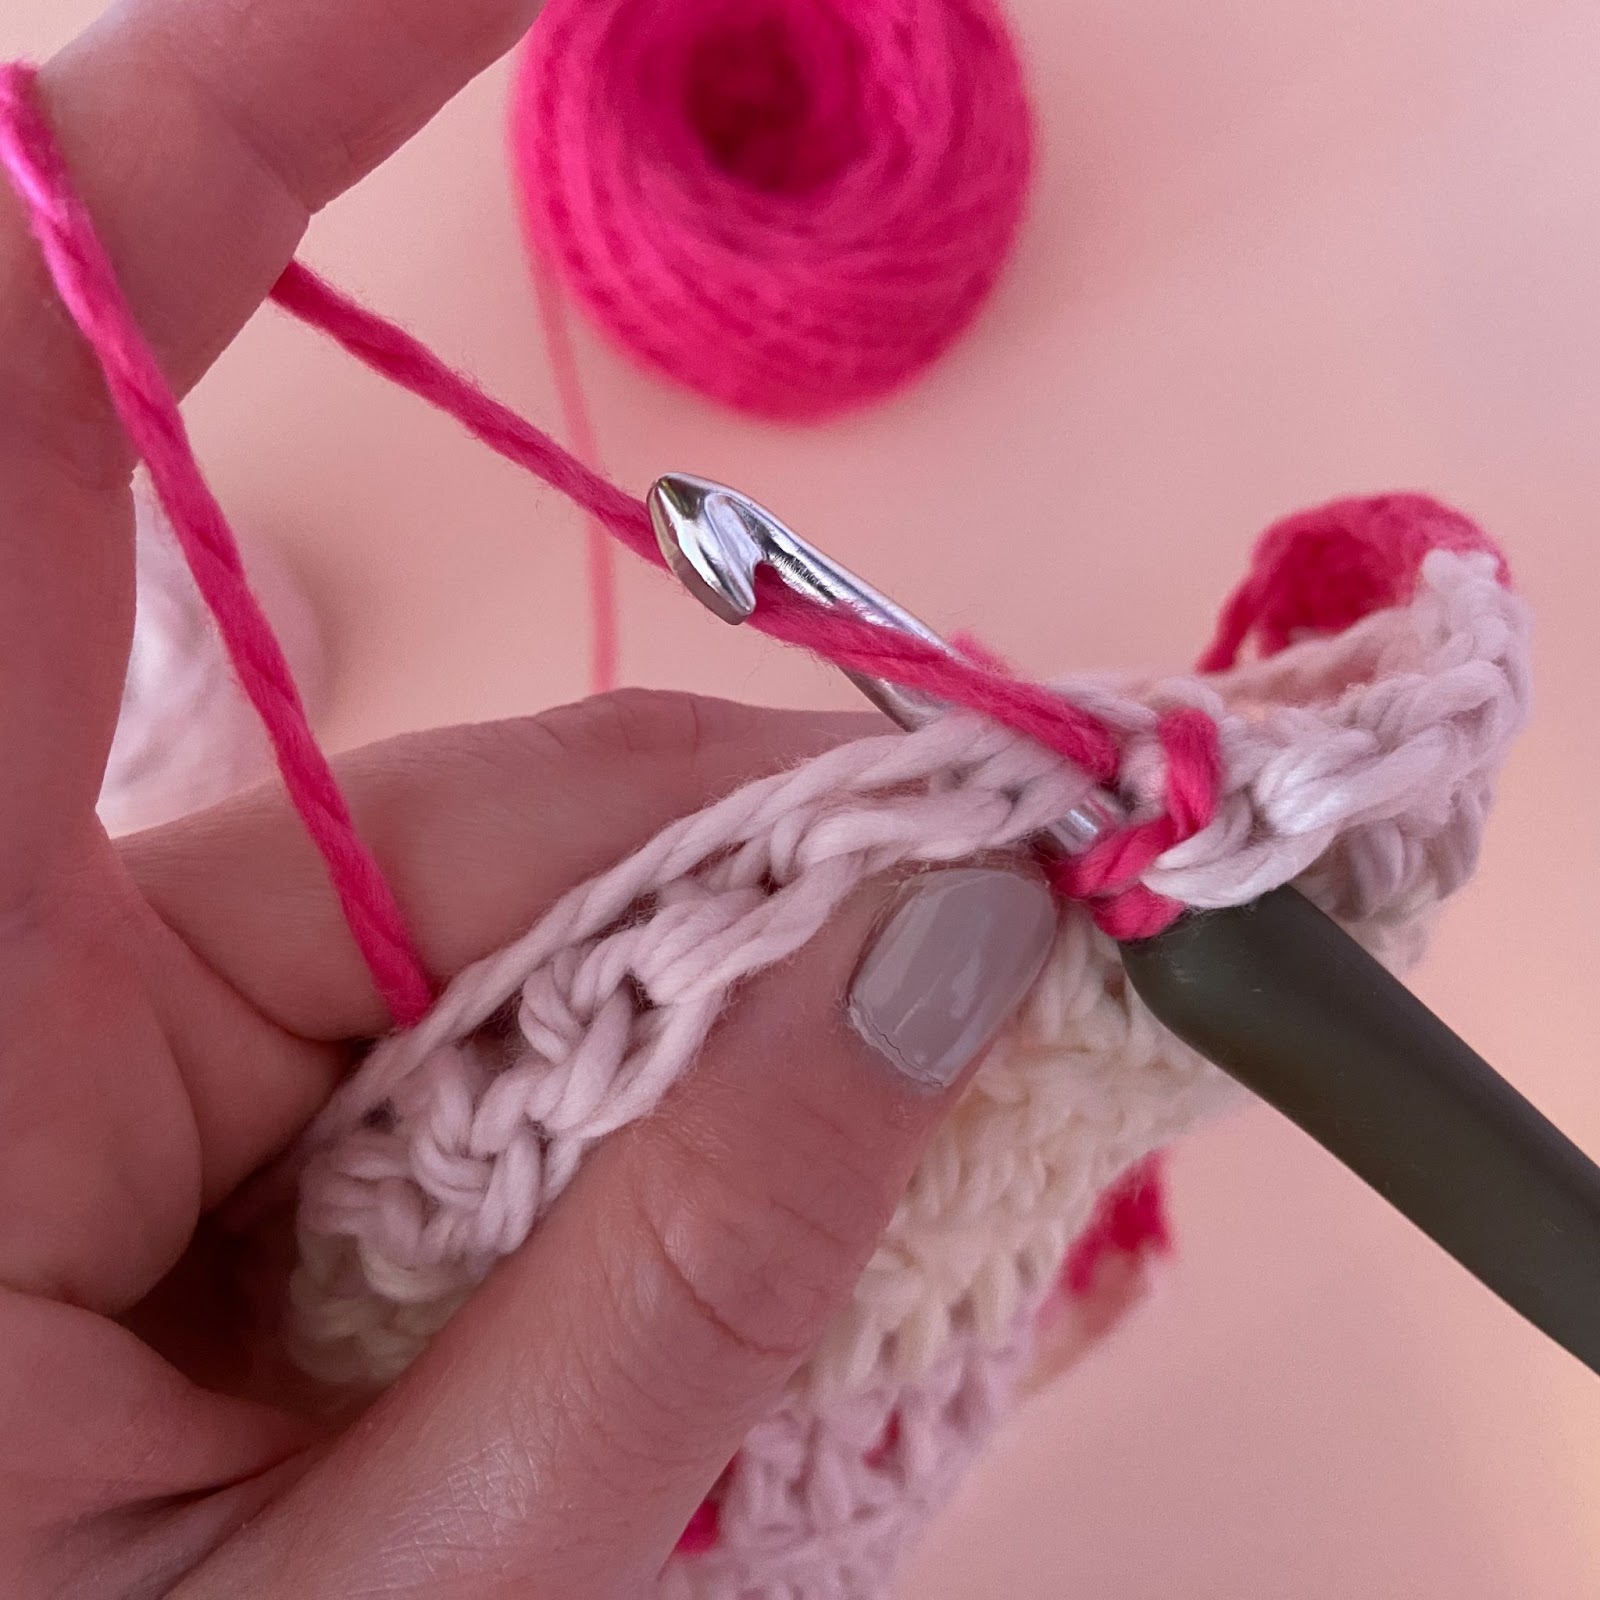
While crocheting the last section of hot pink of the first row, drop the light pink before the last 3 sts. This ensures that the carried yarn is not seen on the edges of the work (picture 1).
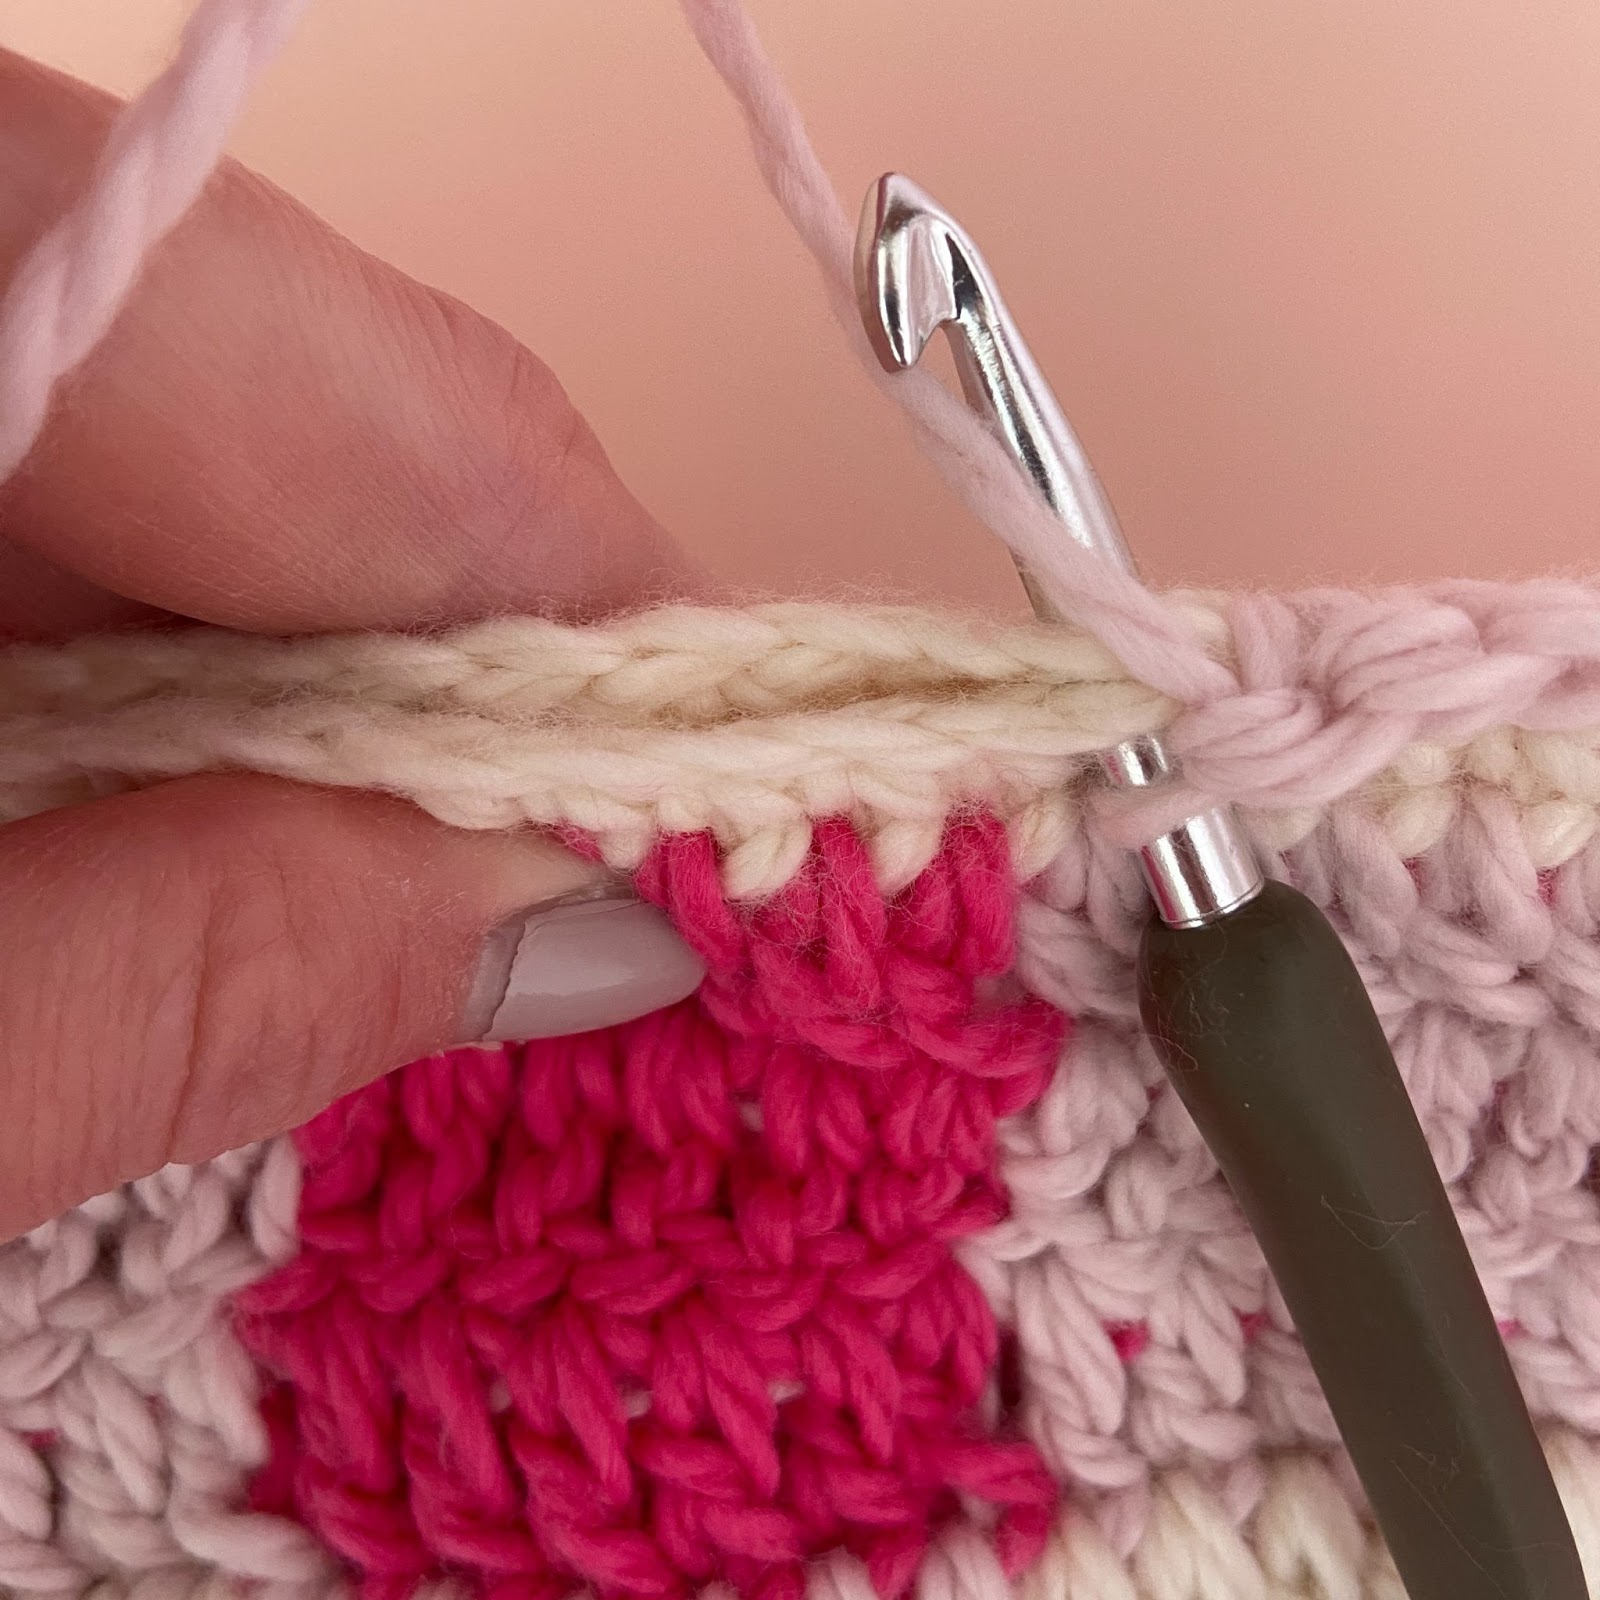
After the first 3 sts of row 2, pick the carried yarn back up, but hold it against the front of the work (pictures 2 and 3).
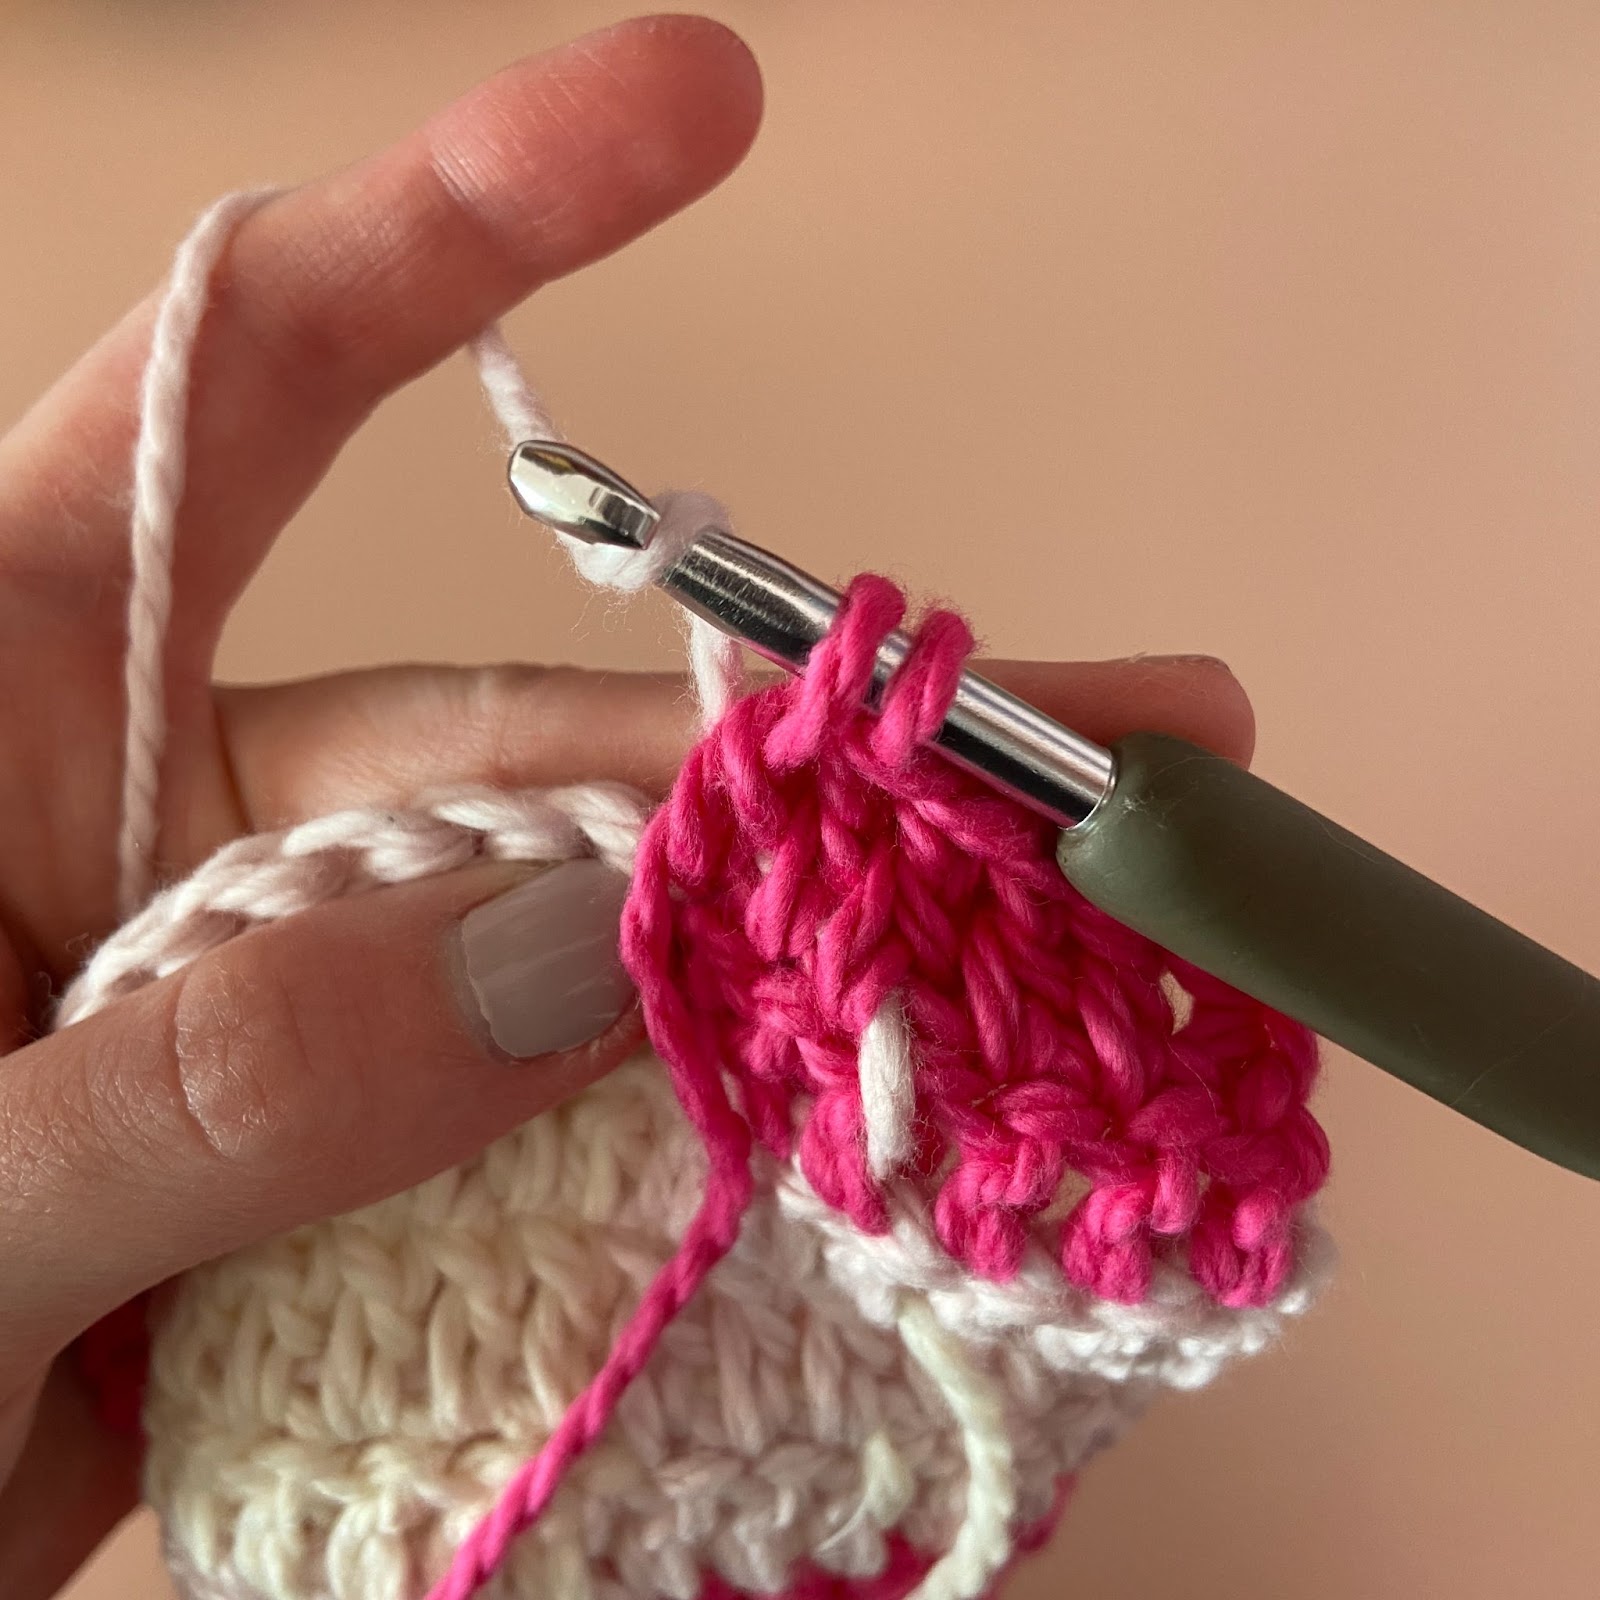
Changing color during row 2 is the same as it was during row 1, but hold the carried yarn against the front of the work.
At the end of the row 2, drop the carried yarn before the last 3 sts.
For row 3, follow the same process to change color. The yarn will be held against the back of the work.
The Front Side
Note: If you would like to adapt this pattern to make a blanket, make sure you begin by chaining a multiple of six and then add one.
Foundation: With the cream, ch 55. Skip over the first ch (does not count as a st), and sc into the 2nd ch from the hook. Then, sc into each of the following chains. Fasten off the cream. (54).
For rows 1-3, hot pink is yarn A and light pink is B.
Row 1 (hold the carried yarn against the back of the work): With yarn A, s-dc into the first sc of the previous row. 5 dc. {Cc to B, 6 dc, cc to A, 6 dc}. Repeat {} 3 more times. Flip. (54).
Row 2 (hold the carried yarn against the front of the work): S-dc, 5 dc. {Cc to B, 6 dc, cc to A, 6 dc}. Repeat {} 3 more times. Flip. (54).
Row 3 (hold the carried yarn against the back of the work): Same as row 2, but hold the yarn against the back of the work. At the end, fasten off both colors and do not flip the work. (54).
For rows 4-6, light pink is yarn A and cream is yarn B. Follow the same pattern as rows 1-3 (begin by joining the light pink into the first st of row 3 and working a s-dc).
Repeat rows 1-6 three more times.
Then, for the last row, join the cream into the first st of the previous row. [Ch 1 (does not count as a st), sc], sc into each of the following dc sts of the previous row. Fasten off. (54).
Repeat this process to make the back side (the front and back side of this pillow are identical)!
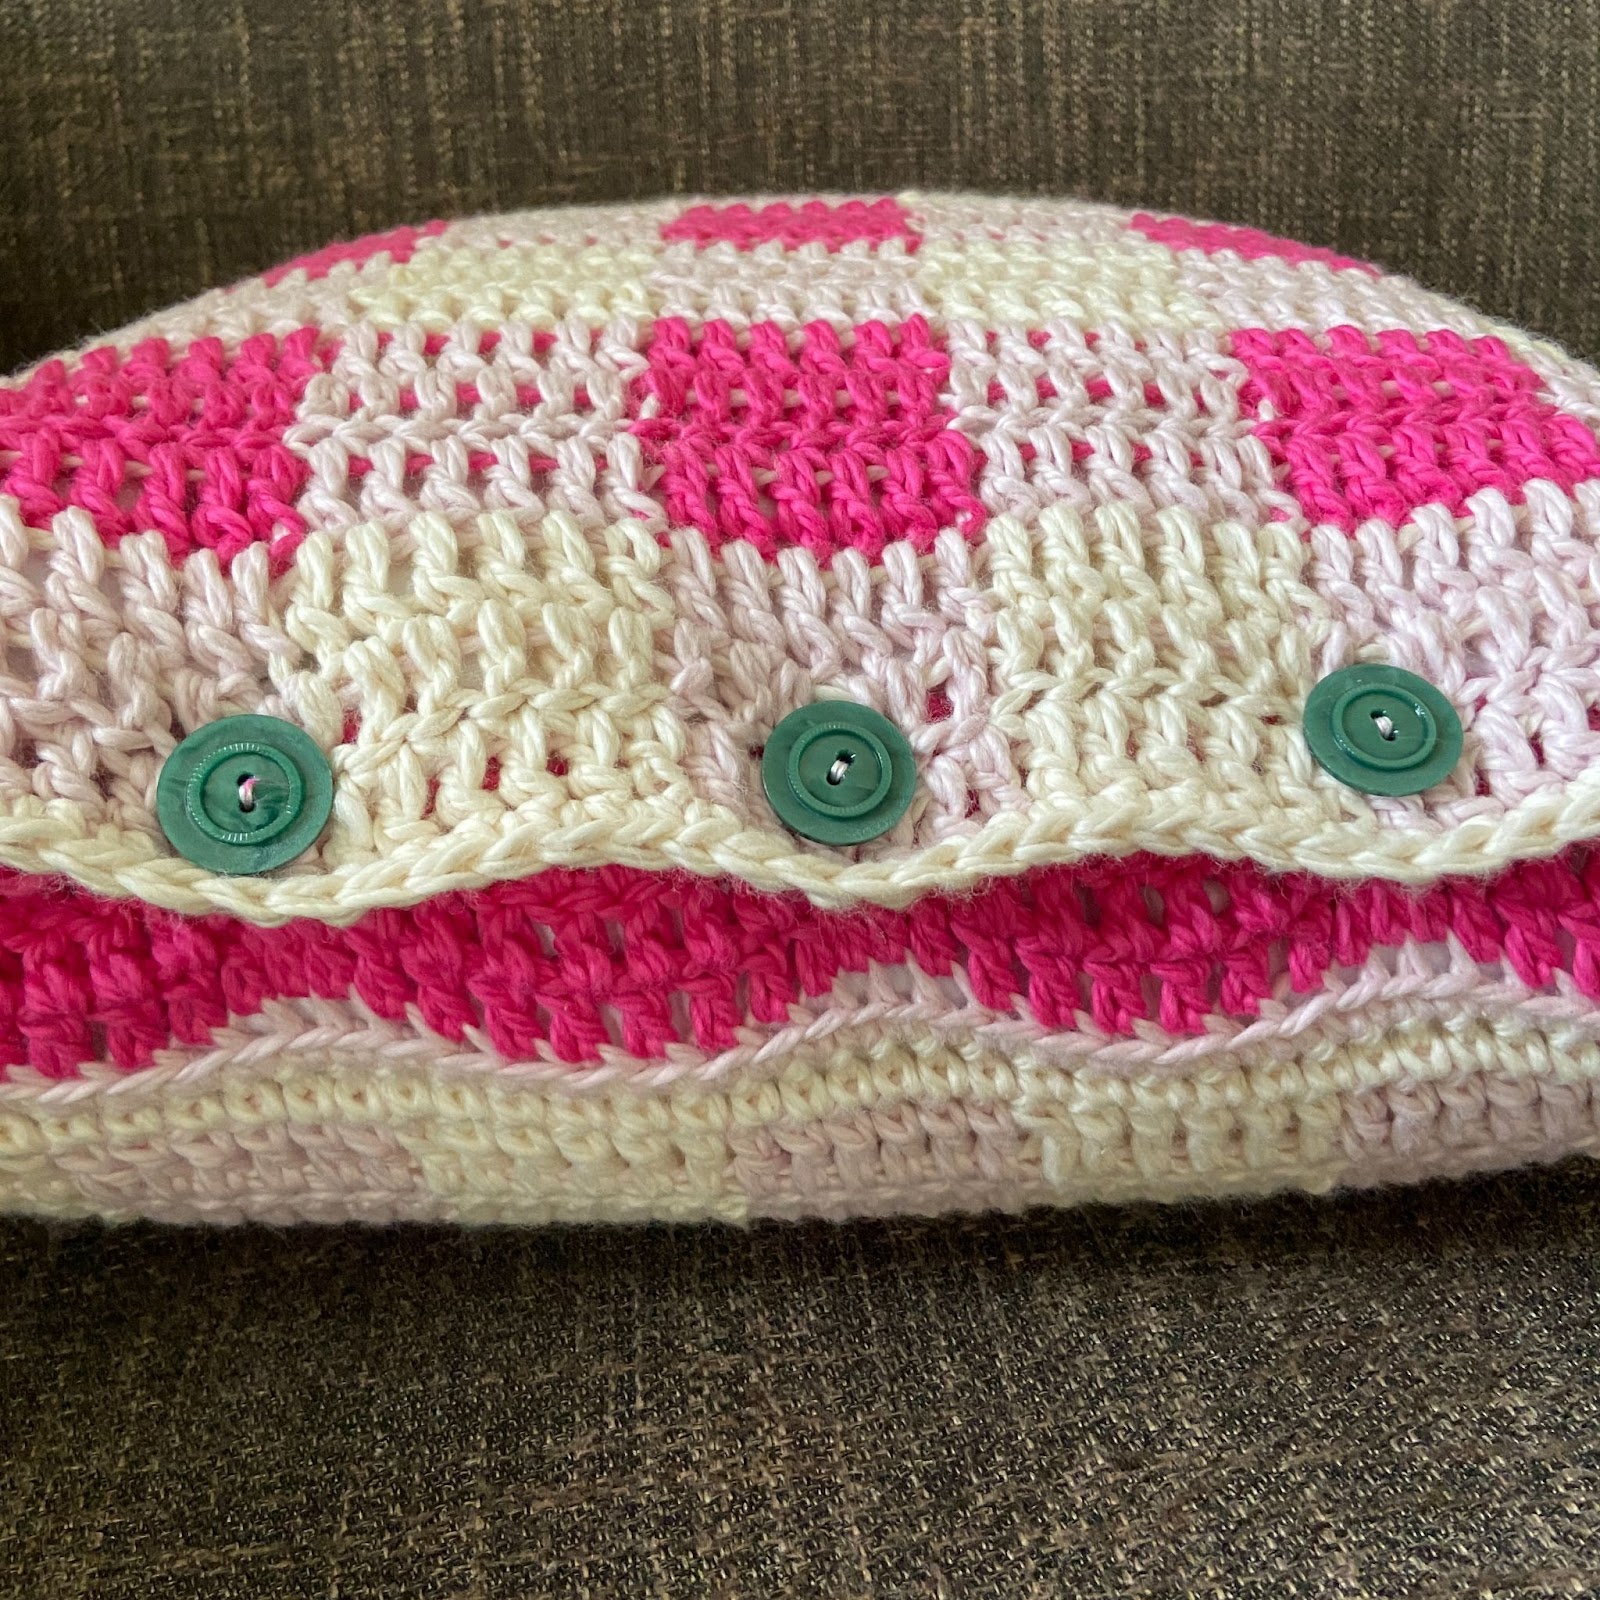
The Button Flap

Five buttons hold the bottom of the pillow together, and allow the pillow to be taken on and off the insert. Hence, a few rows of stitches are added to the bottom of the front side to form the button flap. Later, when the pillow is joined, the back side of the pillow will be pulled over the buttons.
Row 1: Join the light pink yarn (the color you would like to join the pillow with) into the first sc st of the last row of the front side of the pillow. [Ch 1 (does not count as a st), sc], sc into each of the following sts of the previous row. Fasten off. (54).
Row 2: With the hot pink, s-dc into the back loop of the 4th st of row 1, dc into the back loops of the following 48 sts (do not work into the last three sts of row 1). FLIP. (48).
Row 3: S-dc, dc into each of the following sts from the previous row. FLIP. (48).
Row 4: Same as row 3. At the end of row 4, fasten off.
Then, attach the buttons to the 5th, 15th, 25th, 35th, and 45th st of row 3.
Joining the Pillow
It’s time to join the pillow! It is joined along three sides (the buttons hold the bottom together) with a single crochet stitch into the corresponding stitches of the front and back side. We will simply insert the hook into a st of the front side and into a st of the back side, and then, work a single crochet st. 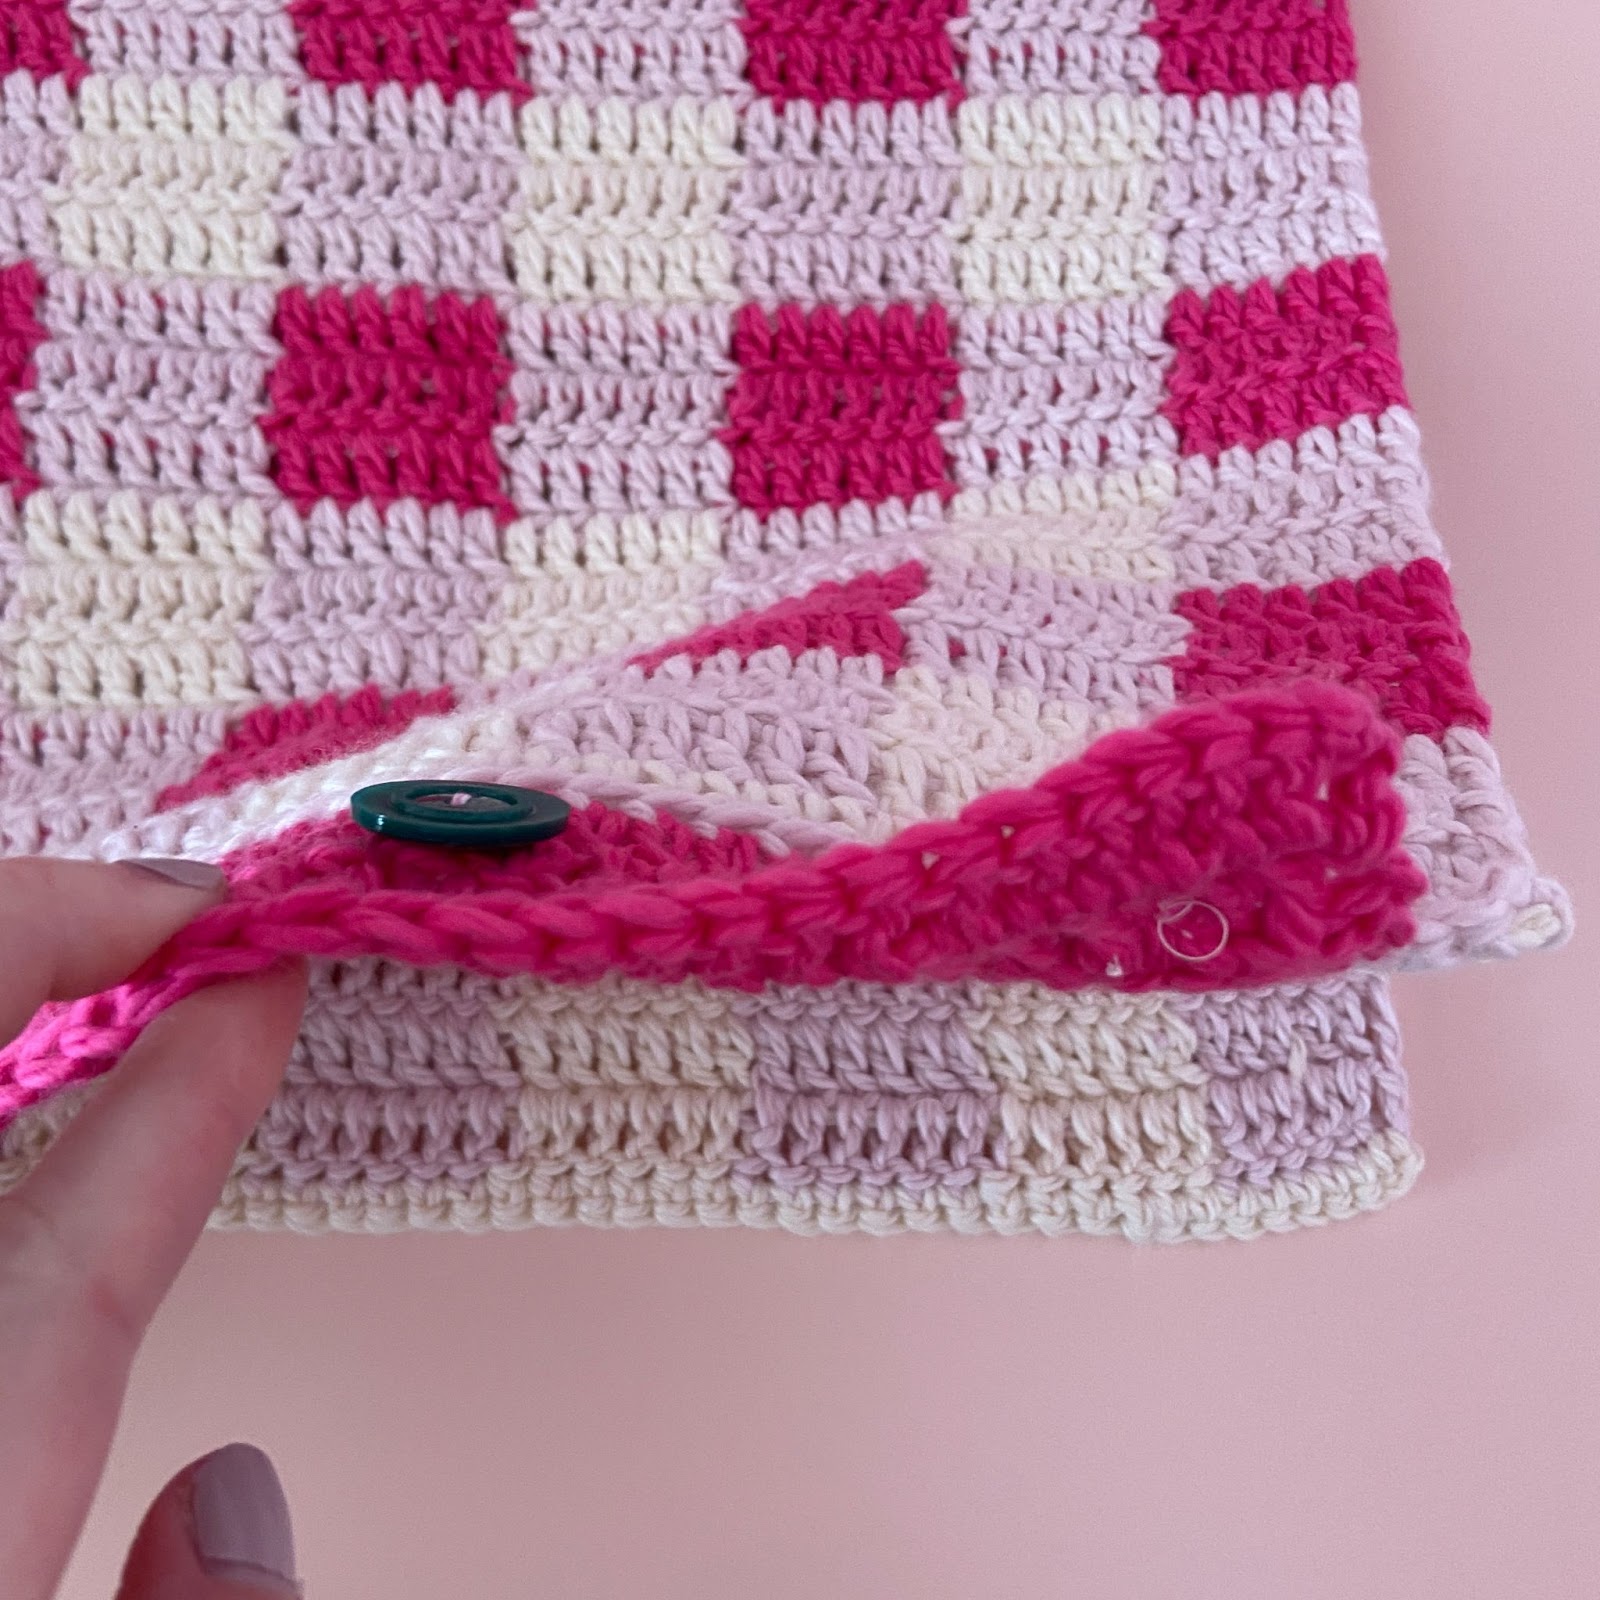
Begin by laying the back side (the side without the buttons) down with the wrong side facing up. Lay the front side on top of it with the right side facing up (picture 1).
Pull the light pink (the color of row 1 of the button flap) through the last single crochet st of row 1 of the button flap. This connects the button flap to the joining seam (picture 2).
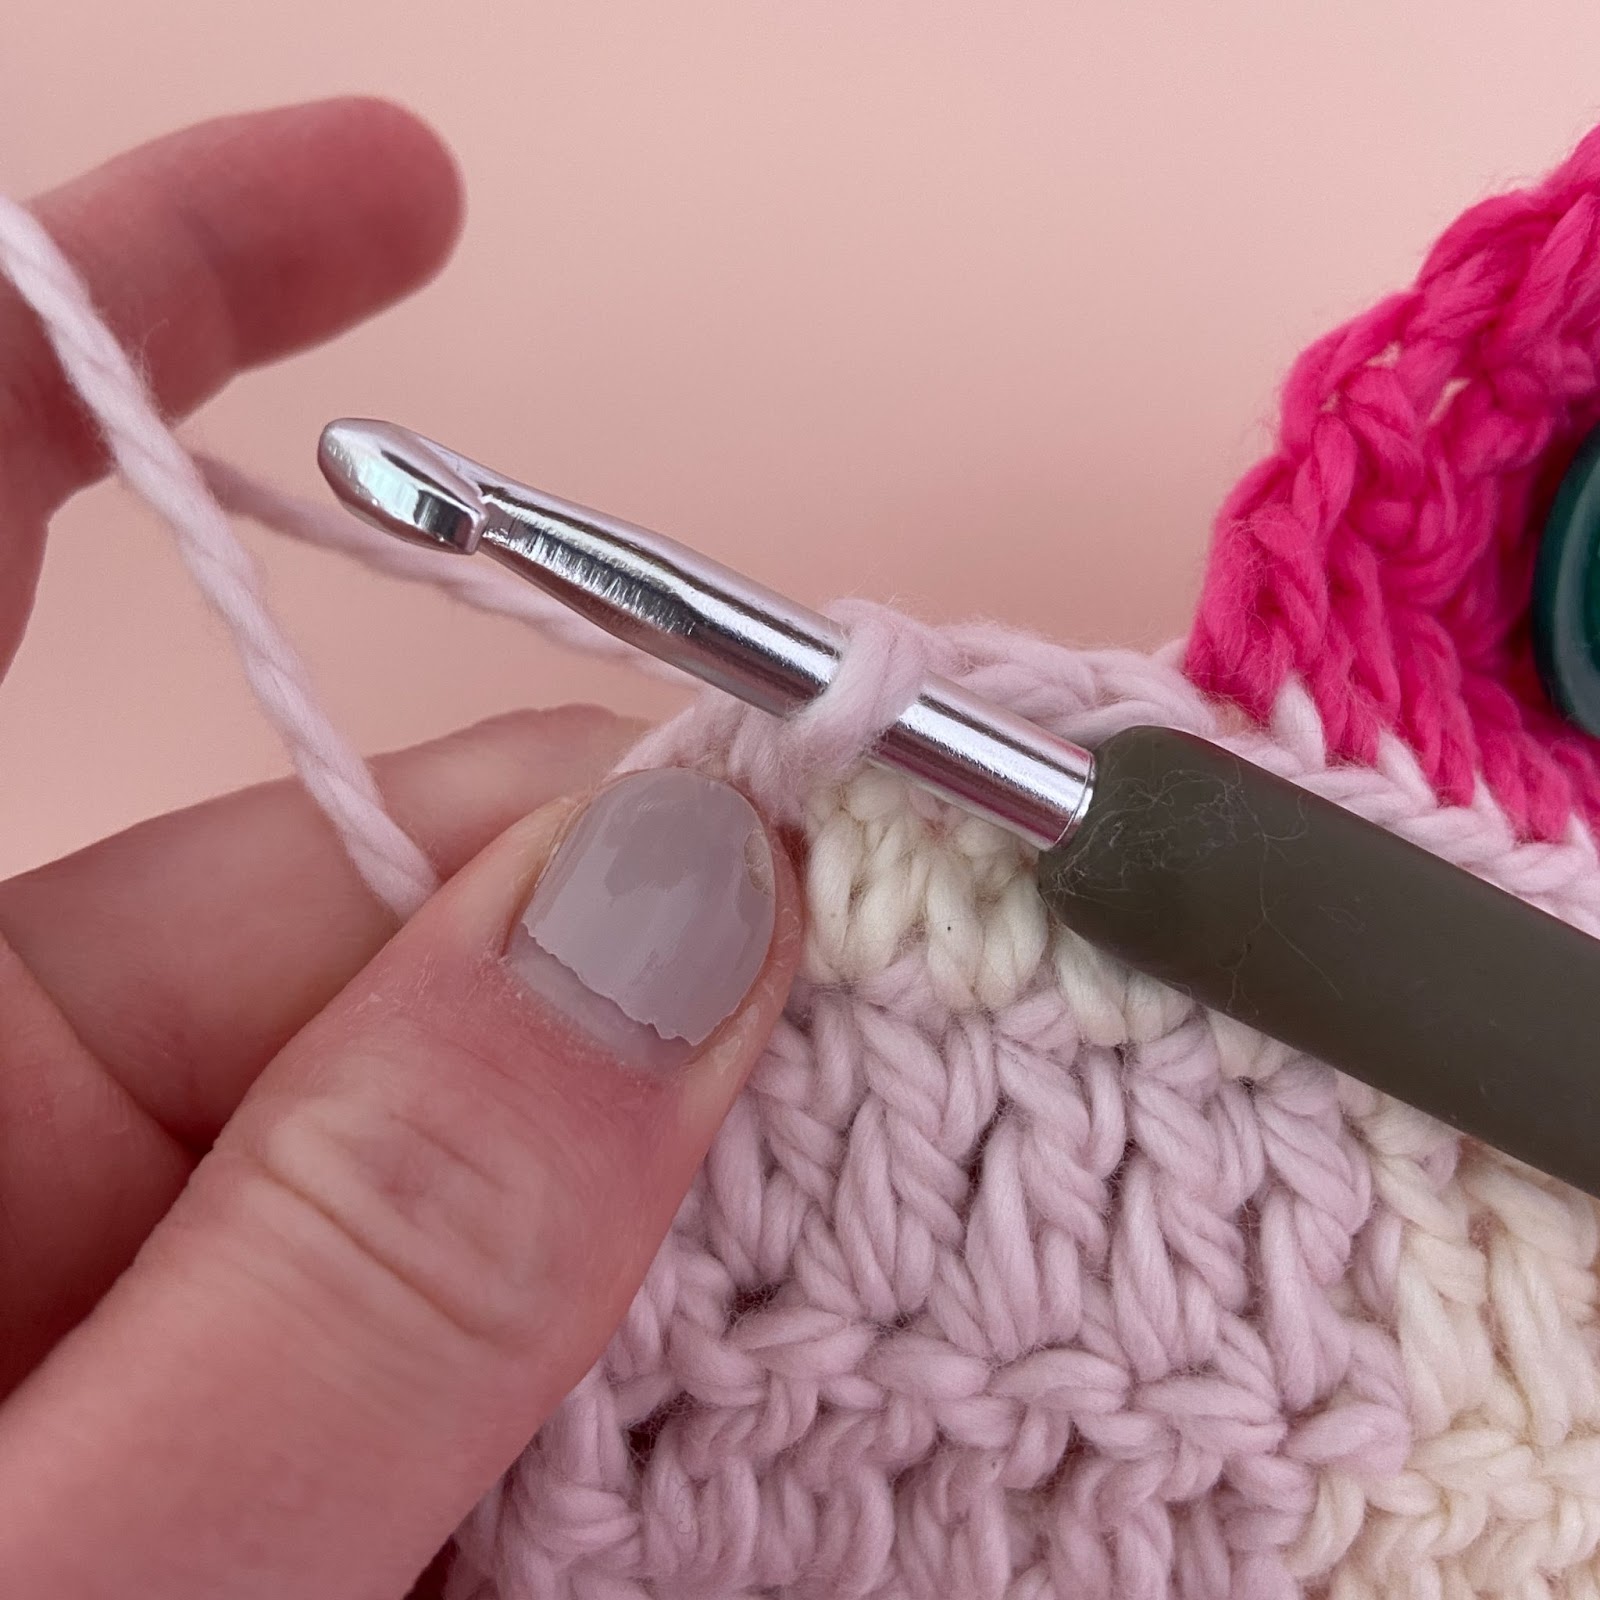
Insert the hook into the cream sc st of both sides of the pillow and work a sc (picture 3).
Along the next side, insert your hook between the last two dc sts of the next row of both sides of the pillow (picture 1), and work a sc. Then, work another sc into that same space. Continue this process along the side (picture 2).
Then, sc into the set of corresponding cream sc sts at the end of the side.

Along the next side, sc into each set of corresponding sc sts (picture 1).
For the third side, follow the same process as the first side.
Then, ss into the first sc of row 1 of the button flap.
Then, slide the insert into the pillowcase. Pull the back over the buttons. The buttons should end up between the dc sts of the second to last row of the back of the pillow.
Then, the pillow is finished! I hope you enjoyed this pattern! If you make it and post it on Instagram, make sure you tag me, so I can see it! You can also email me a picture at maggietrunkhill@daisygirlcrochet.com.
*If you would like to make the pillow and sell the pillow, please give me (Maggie Trunkhill) credit as the pattern designer. Do not reproduce this pattern in any form without my permission.